

The new admin panel is merged into our main branch and will be officially released in v6.4.0. Every screenshot in this post comes from a test instance filled with made-up accounts.
What’s in it
- User list: search, filters by login method, role and status, and bulk actions.
- User page: the account, projects, features, integrations, audit logs and sessions of one person.
- Project list: every project on the instance, searchable by name, ID, owner or sharing link.
- Project page: the settings, files, members, deleted files and audit logs of one project.
- Template management: publish a project as a template, update it, and keep the gallery in order.
- Audit logs: who did what, when, and from which IP address.
One list for every user
Click Admin, then Manage Users. Each account is one row that shows how it logs in, its role and its status.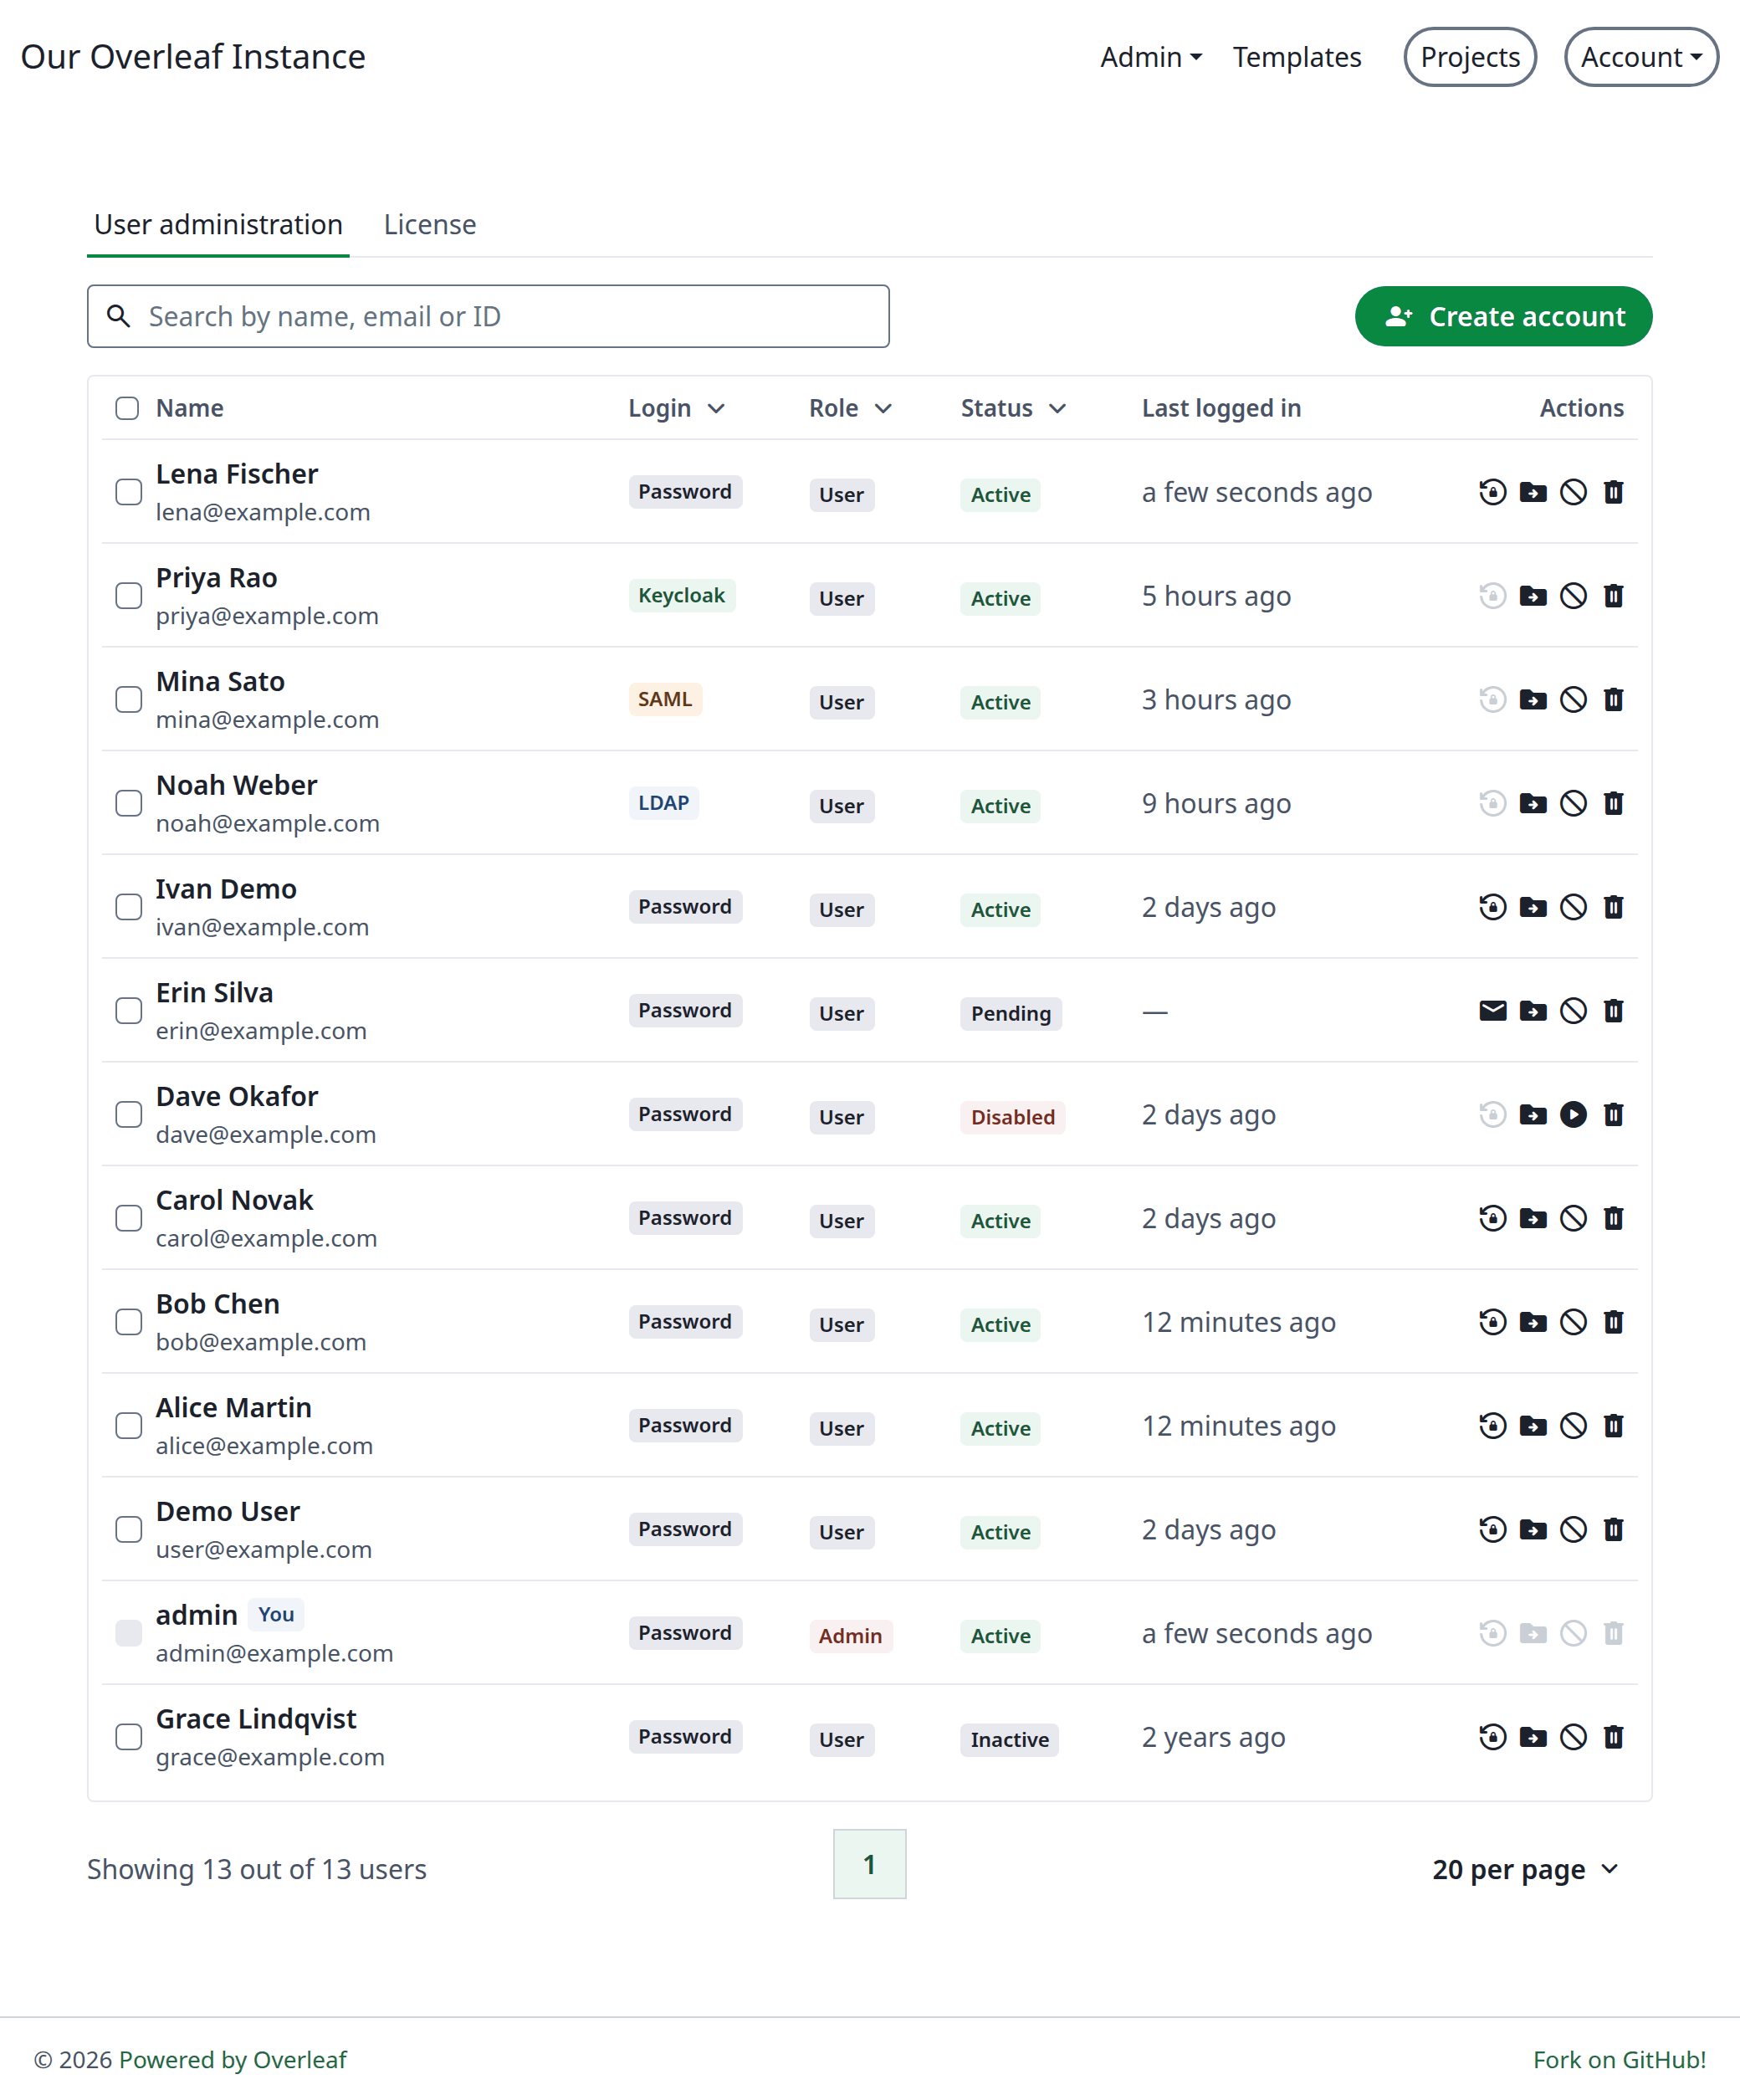
The user list
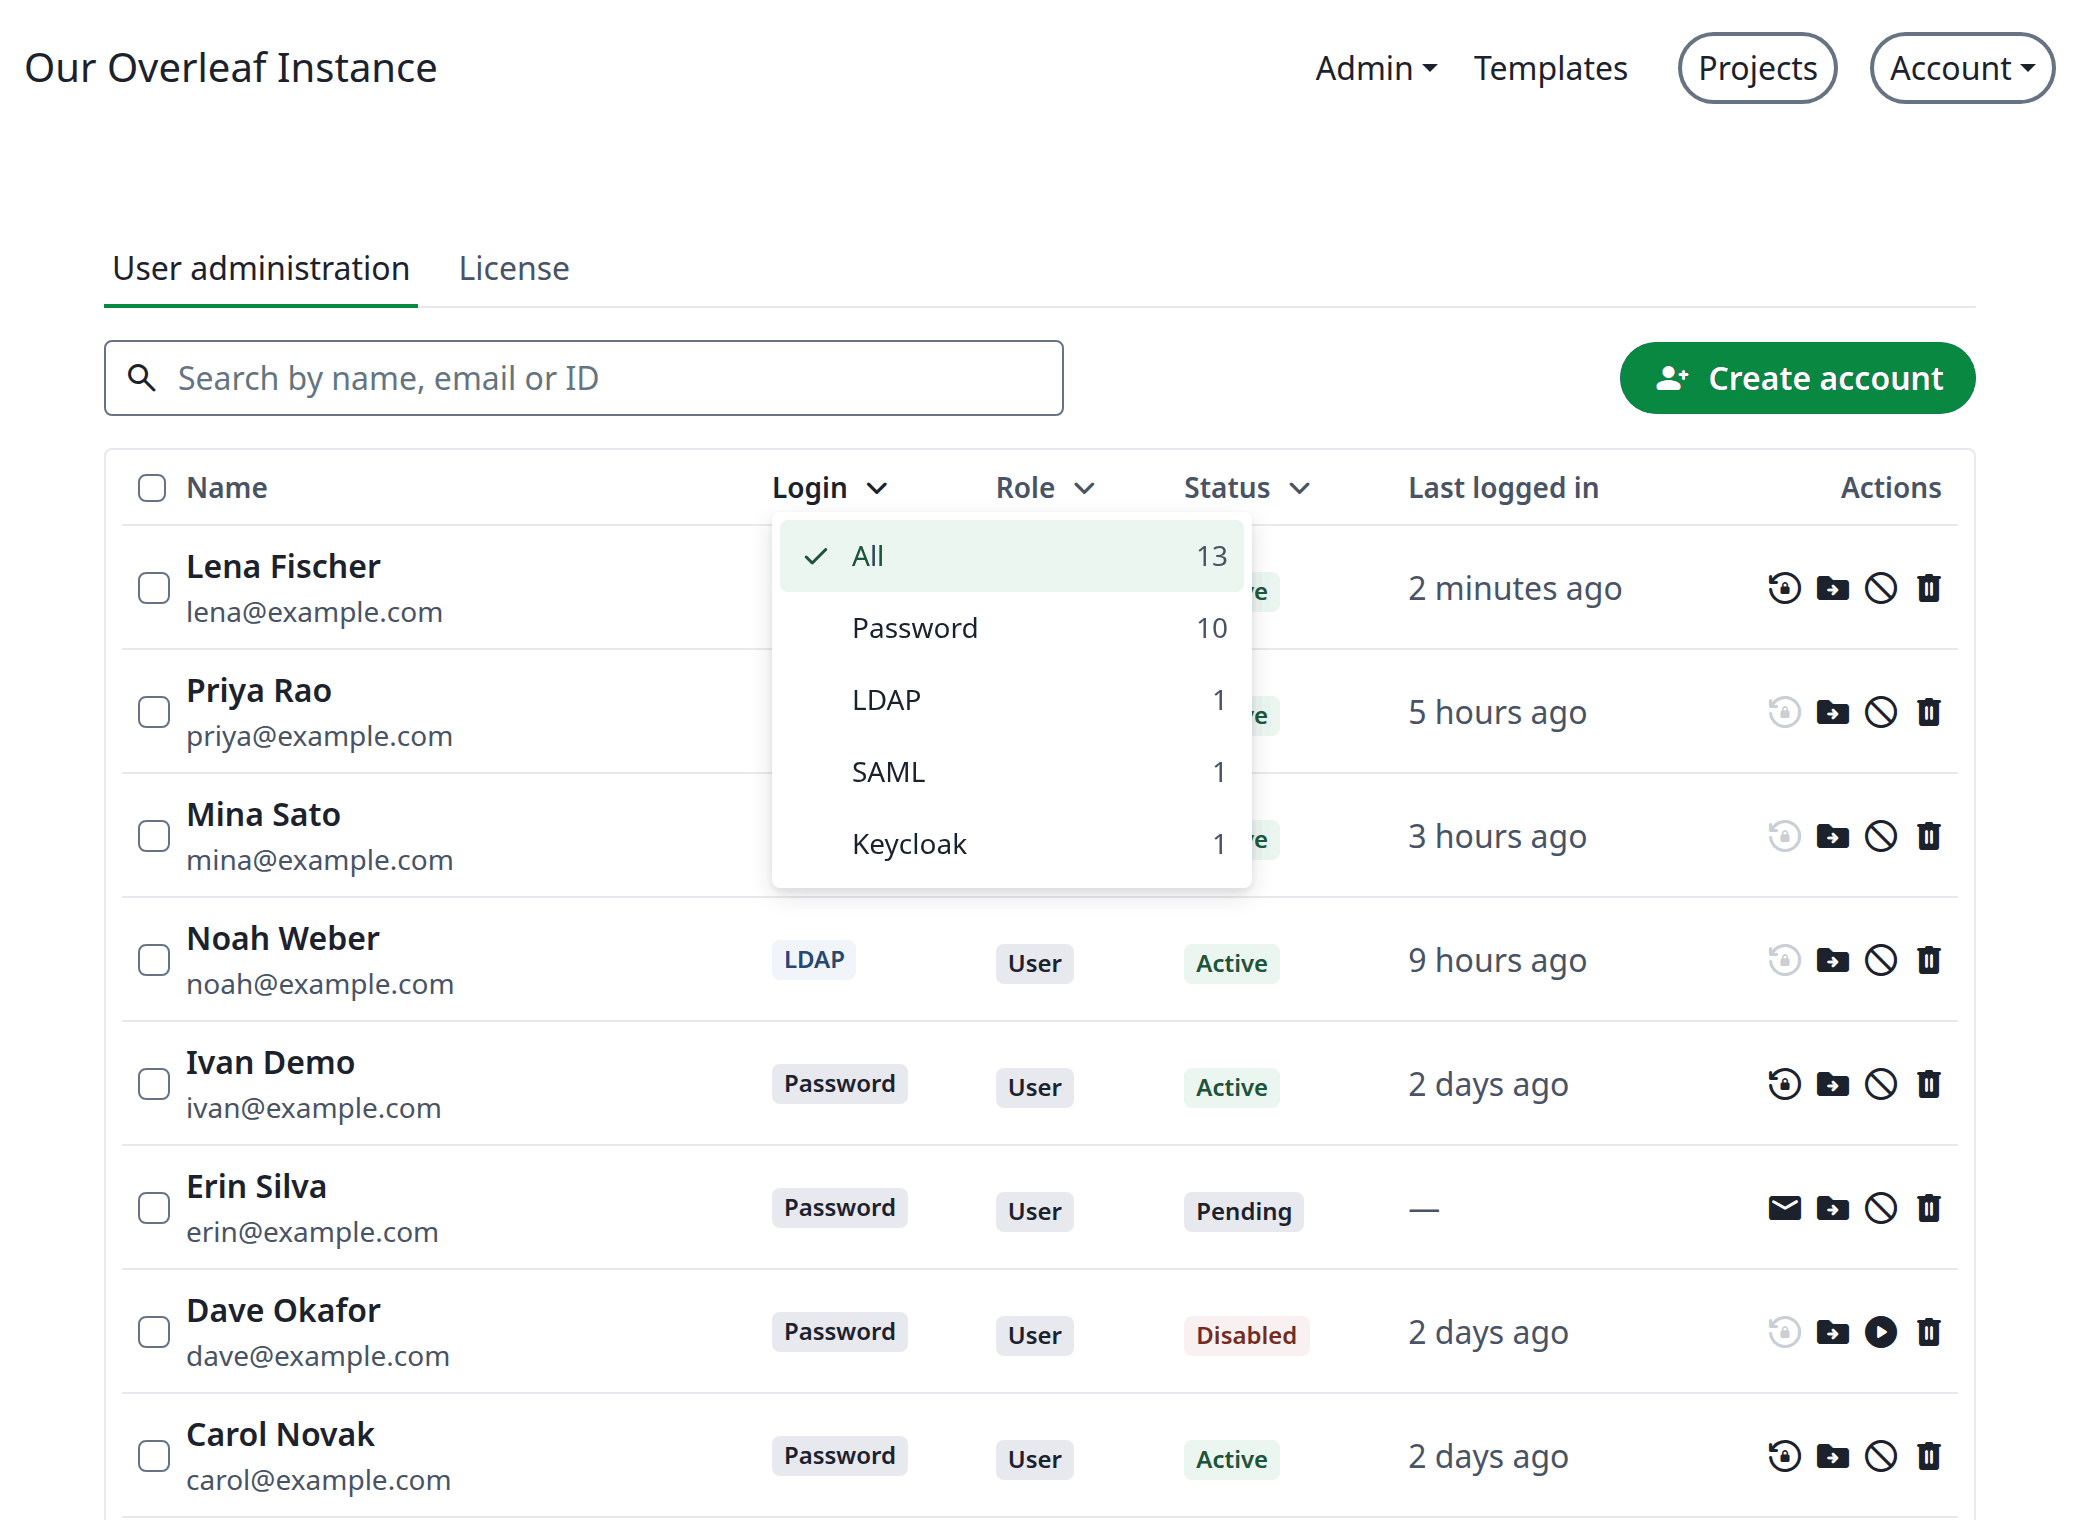
Filtering by login method
Deleted accounts stay out of the way in their own filter. If a search also matches a deleted account, a line above the table says so and offers to show it.
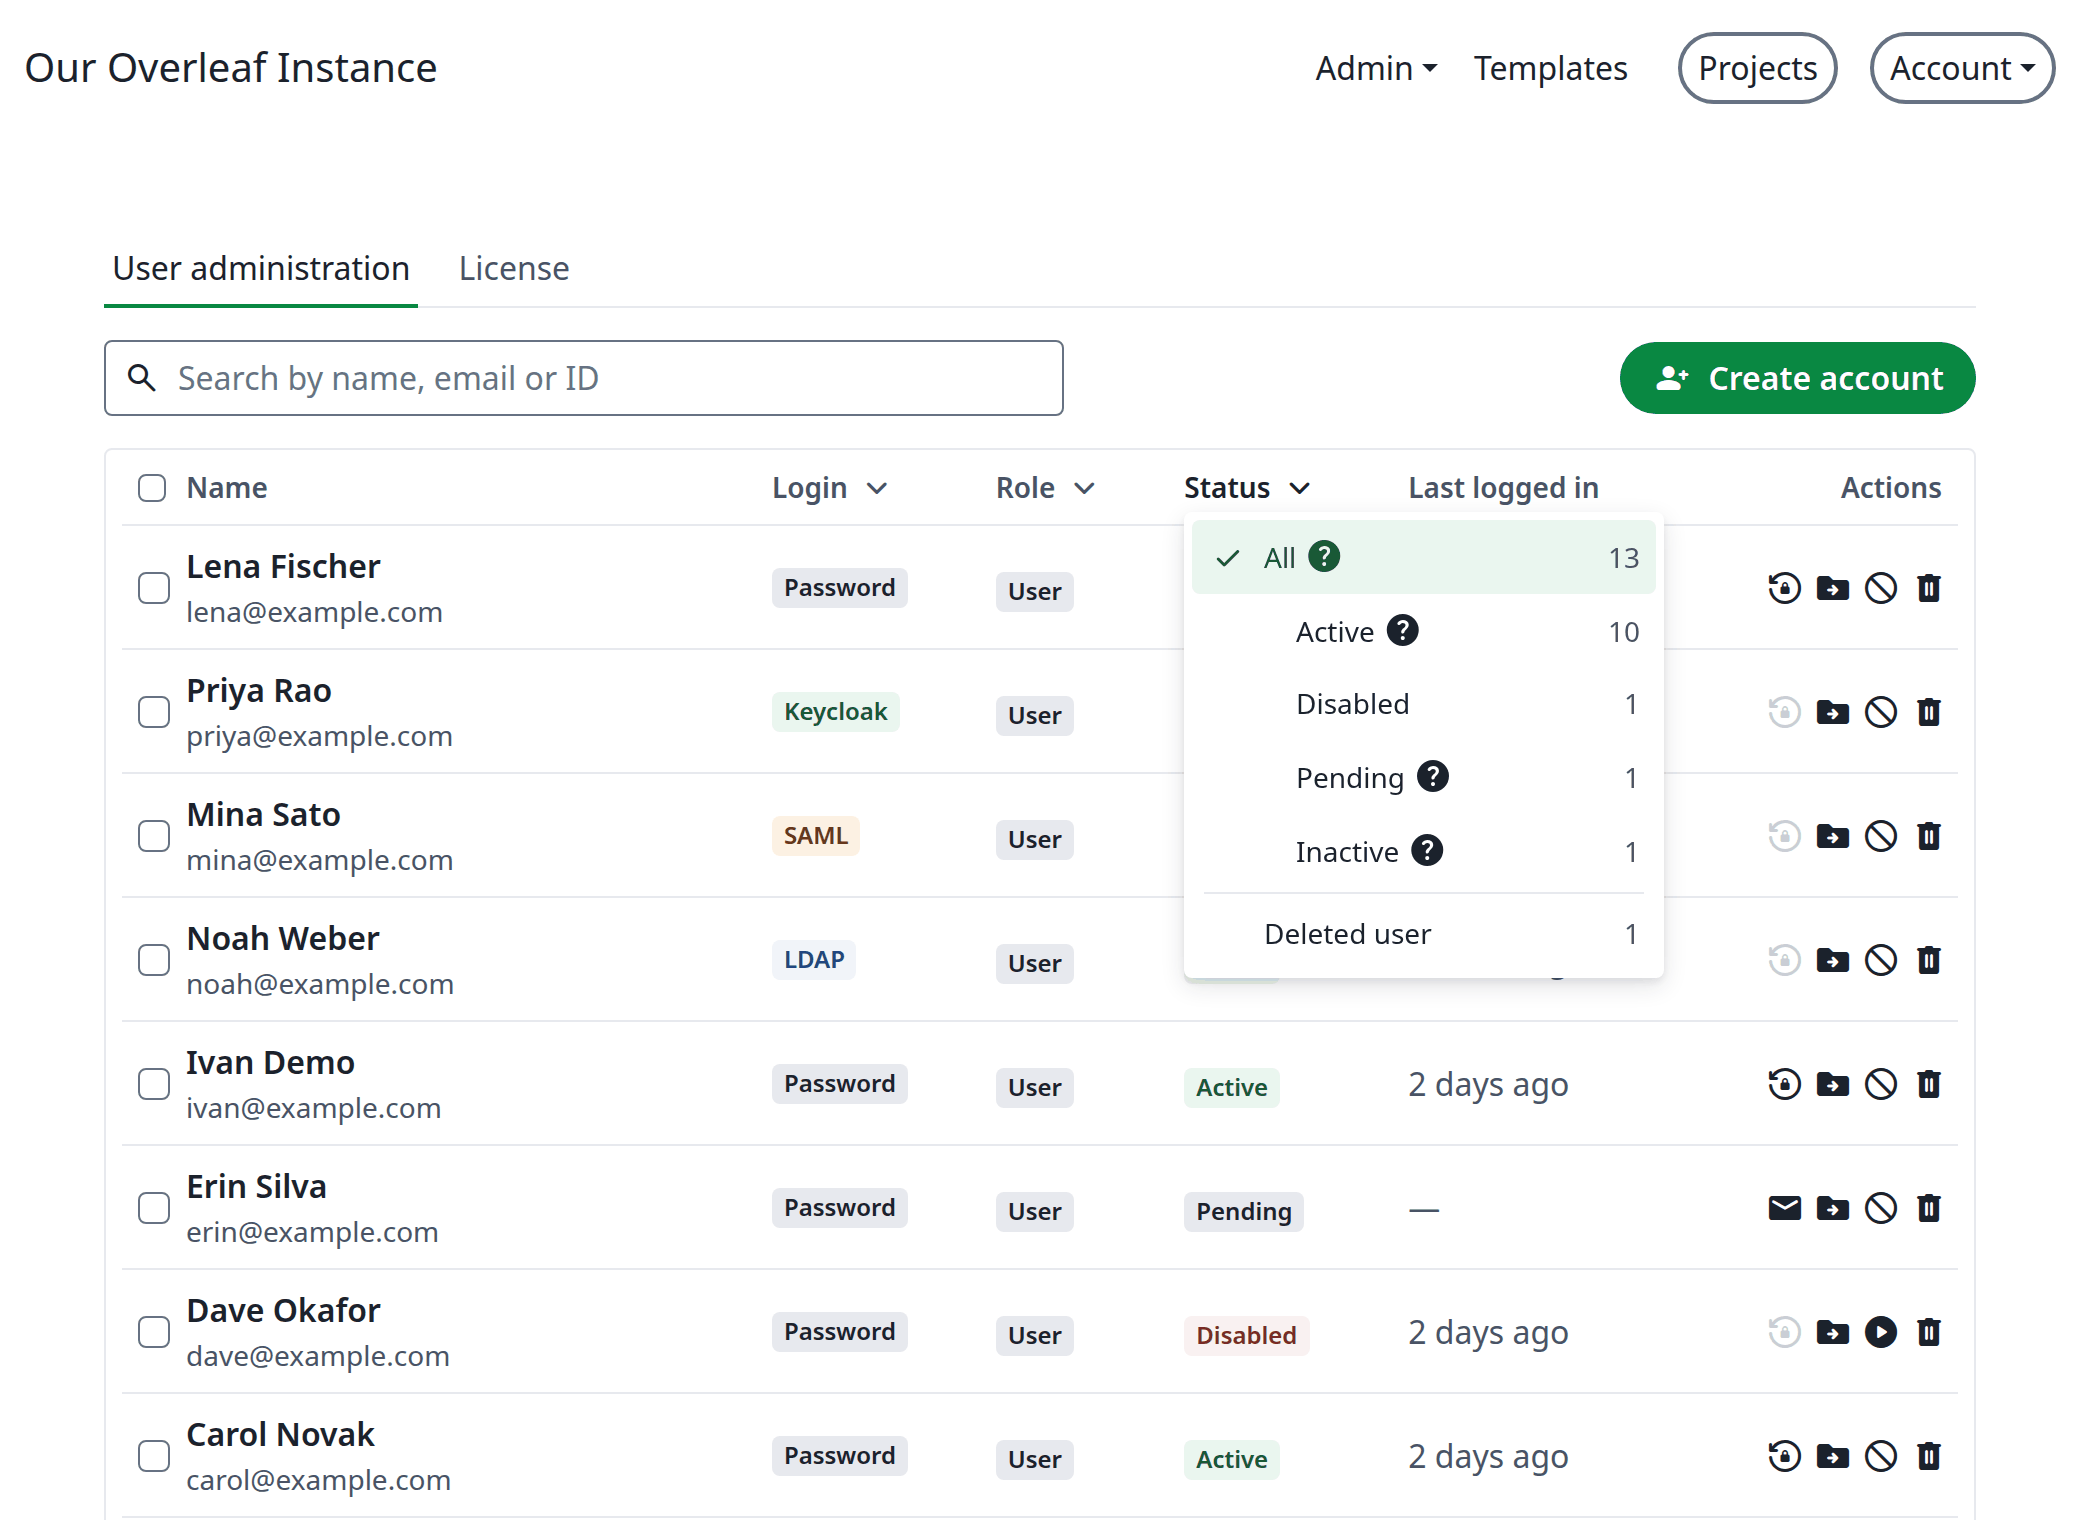
Filtering by status
Bring people in, with or without email
Create account adds a user and gives you the link they need. When email delivery is not set up, the dialog says so plainly and lets you copy the link, so a small instance can still onboard people.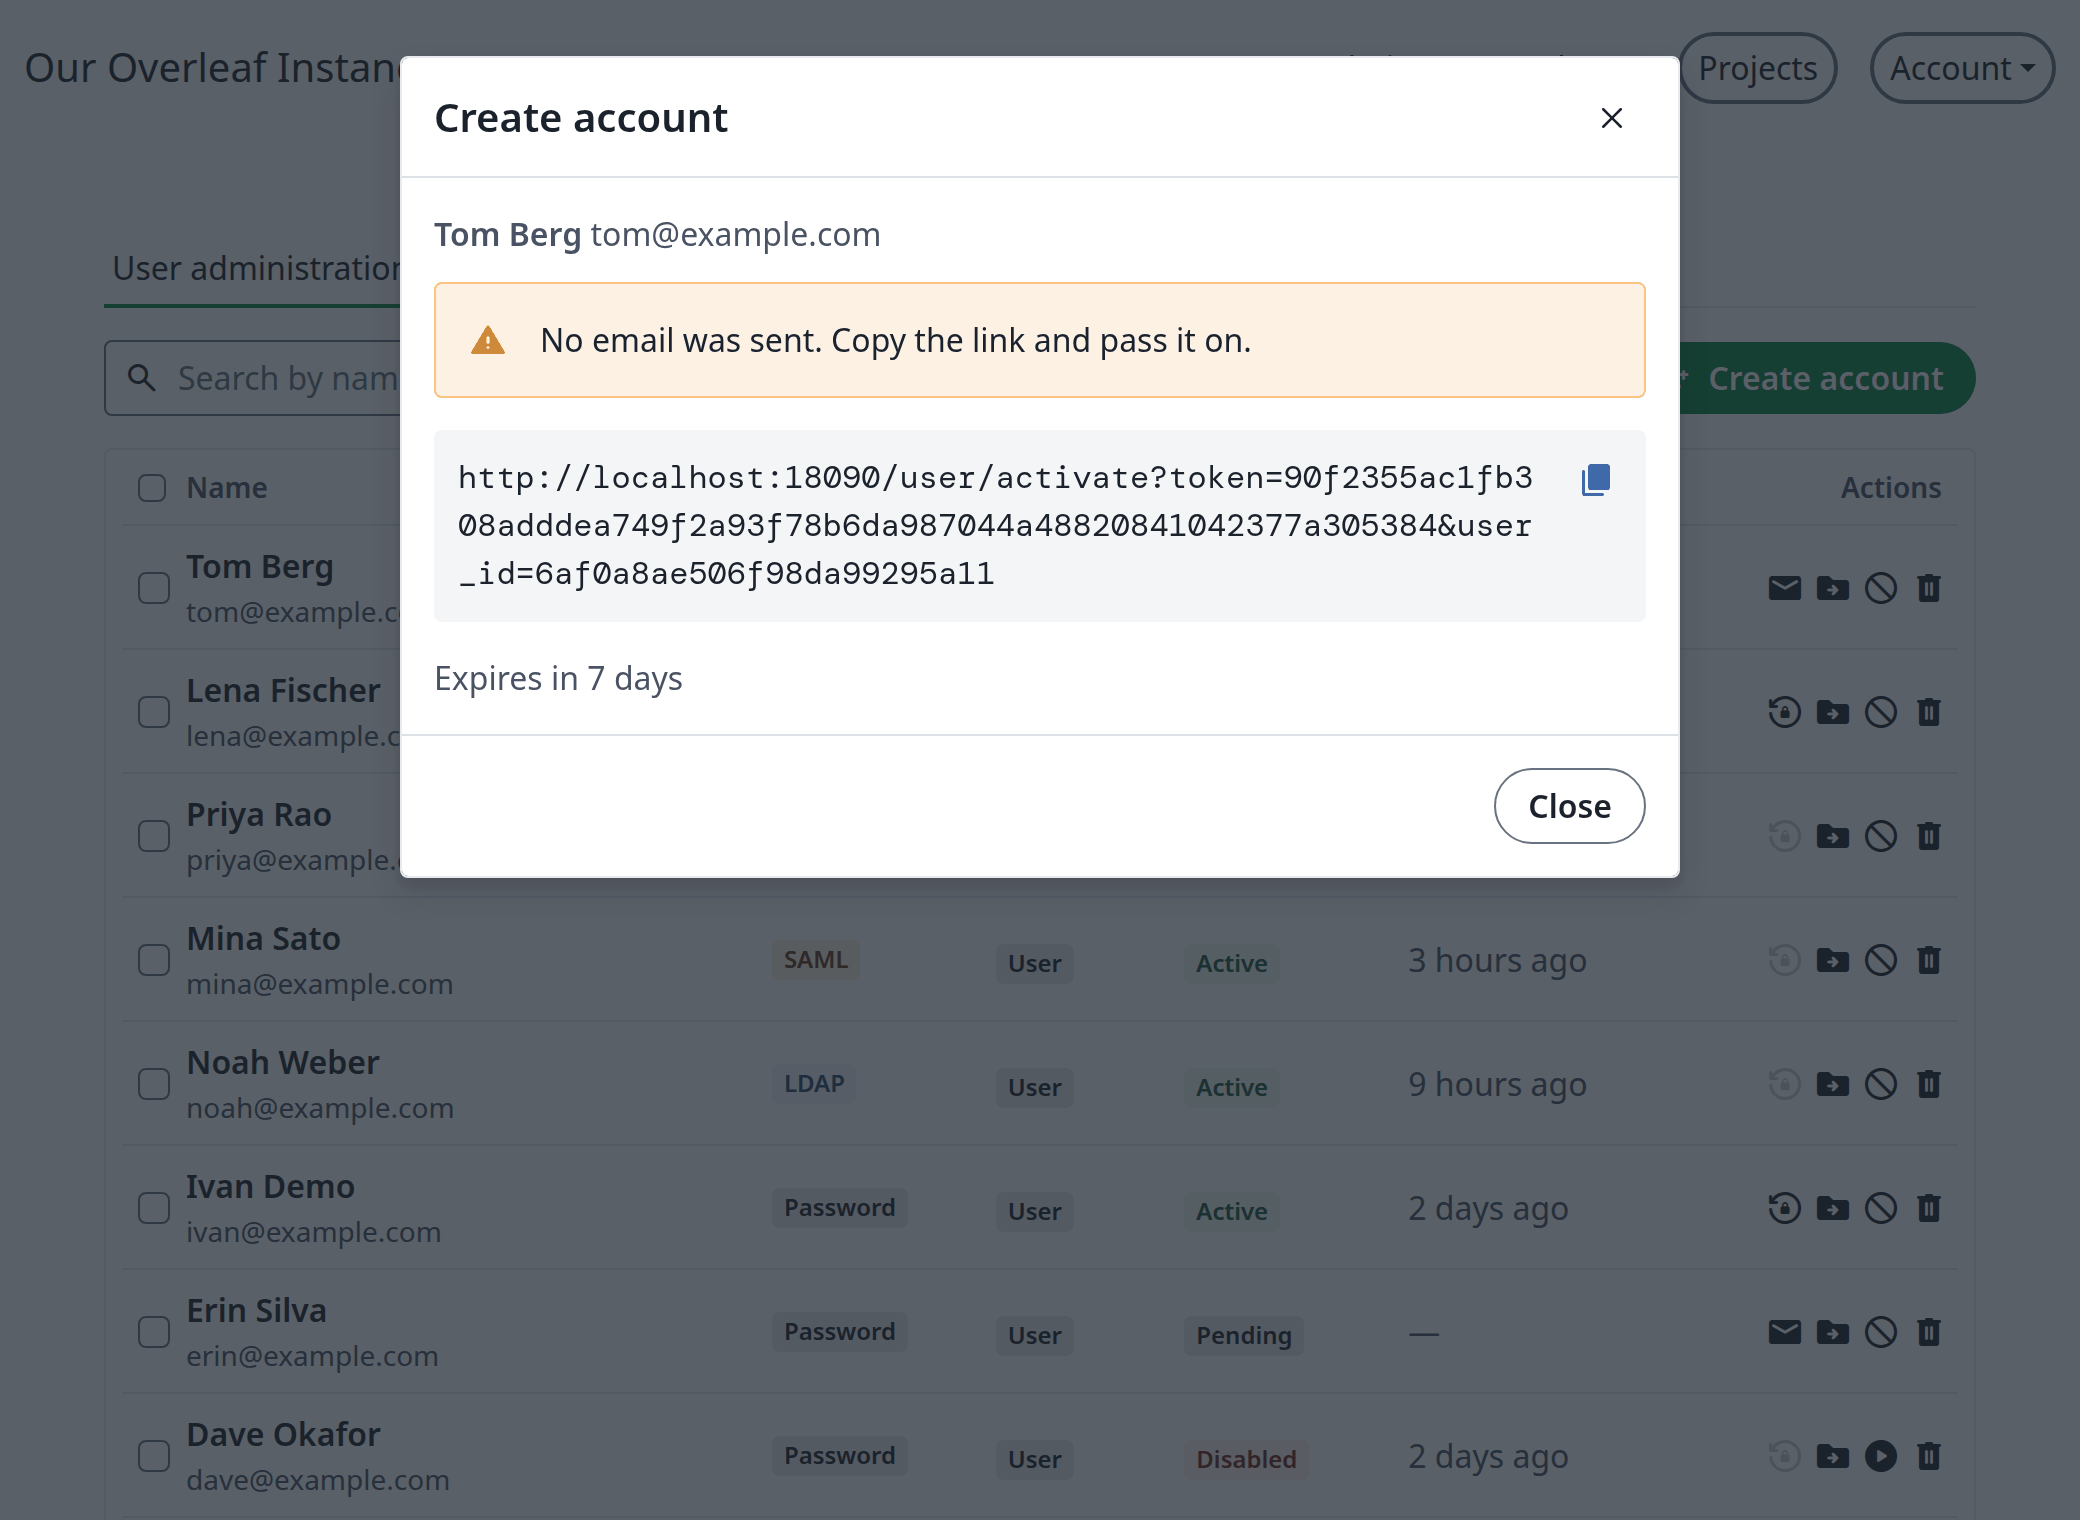
A new account's activation link
Change many accounts at once
Tick some accounts and the toolbar offers Send activation email, Transfer this user’s projects, Disable, Enable, Make admin, Remove admin and Delete account. The dialog lists the accounts before you confirm. If some of them fail, it tells you which, and what already worked stays done.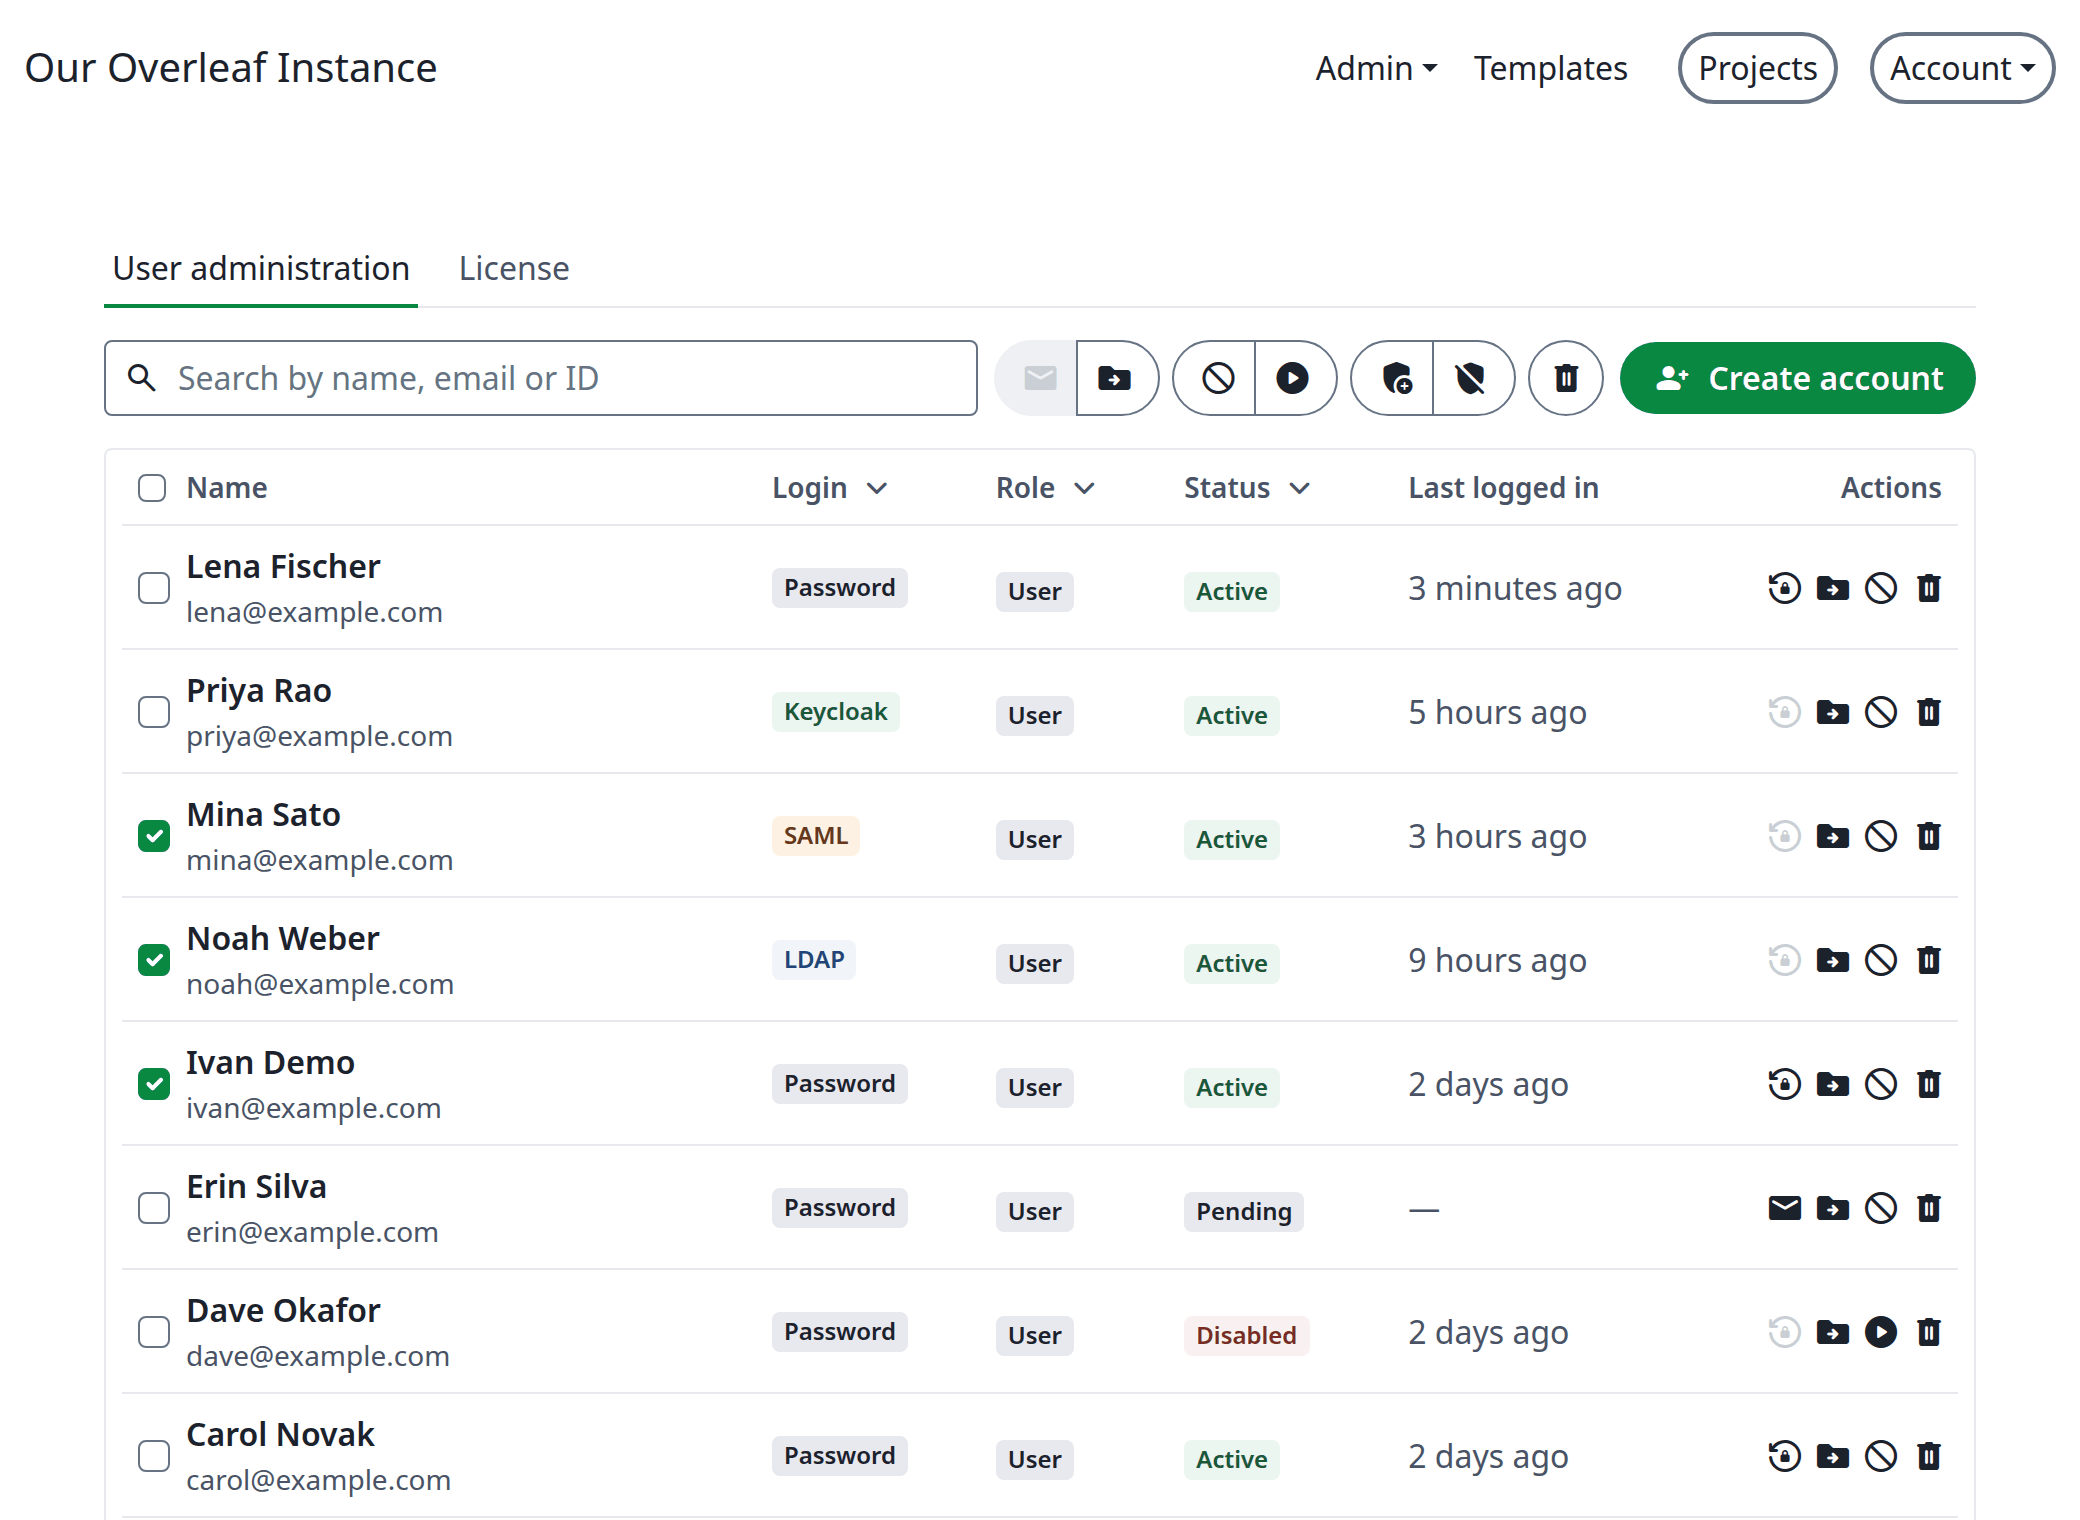
Bulk actions
Hard to get wrong
- Your own account is marked You and its actions are greyed out, so you cannot disable, delete or demote yourself.
- Every action asks for confirmation in a dialog that names the account.
- Delete account can hand the user’s projects to someone else first.
- A deleted account can be restored, together with the projects that were deleted with it. Only Delete permanently is final, and it warns you.
Everything about one person
Click a name to open the user’s page. It has six tabs, and the same action icons as the list.Account
The account’s details, from the ID and emails to the last login and its IP address. Click the pencil to change the email, the names or the password, or to turn Admin on or off.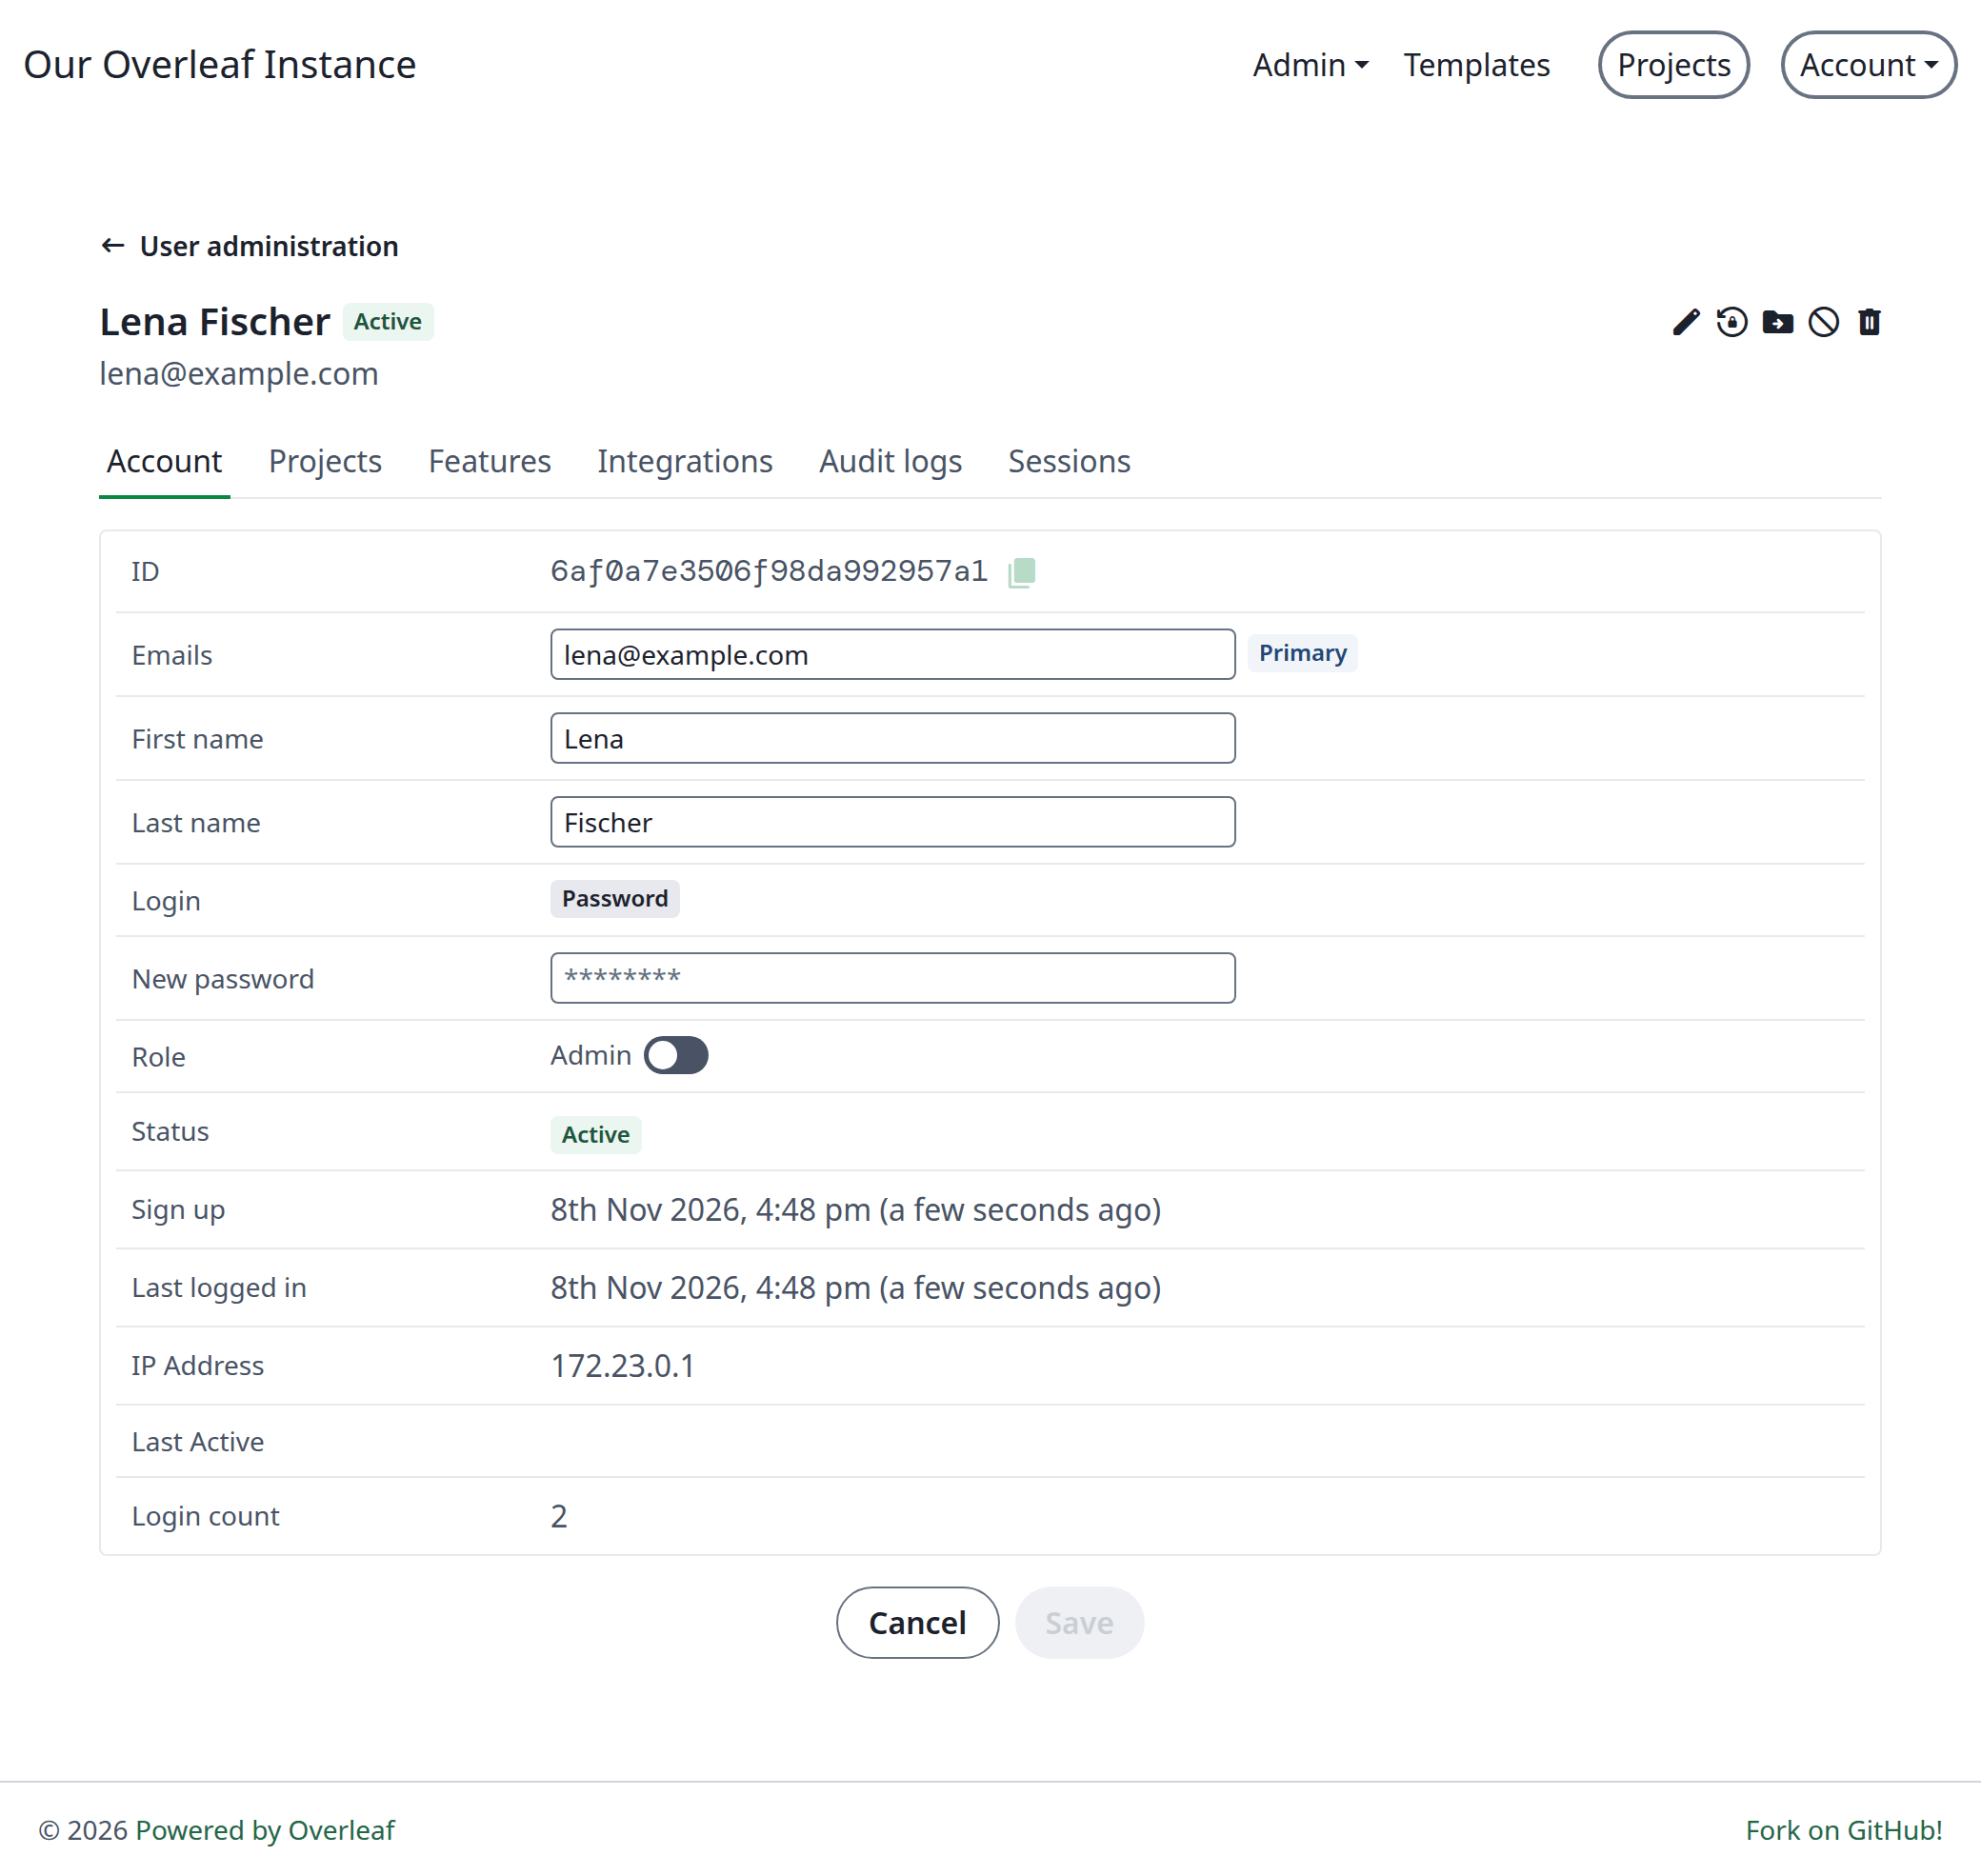
Editing an account
Projects
The projects this person owns, with their own search, status filter and actions.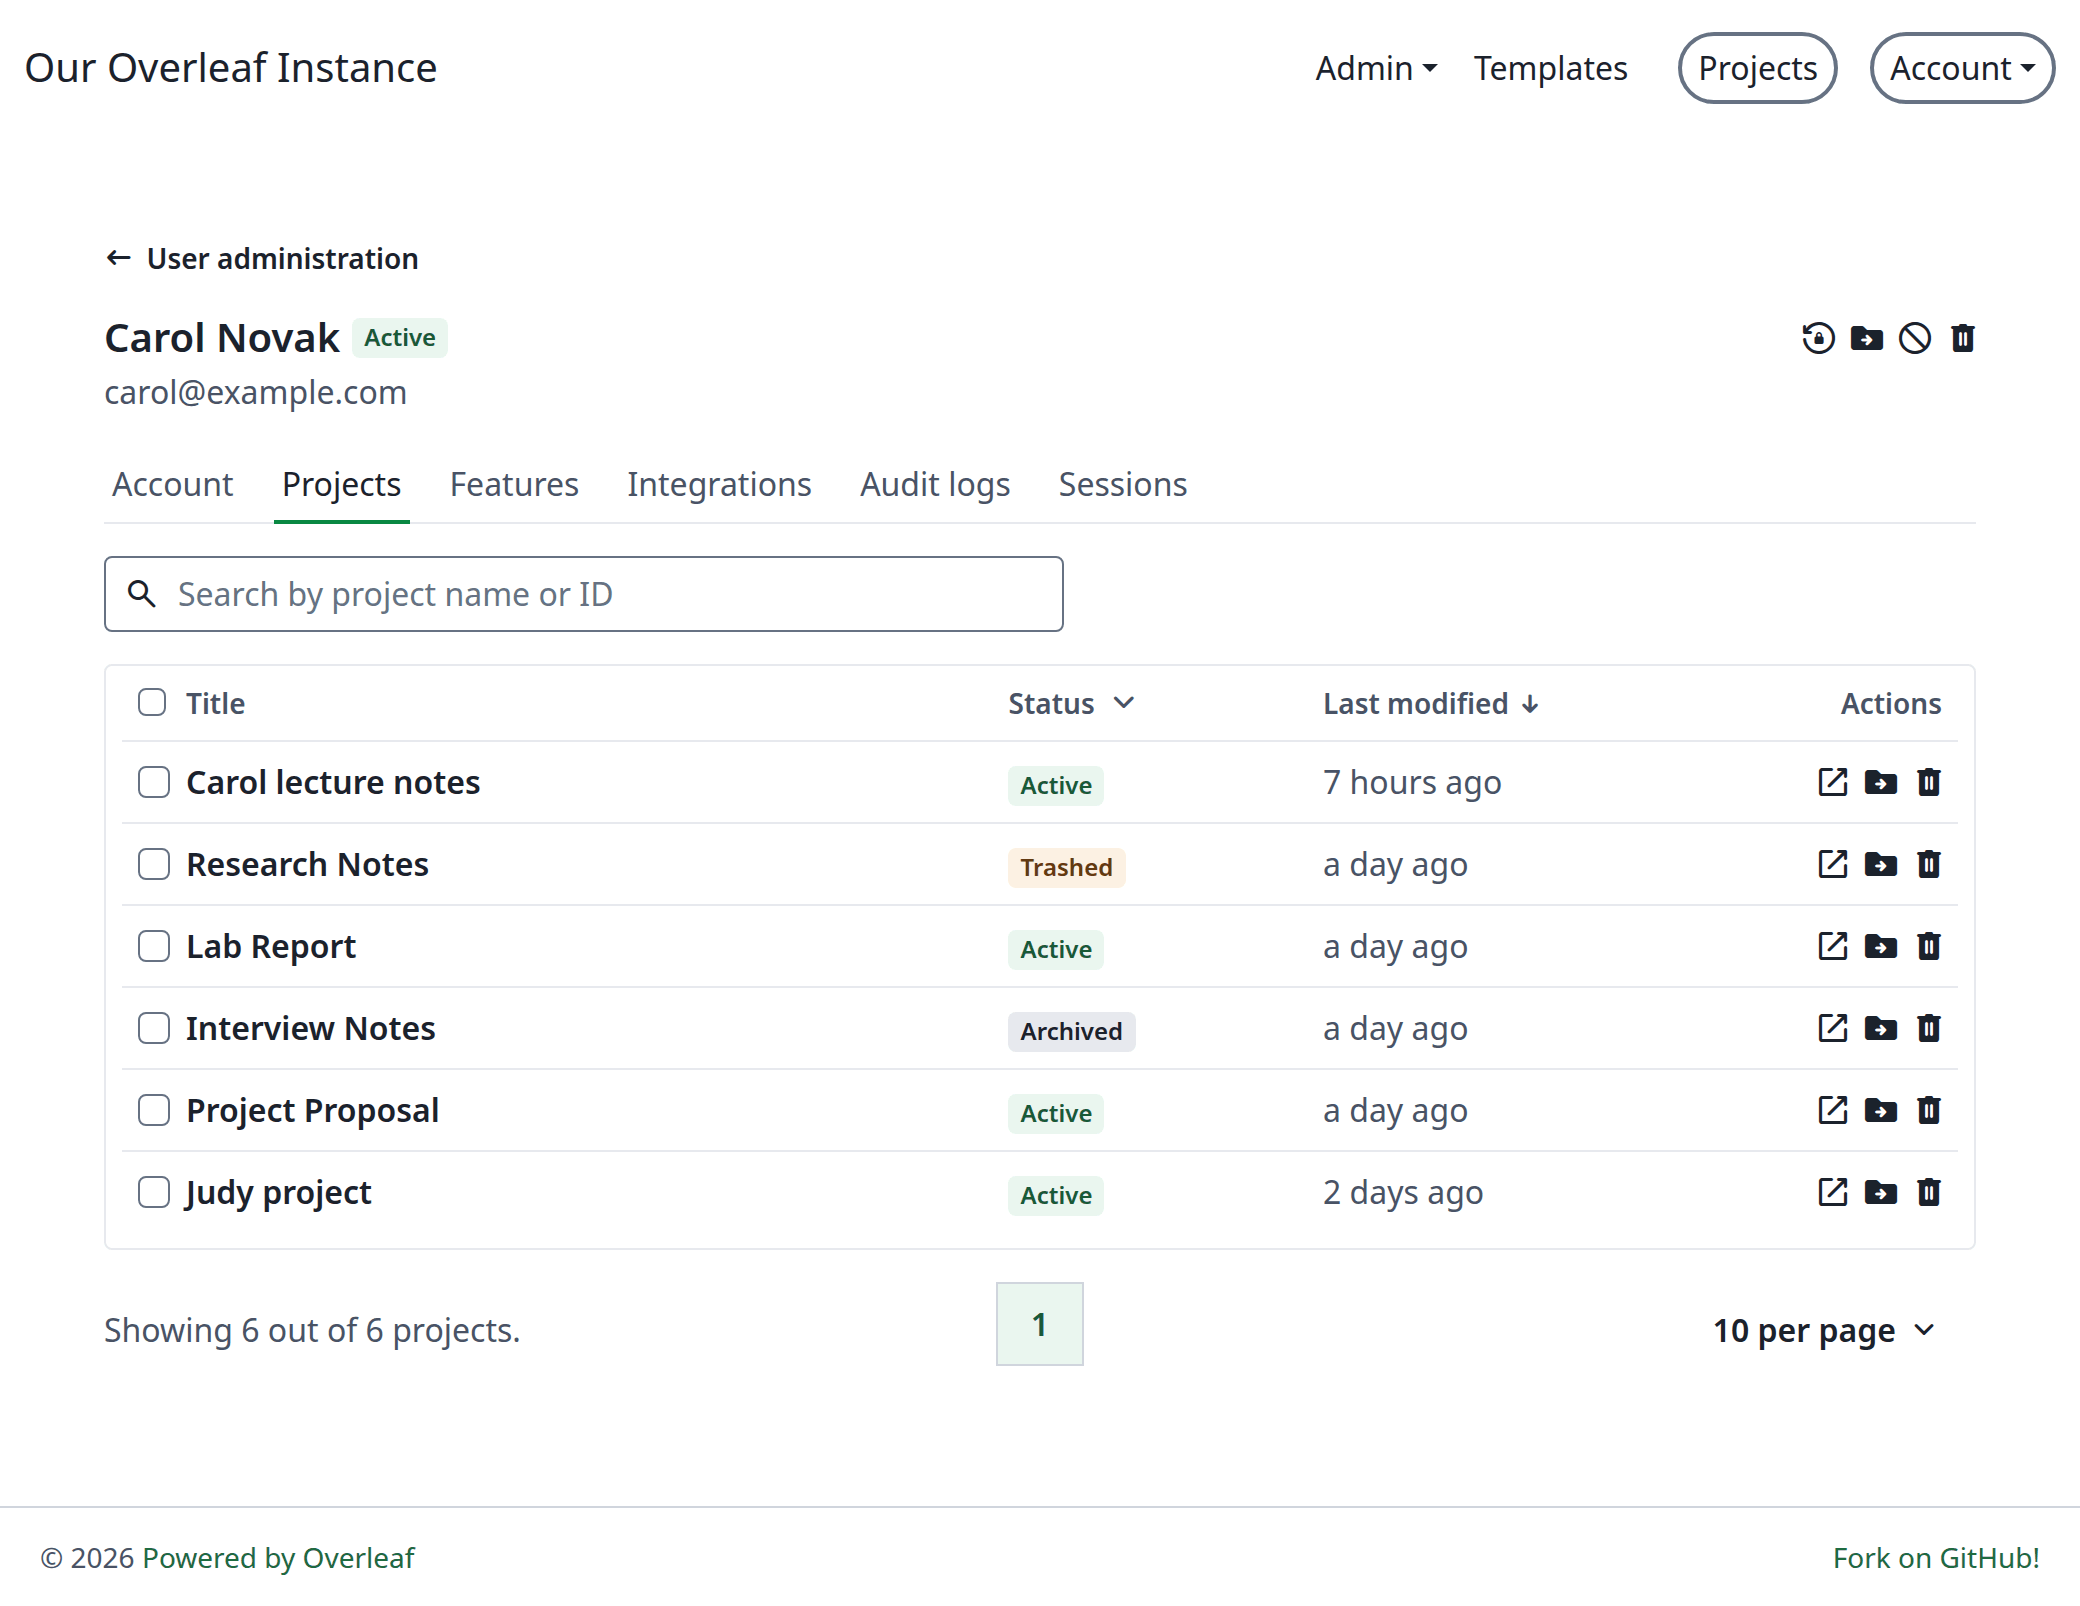
A user's projects
Features
What this account has switched on, such as collaborators per project, the compile timeout, integrations and AI, along with the account’s AI usage and a button to reset it.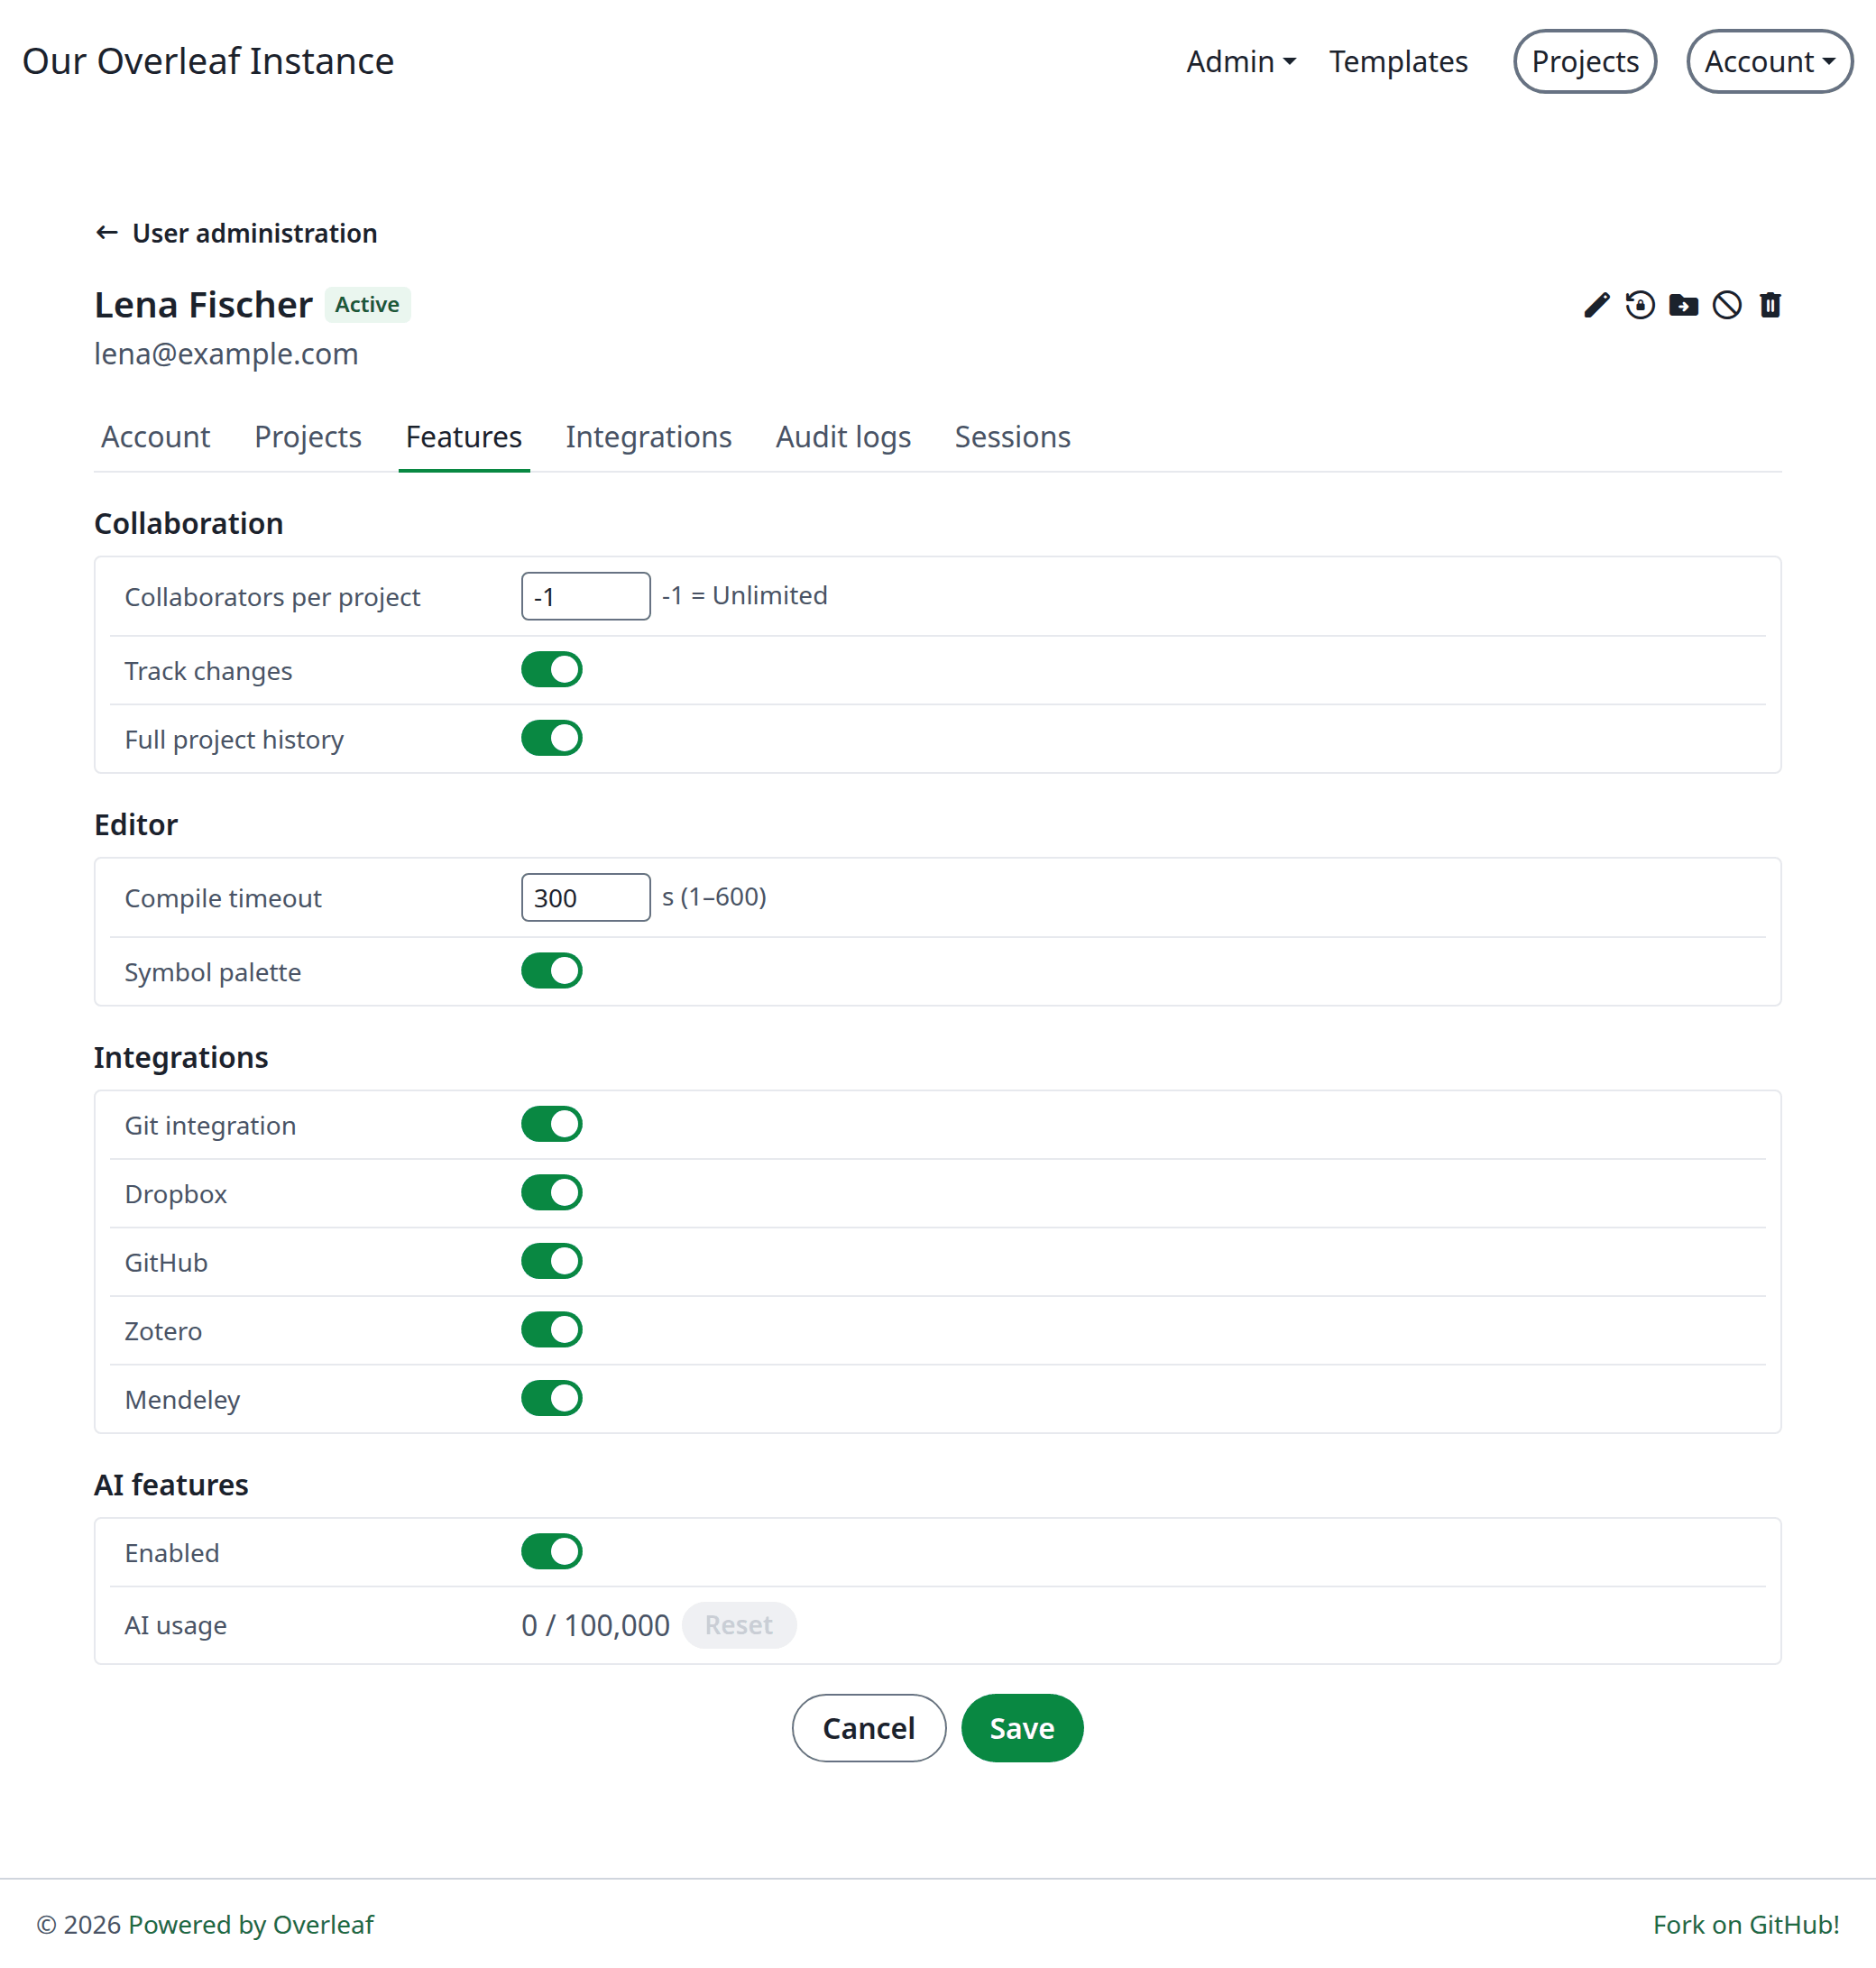
A user's features
Integrations
The person’s Git access tokens and the services they have linked.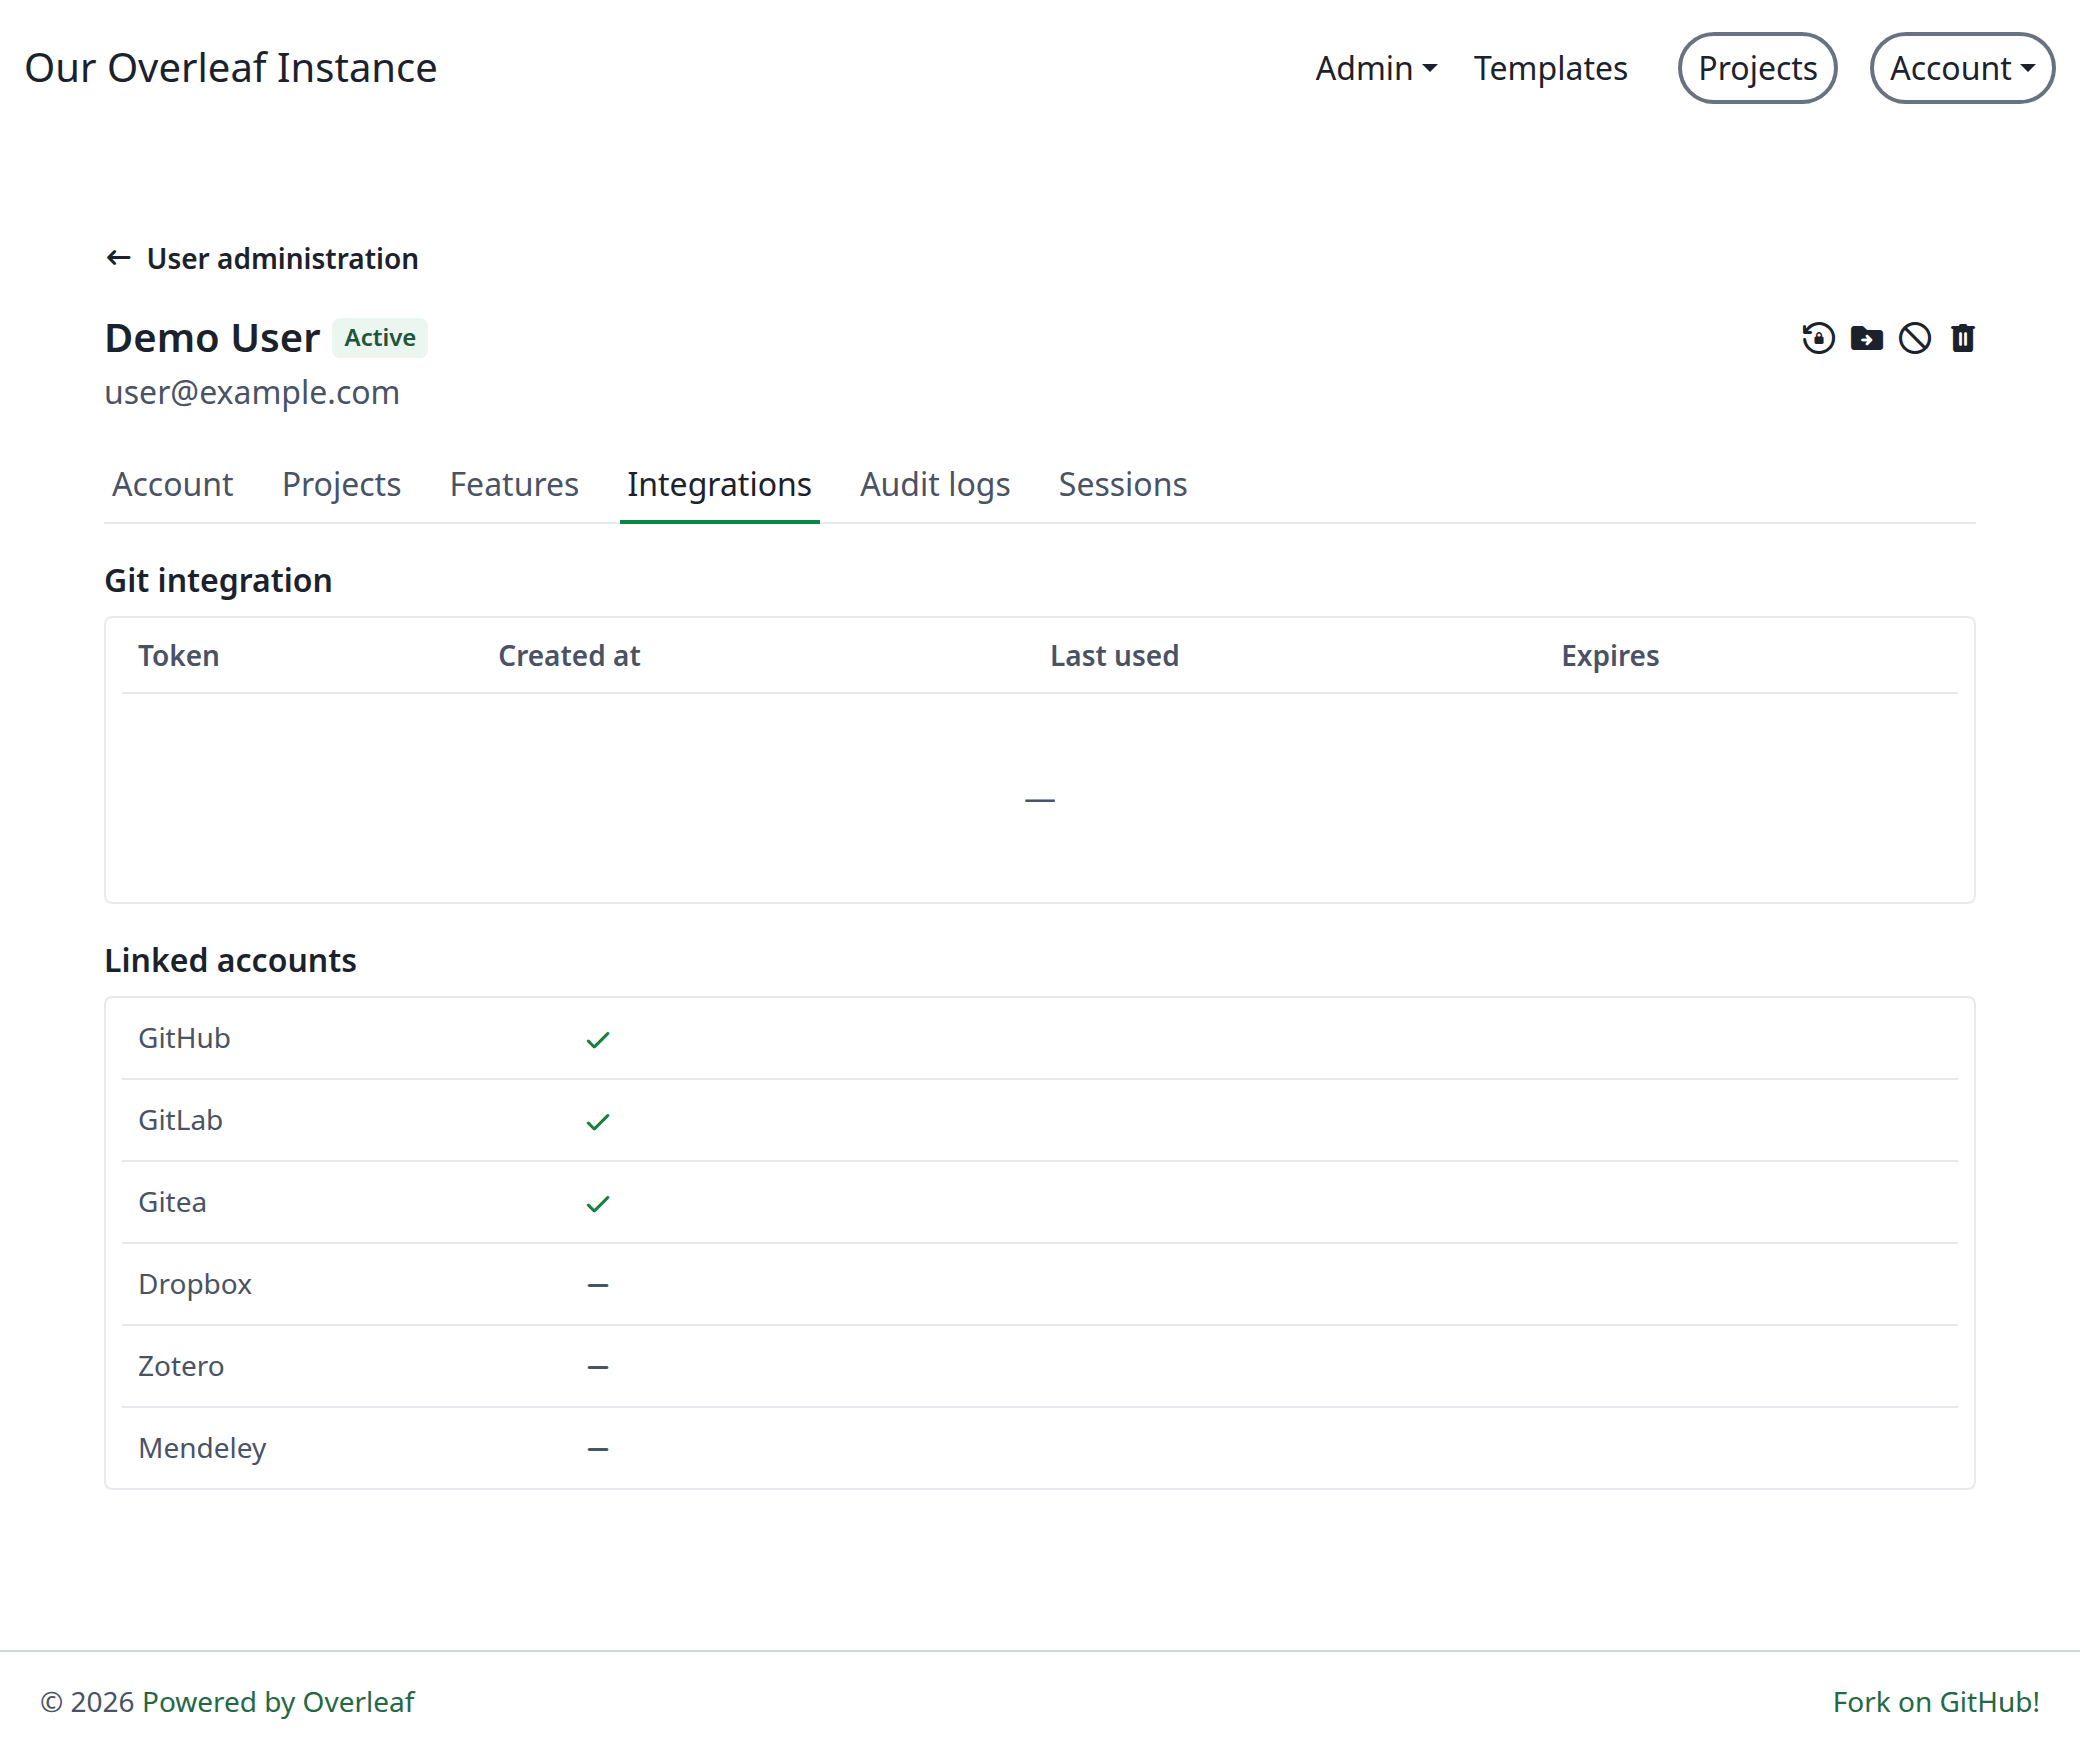
A user's integrations
Sessions
Where the person is logged in. Clear sessions logs them out everywhere, which is the first thing to do when a laptop goes missing.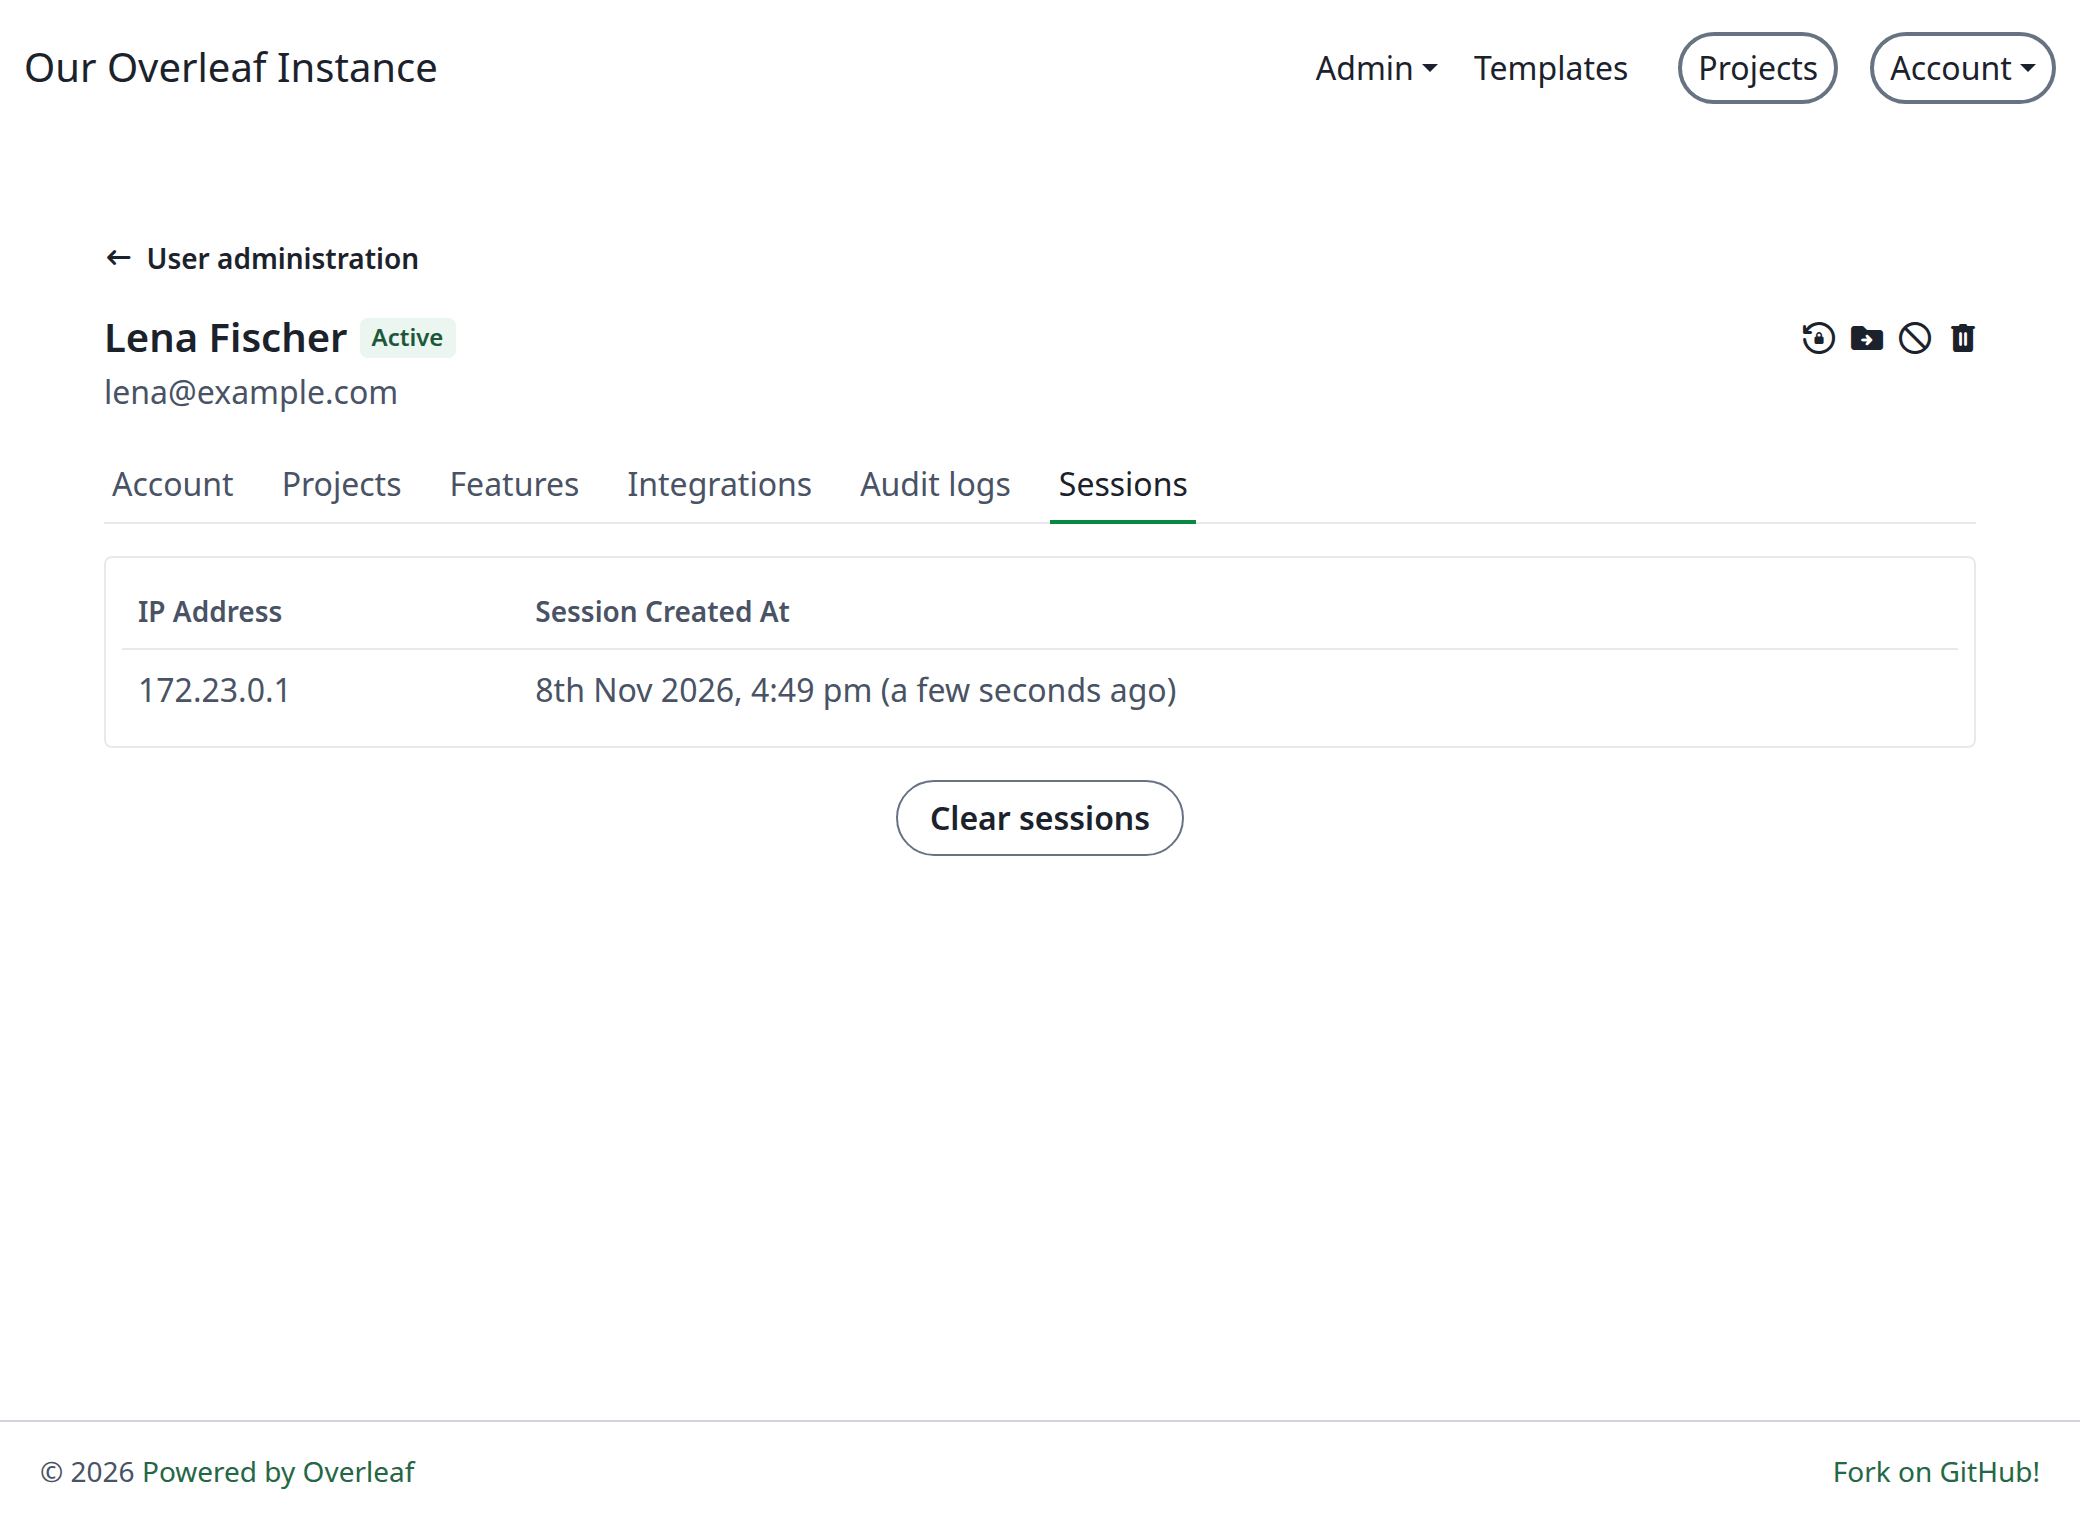
A user's sessions
Every project on the instance
Click Admin, then Project/Object Lookup. The list shows the projects of every user, with their owners and statuses. The search box takes a project’s name, its ID, its owner, or a link. Paste a sharing link and you find the project behind it.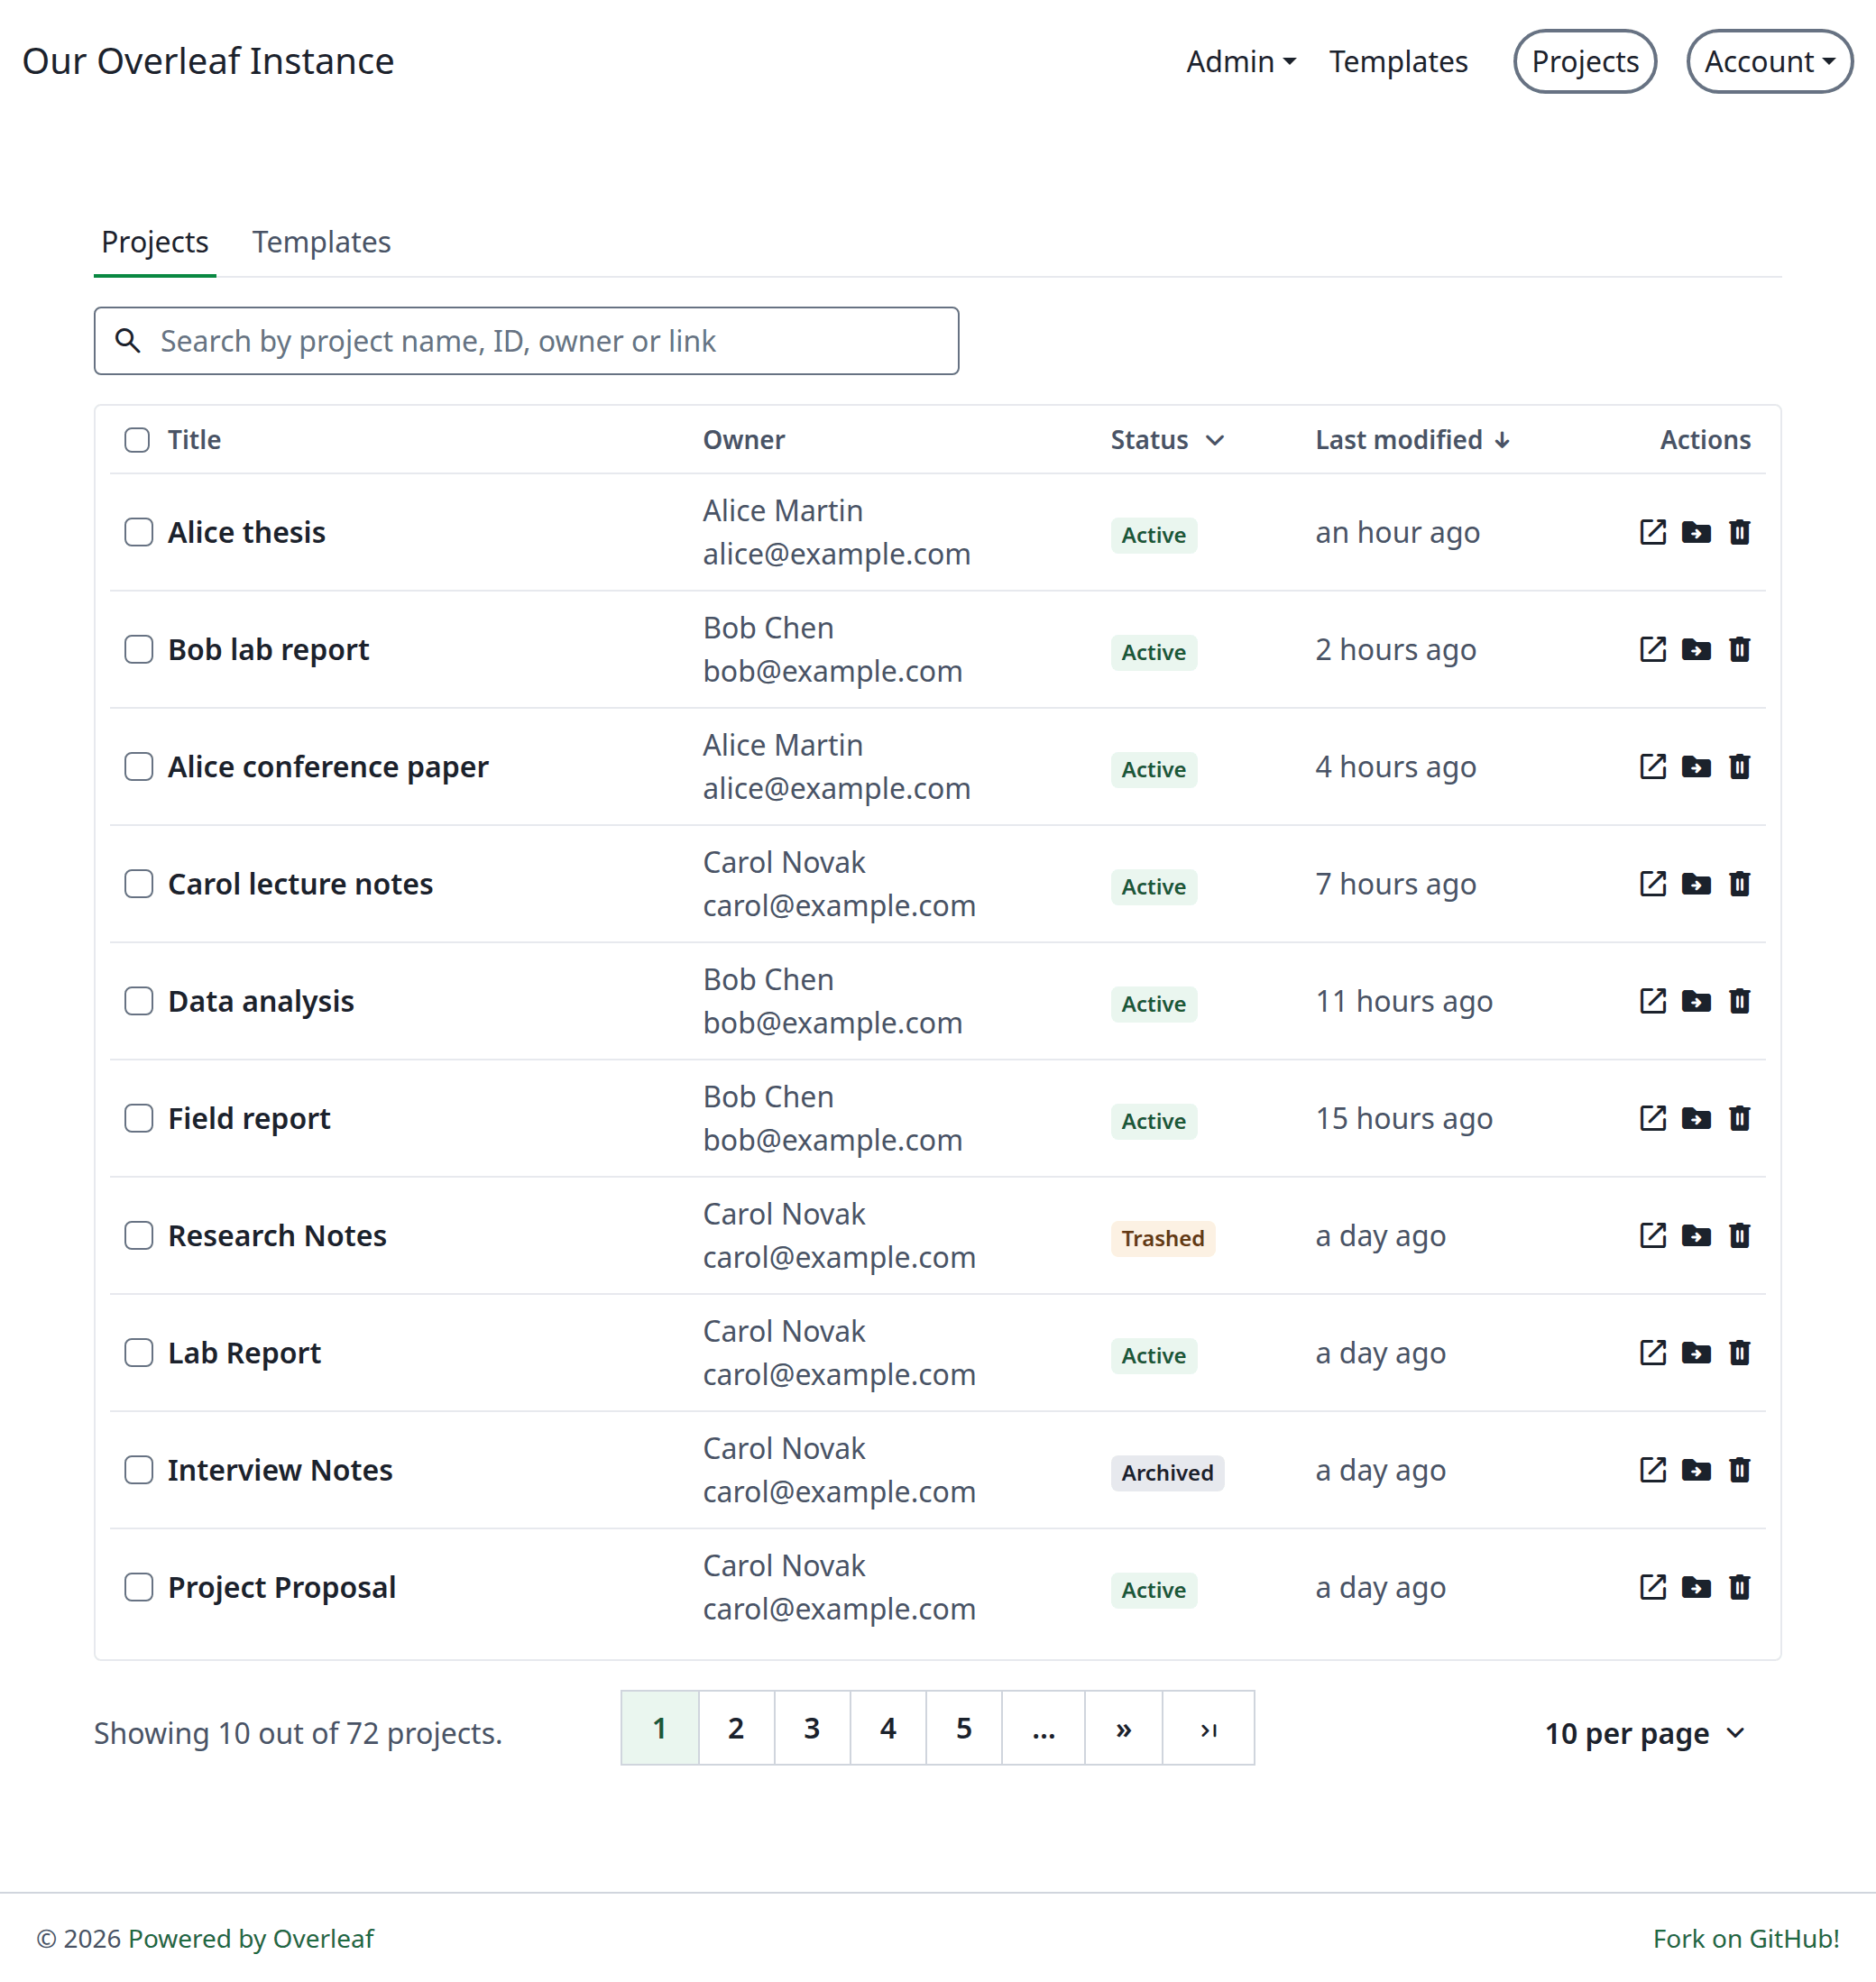
All projects
.zip file, change their owner or delete them. In the Deleted view, the buttons are Restore and Delete permanently.
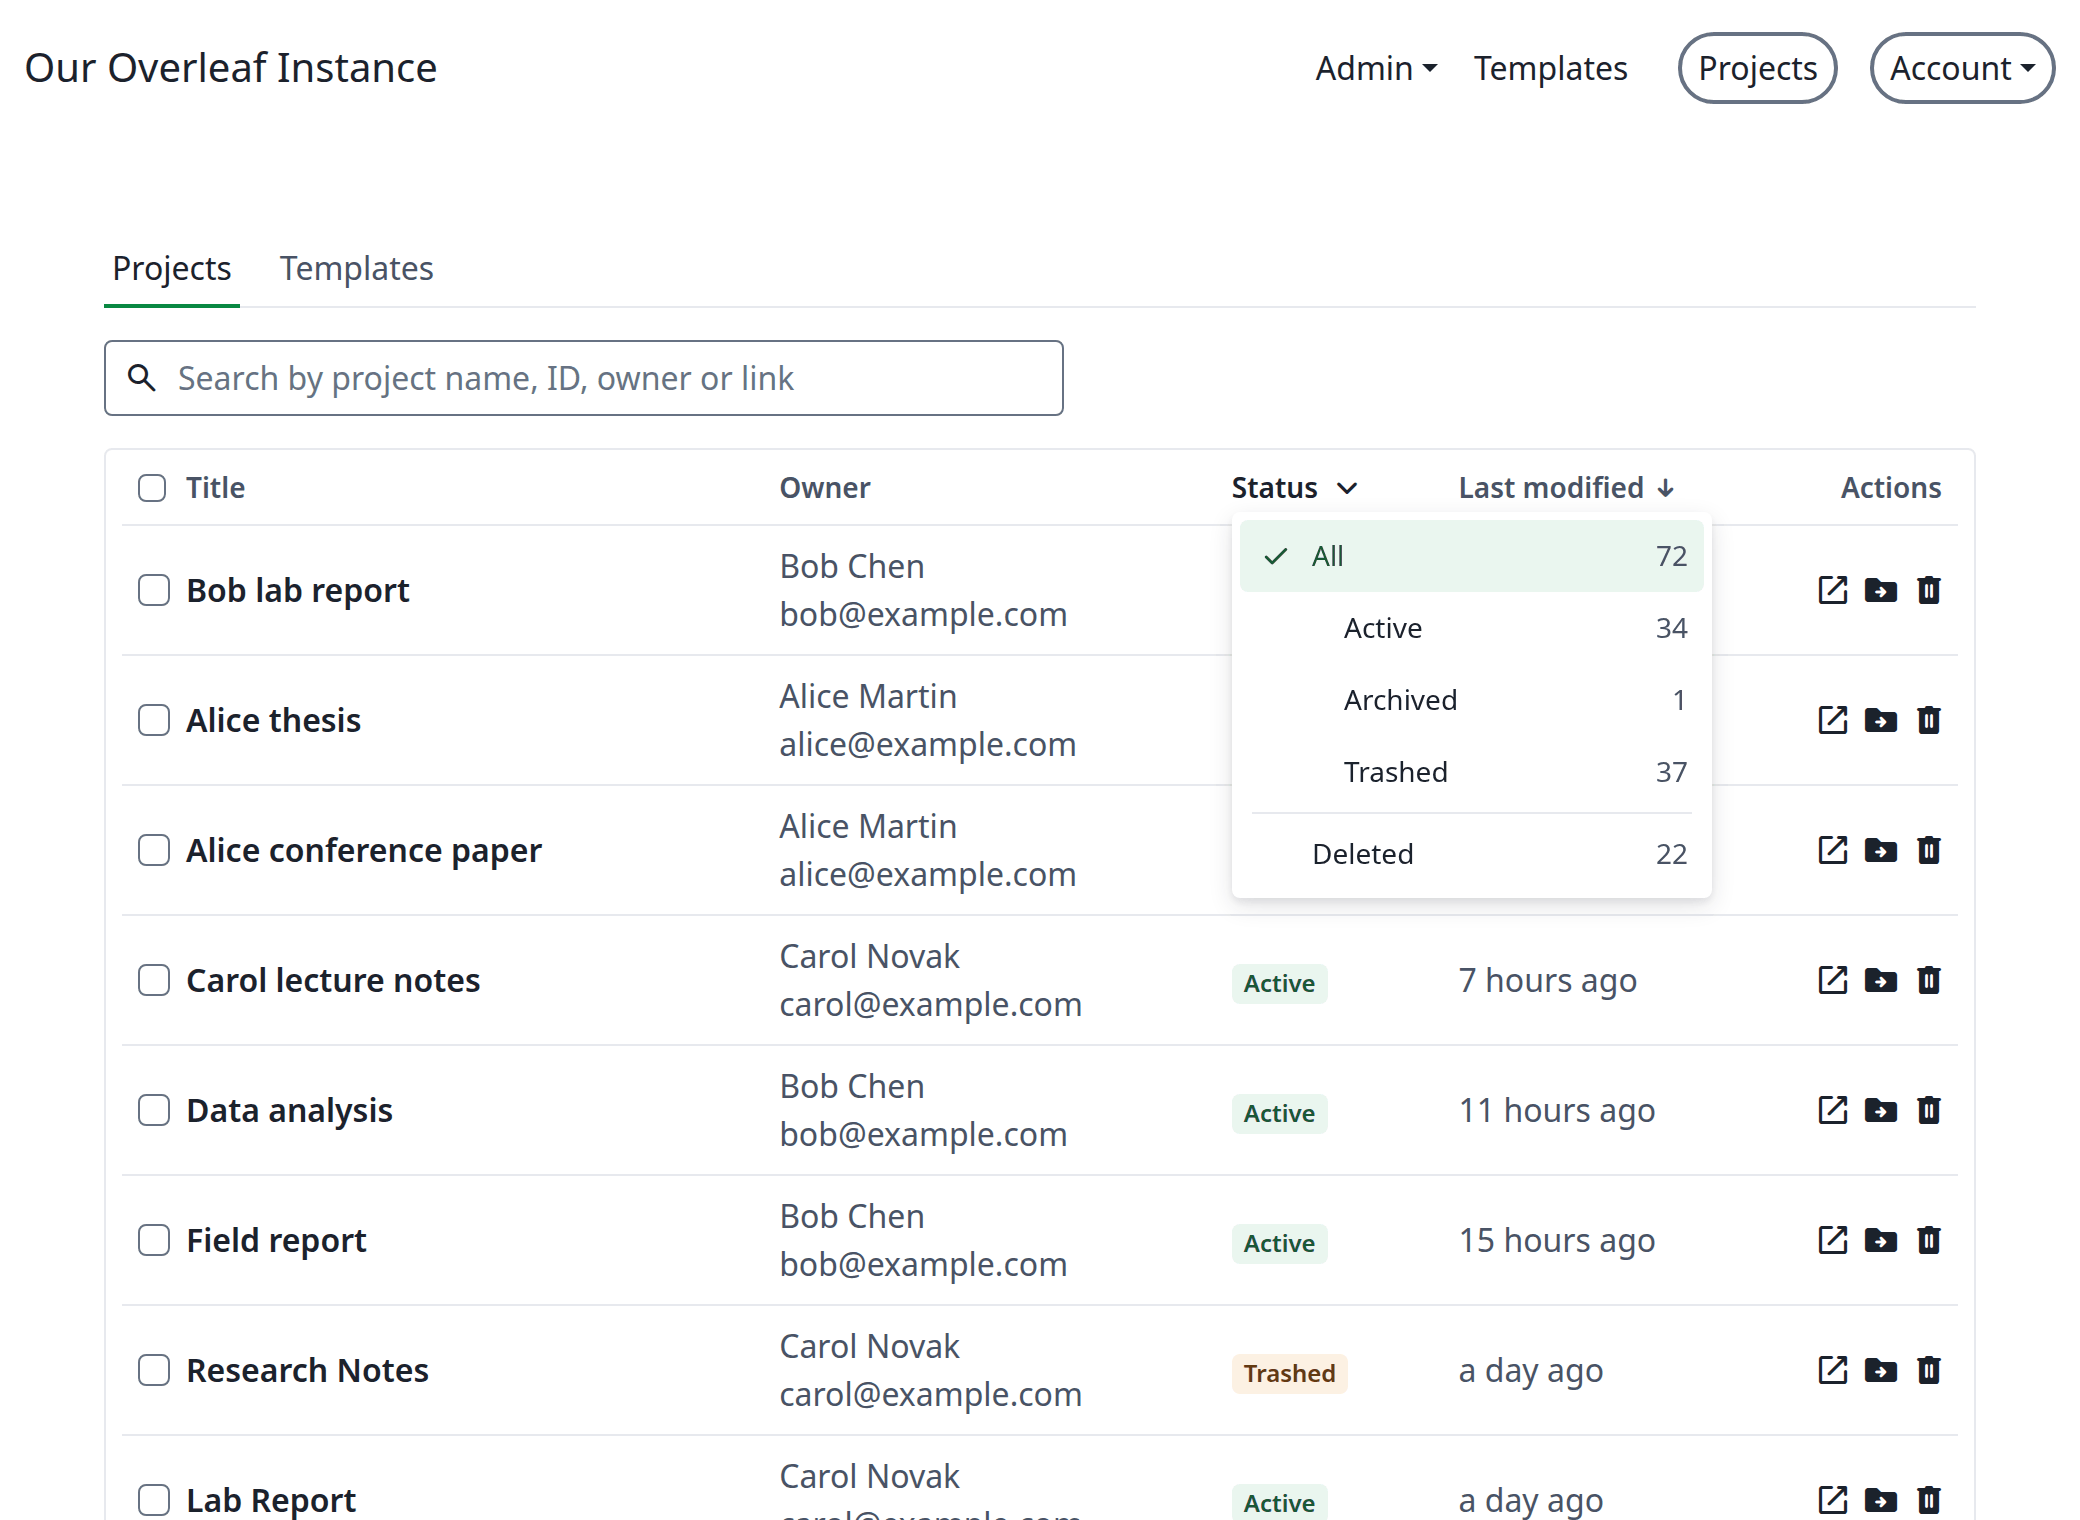
Filtering projects by status
Everything about one project
Click a project’s title to open its page.Overview
Change the name, link sharing, compiler, TeX Live version and main document. Change project owner gives the project to another user, which helps when someone leaves the lab and their thesis has to stay.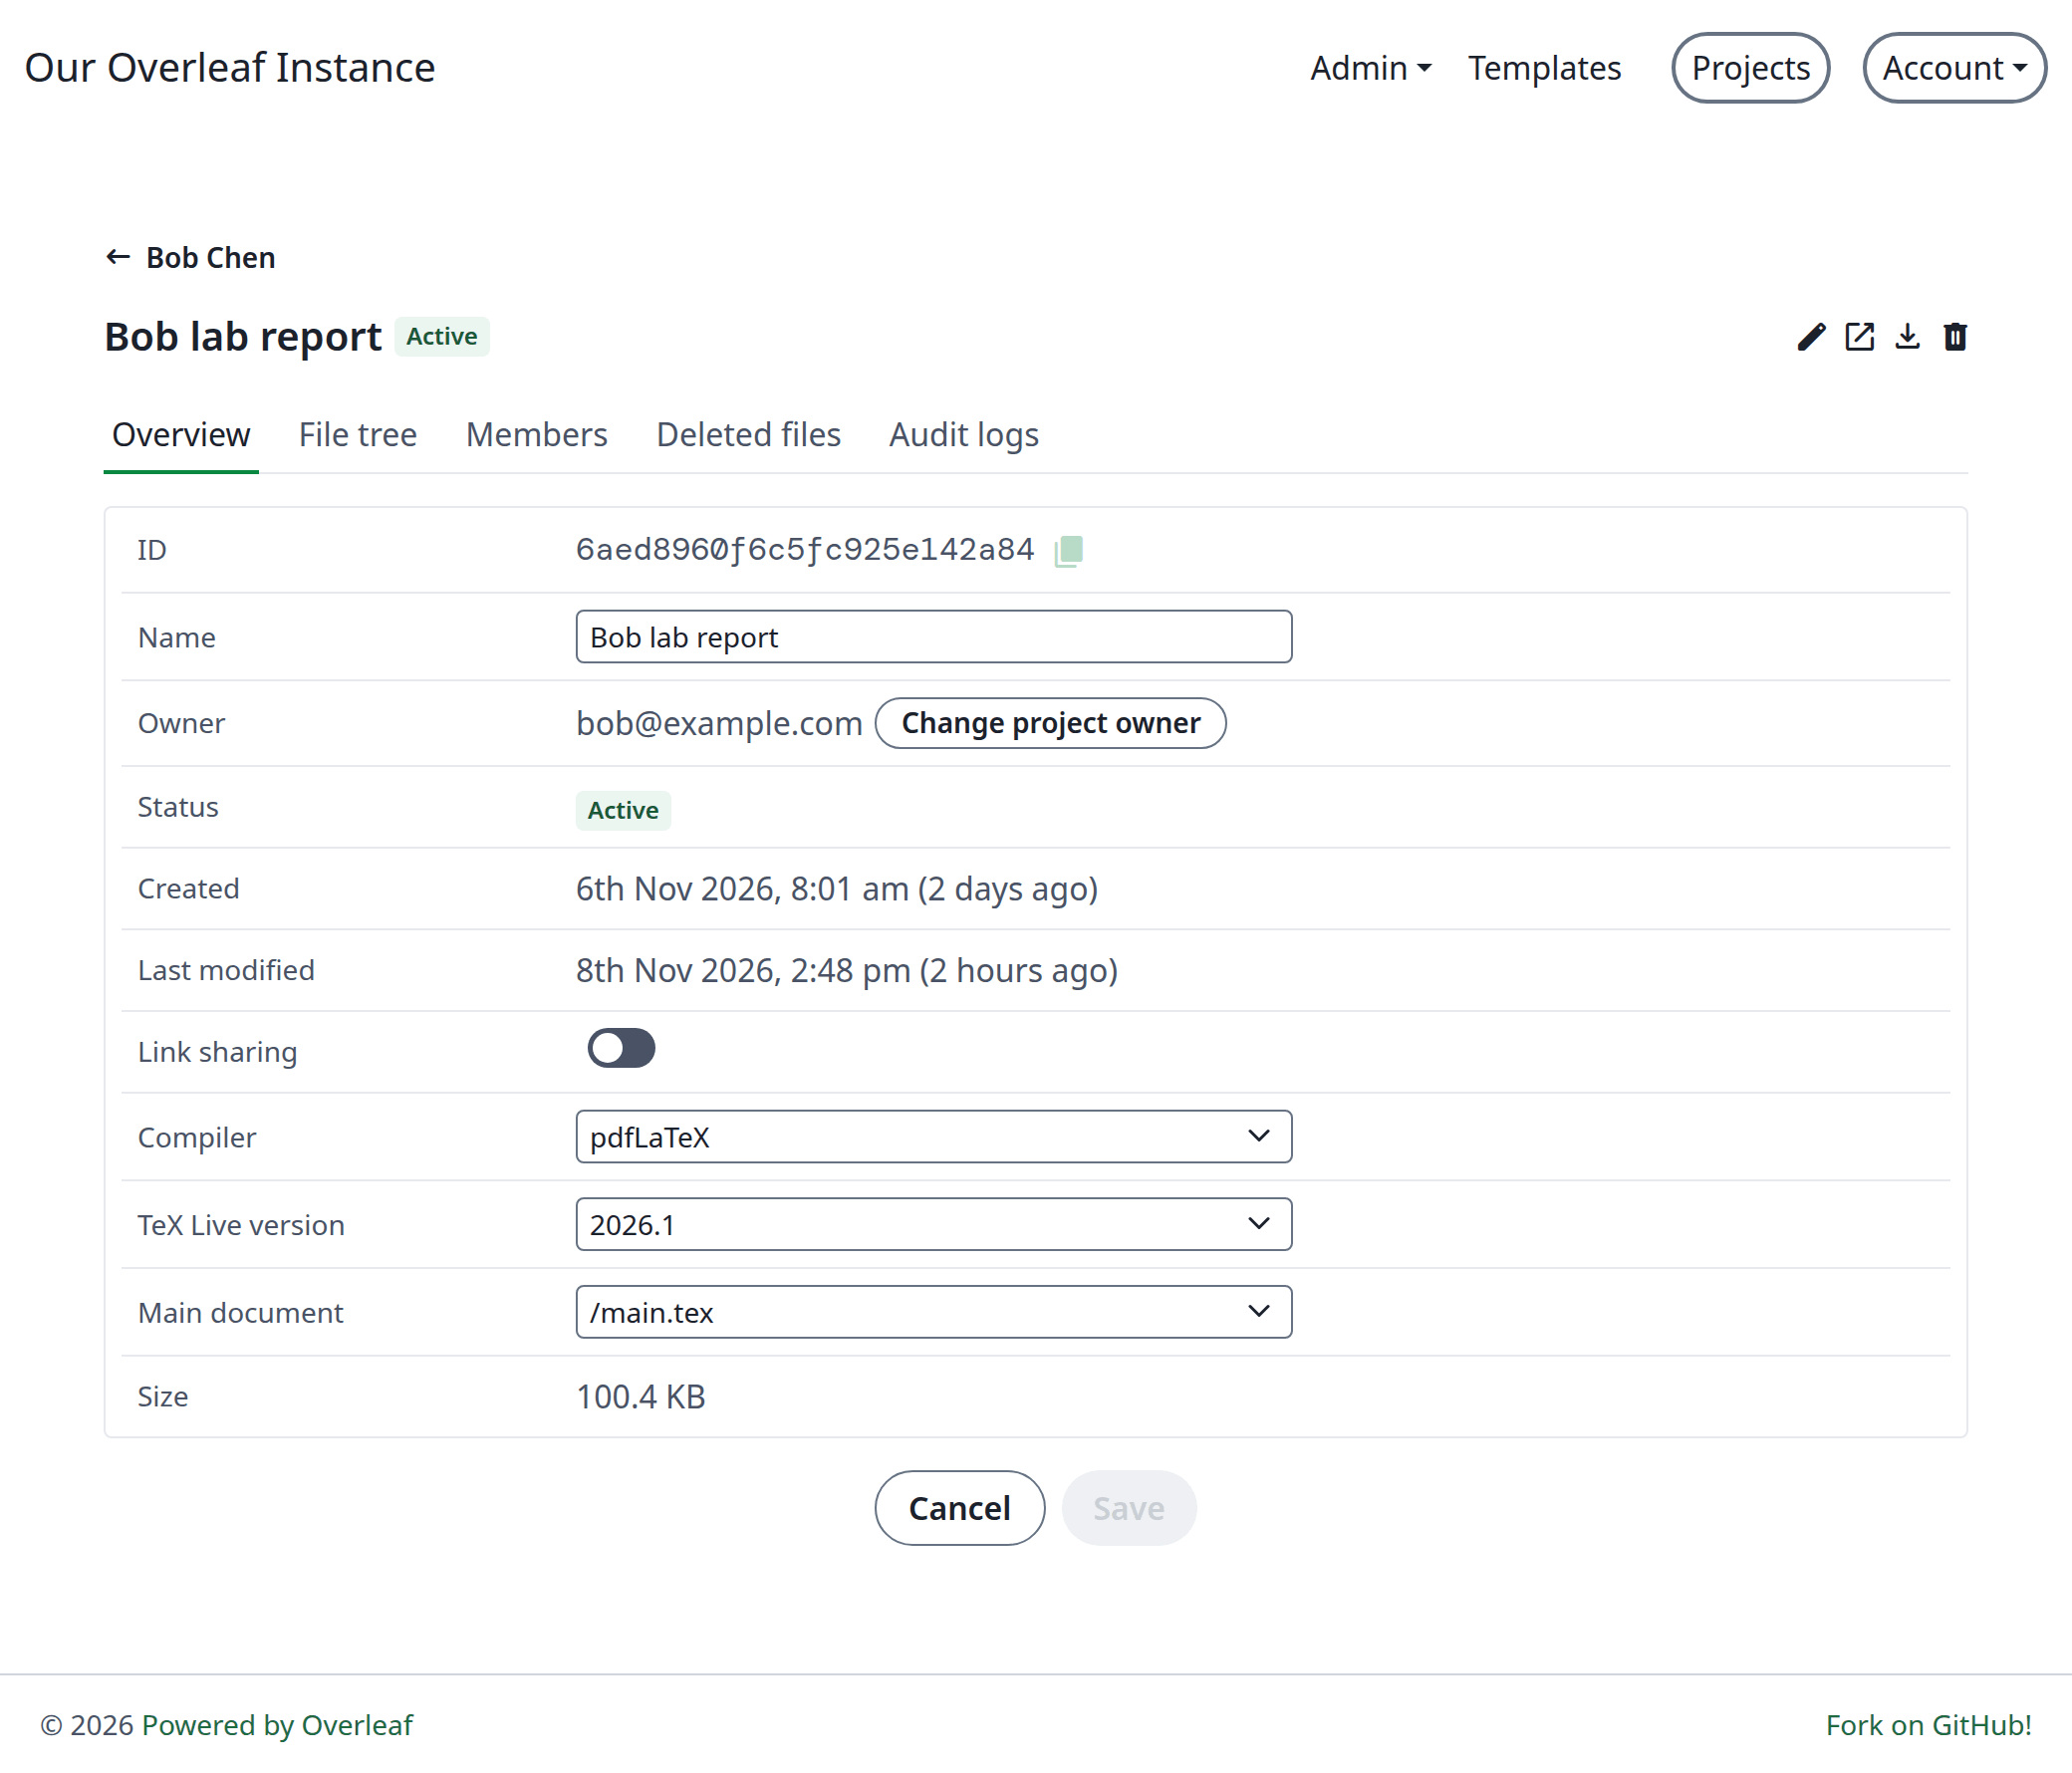
Editing a project
File tree
The project’s files and folders, read-only.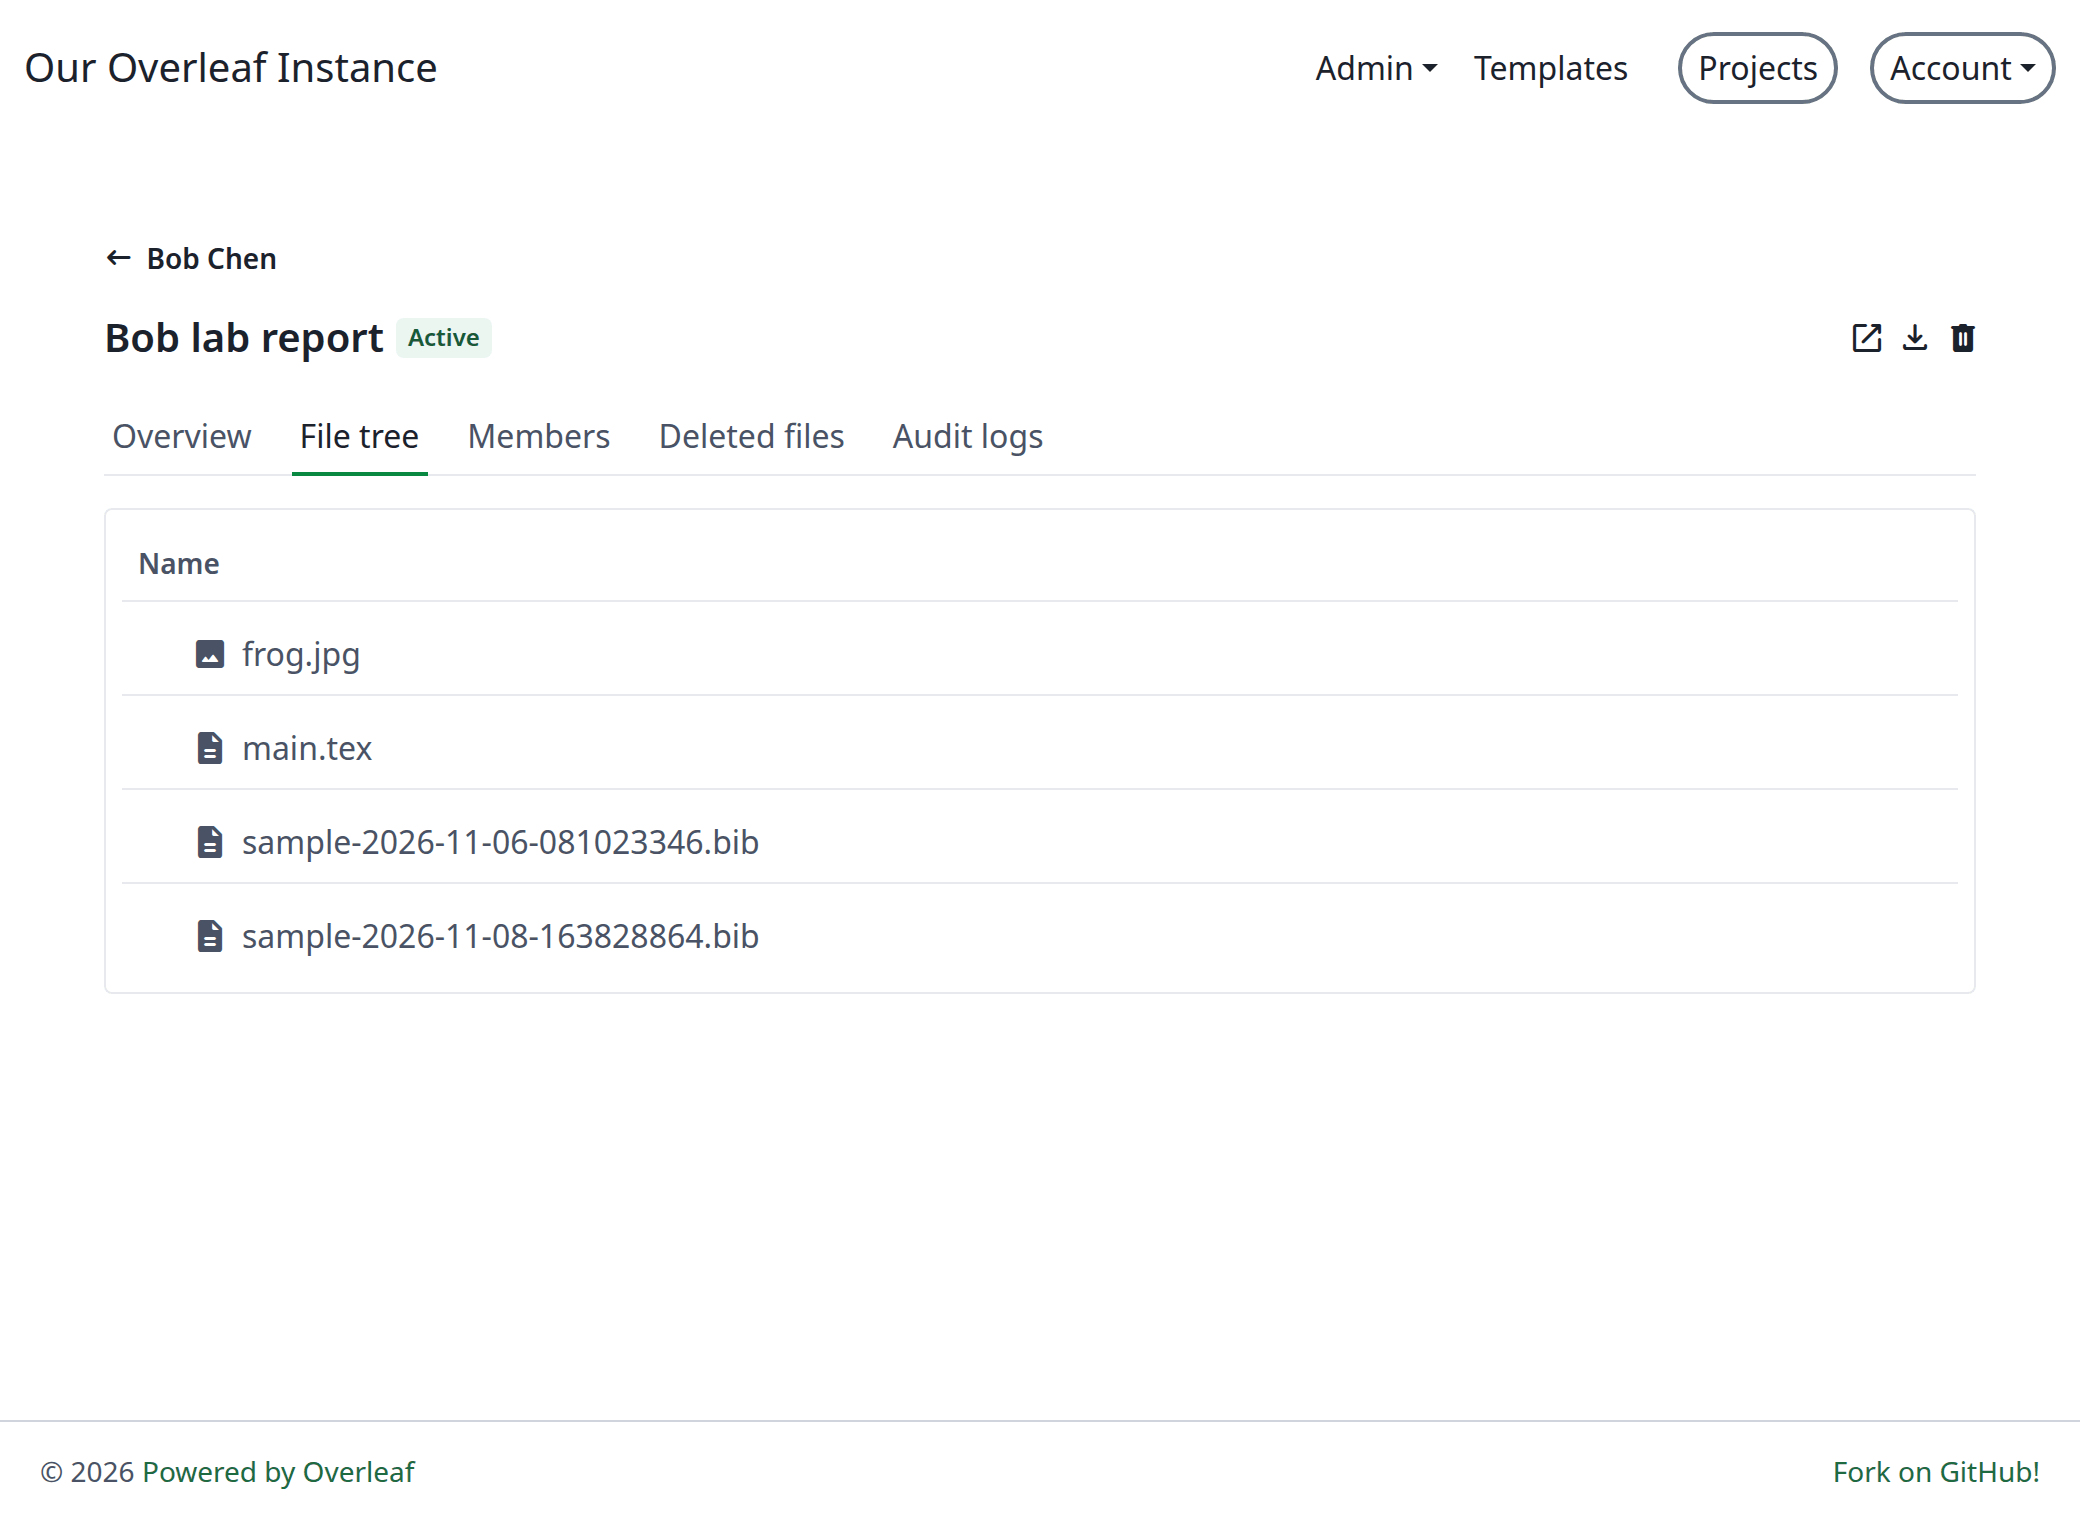
A project's files
Members
The owner, the collaborators and the pending invitations. Change a collaborator’s role, remove their access, or resend or revoke an invitation.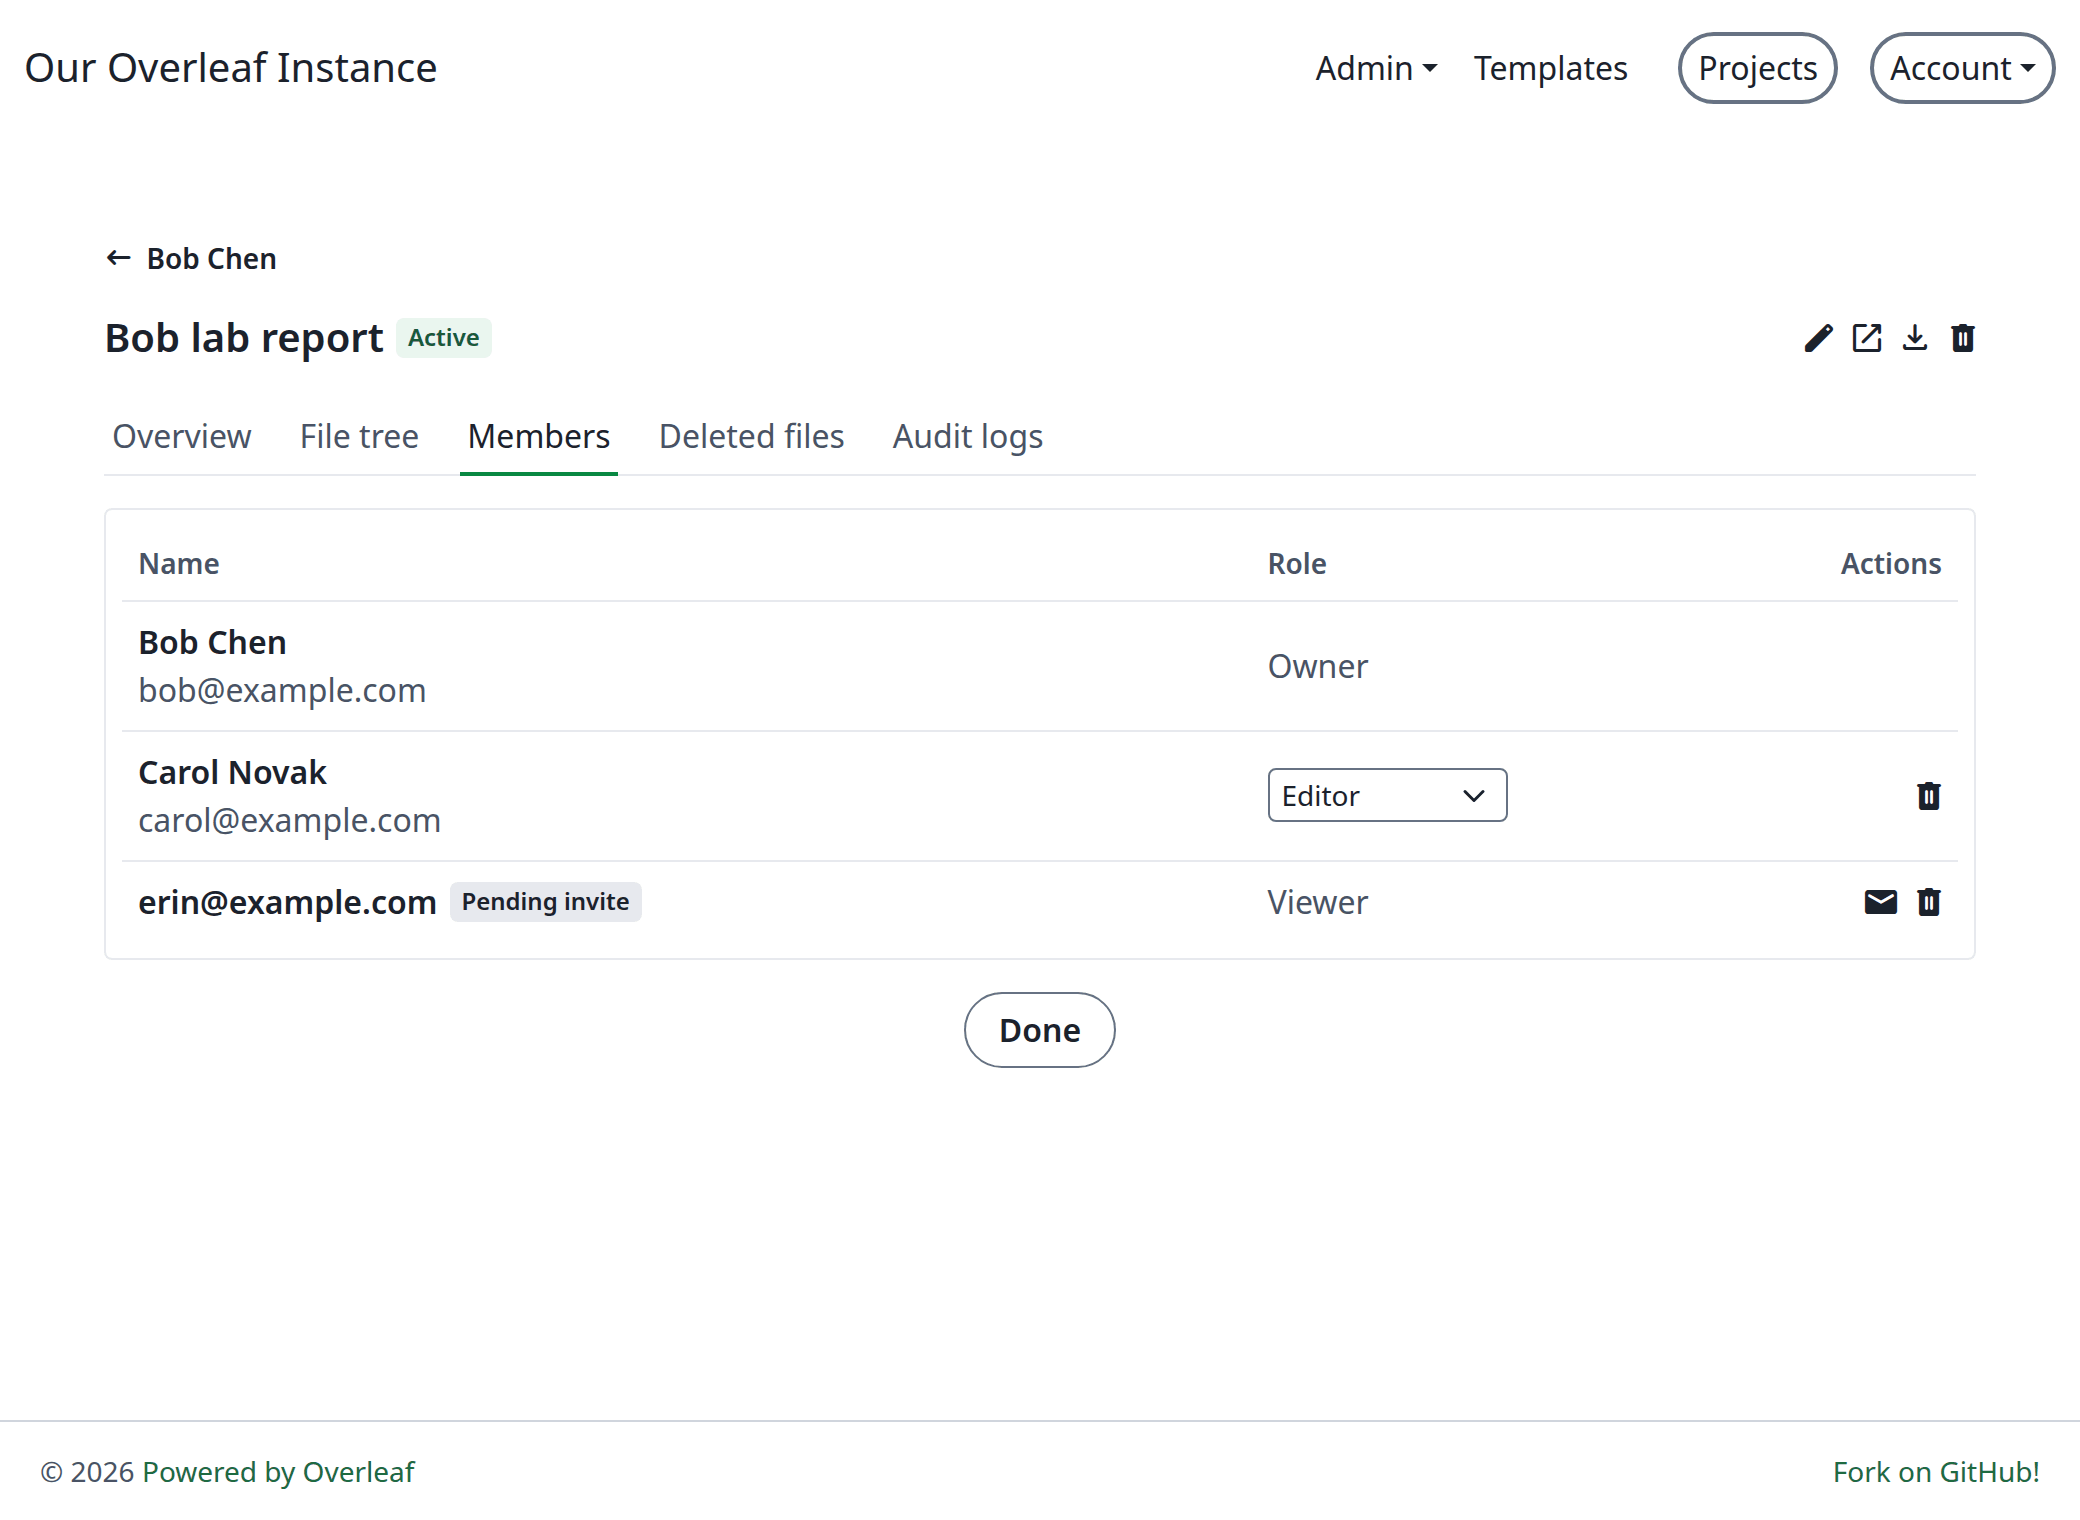
Changing a project's members
Deleted files
Files removed from the project. Restore file puts a copy into the project’s root folder, and the row shows the name of the copy.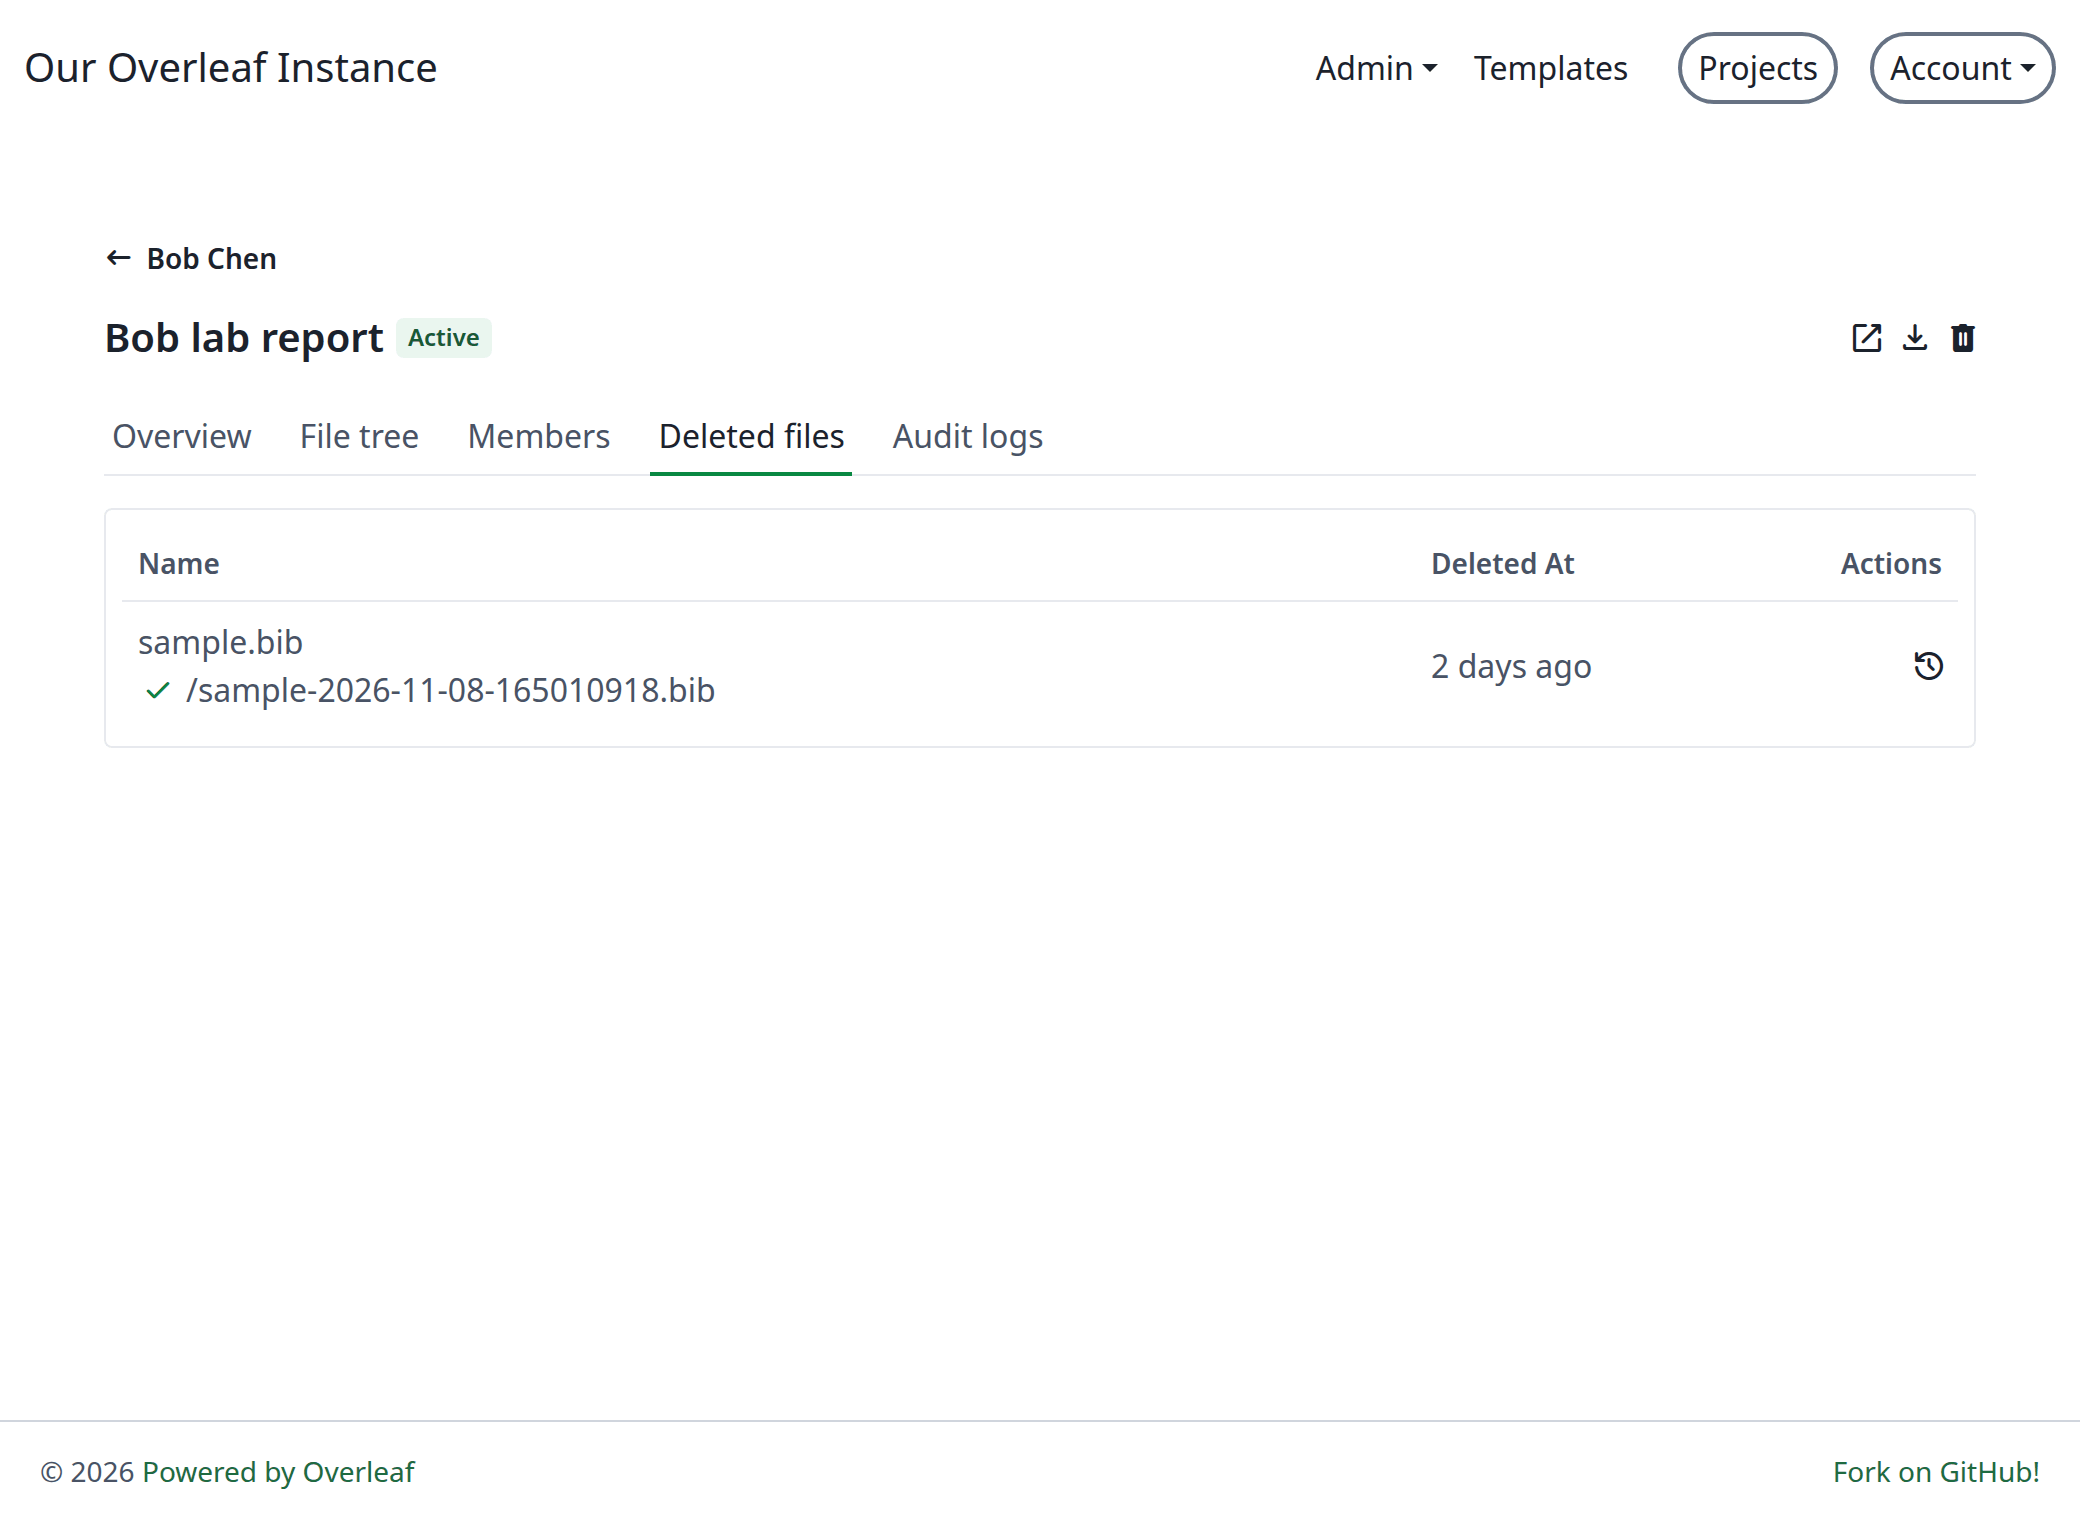
A restored file
Template management
A template starts as an ordinary project. You publish it from the editor, and manage it from its page in the gallery or from the admin panel.All templates in one table
Click Admin, then Project/Object Lookup, then the Templates tab. It lists every published template with its author, its owner and when it last changed, and you can search it. Click a title to open the template, click an owner to open that user’s page, or click the bin to delete a template. A deletion goes on your own audit log.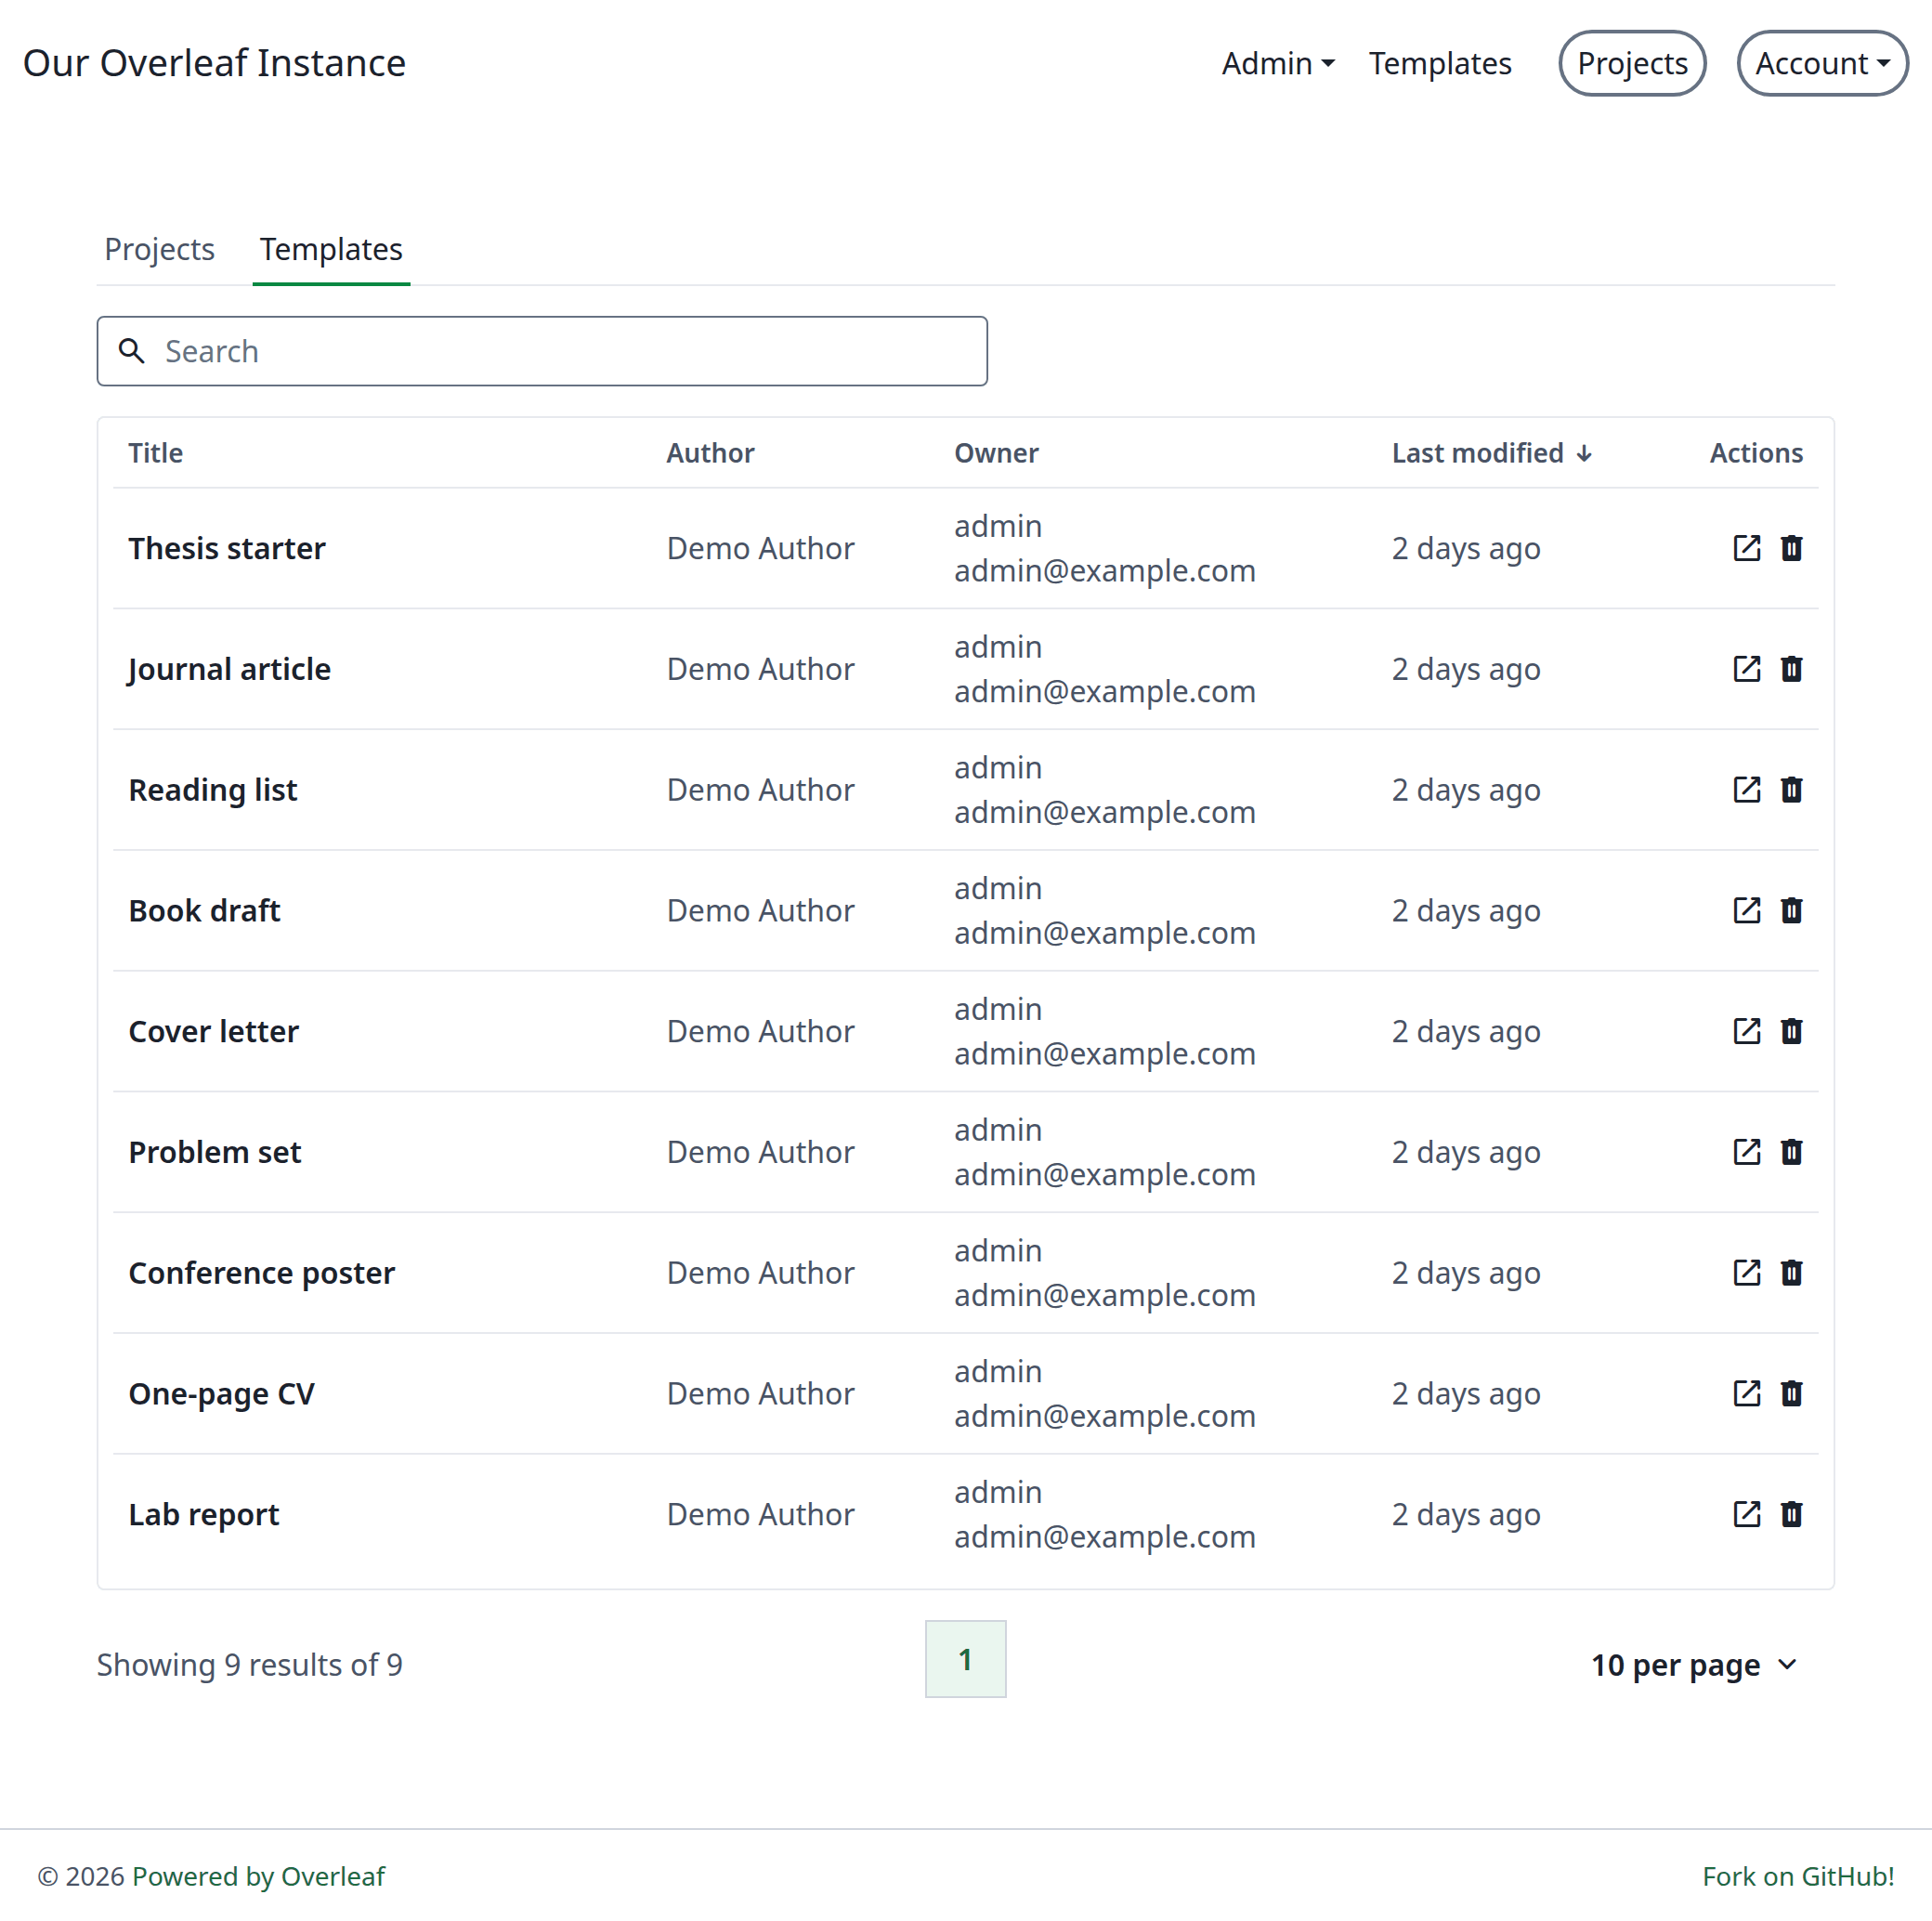
All templates in the admin panel
Publish from the editor
Open a project and compile it until the PDF looks right, because the gallery shows the PDF of the last successful compile. Then click File, then Manage Template, and fill in the title, the author, a category, a description in Markdown and a license. The project’s compiler and main document go with the template, so projects opened from it use the same ones.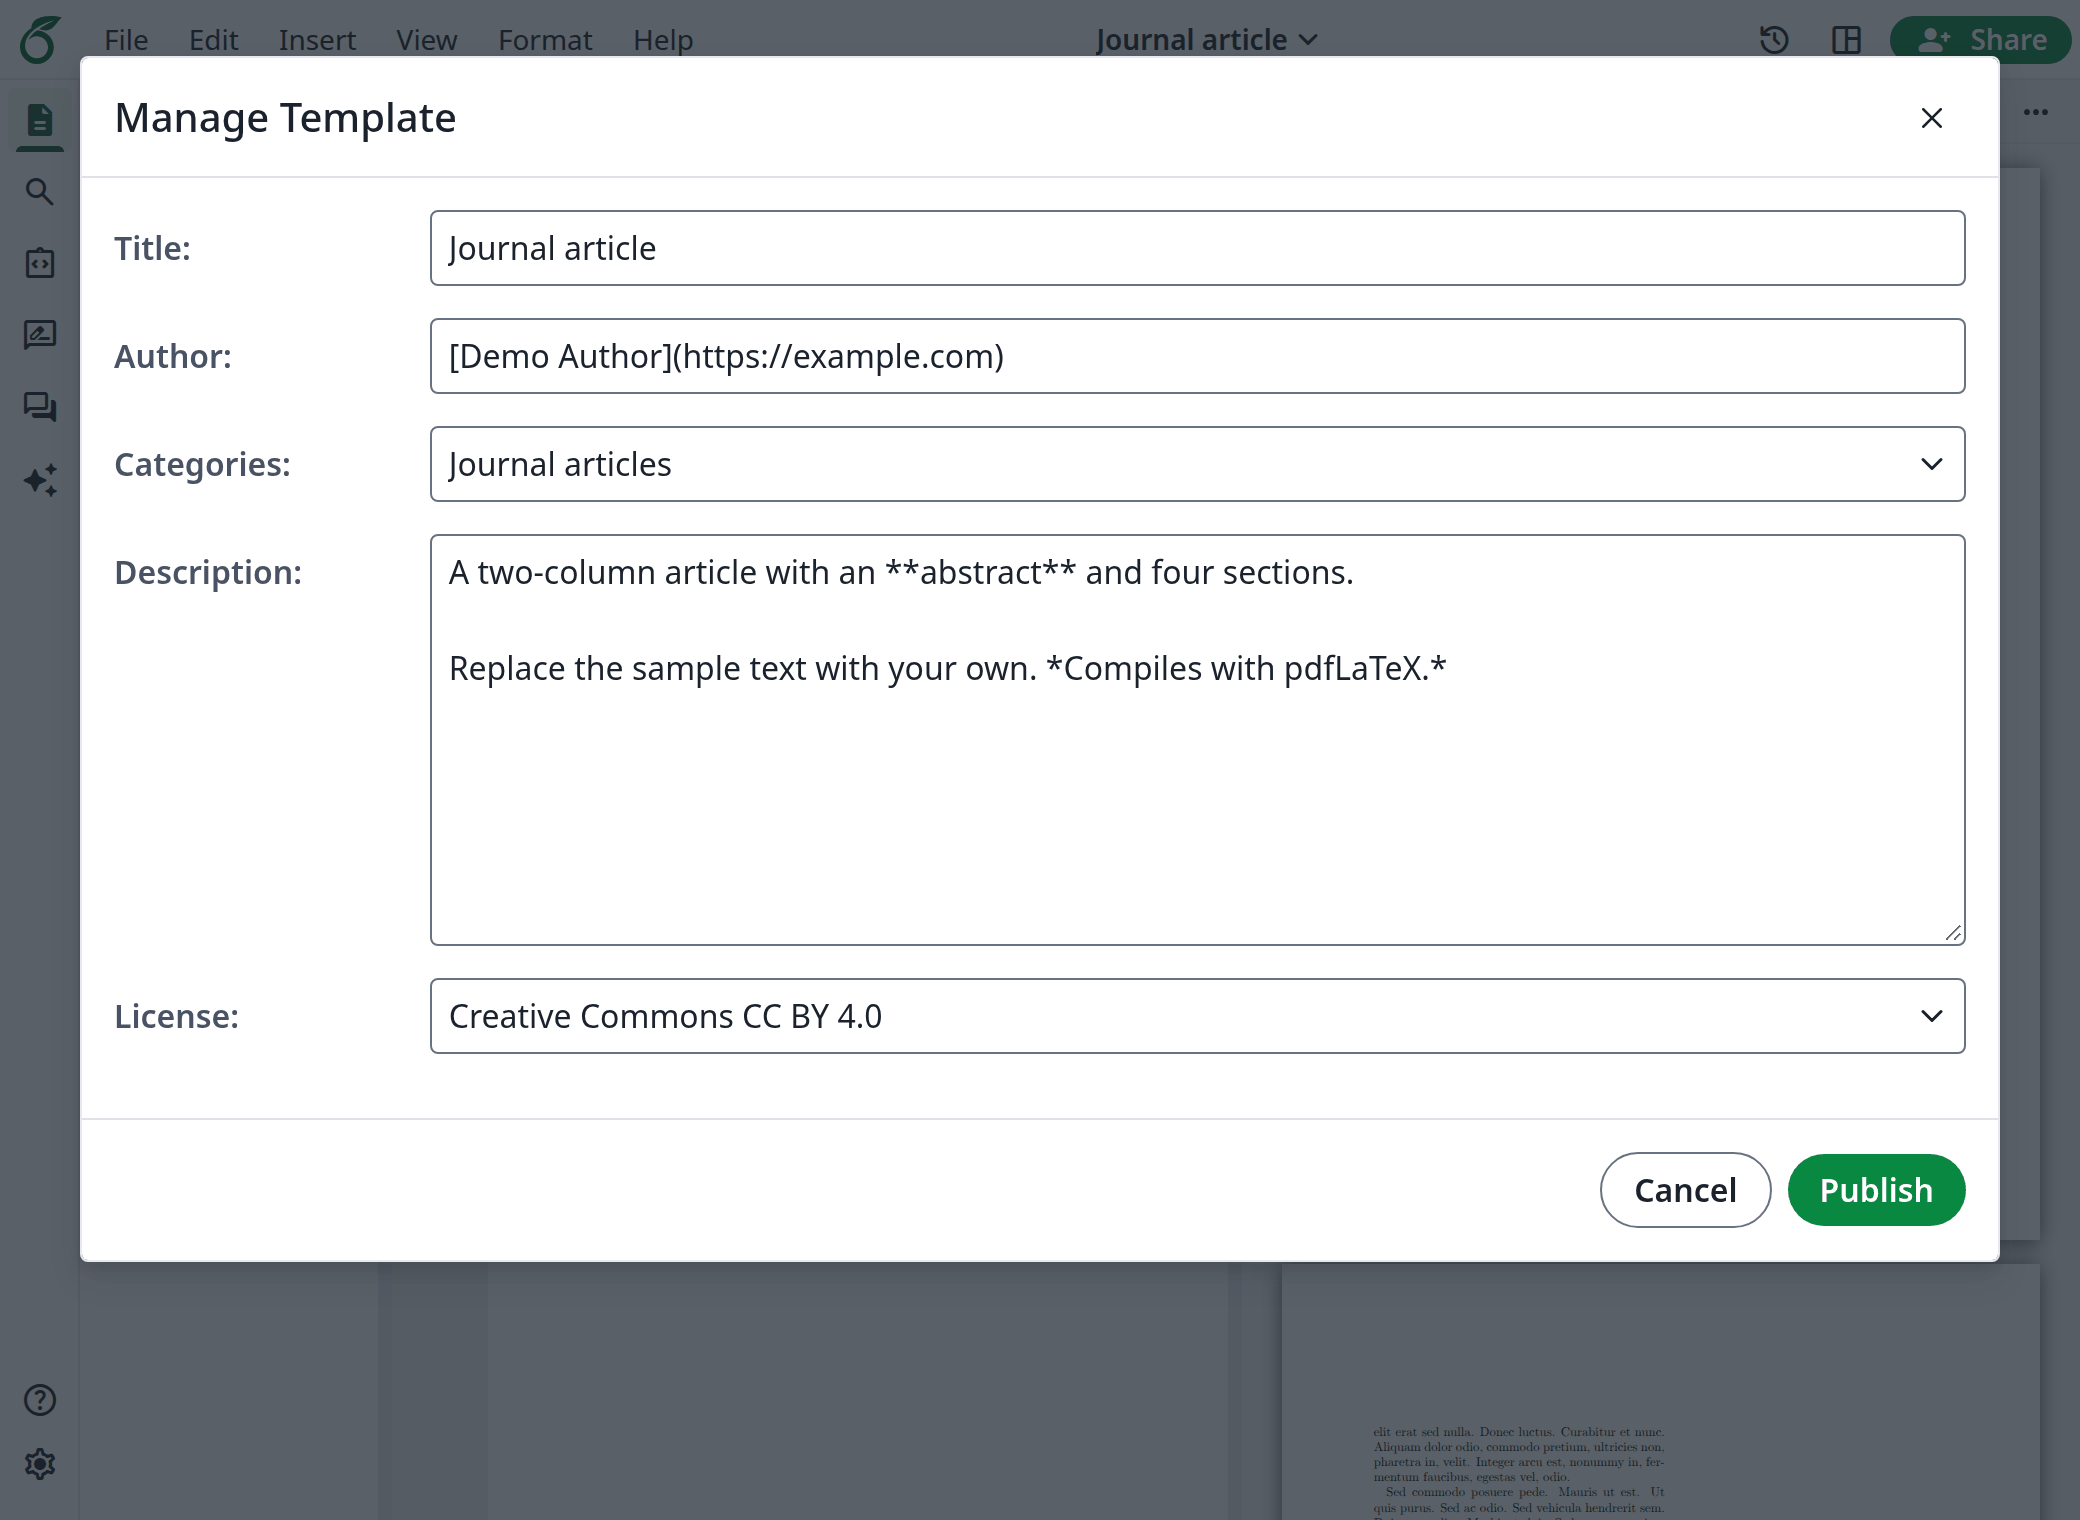
Publishing a project as a template
Update a template
To change a template’s files and PDF, publish the project again under the same title. The dialog tells you that the title already exists, and the button becomes Overwrite. Projects that people have already opened from the template do not change.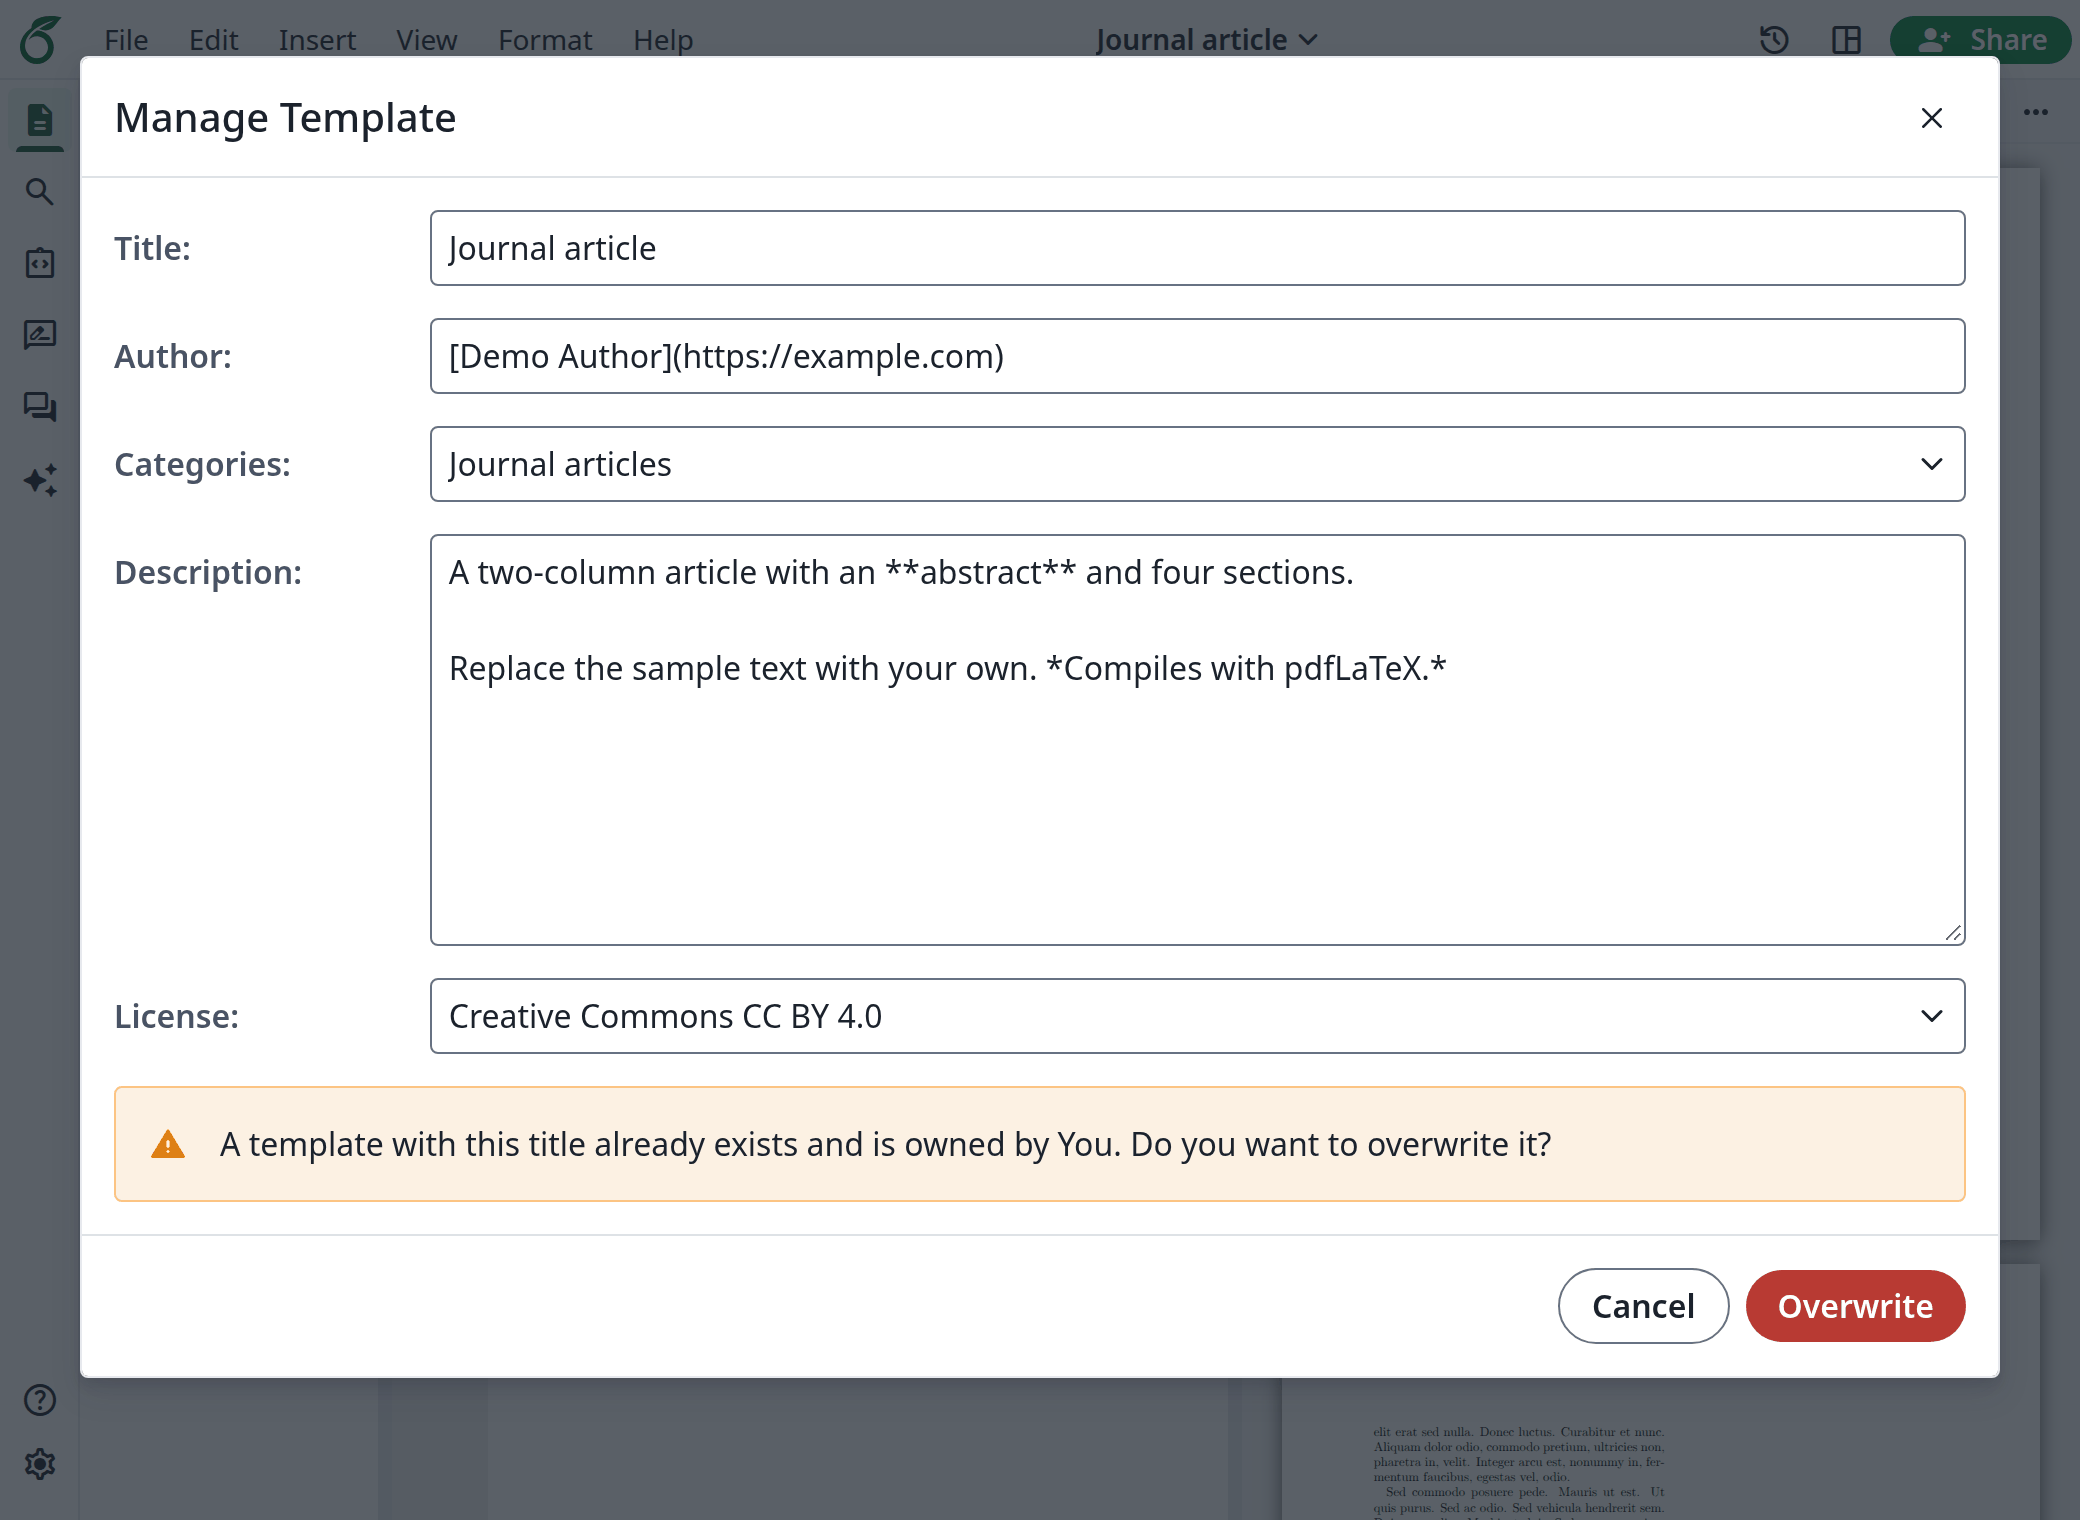
Publishing under the same title
The template page
Everyone can use Open as Template, View PDF and the download button. Administrators also get Admin: Source Project, Edit and Delete.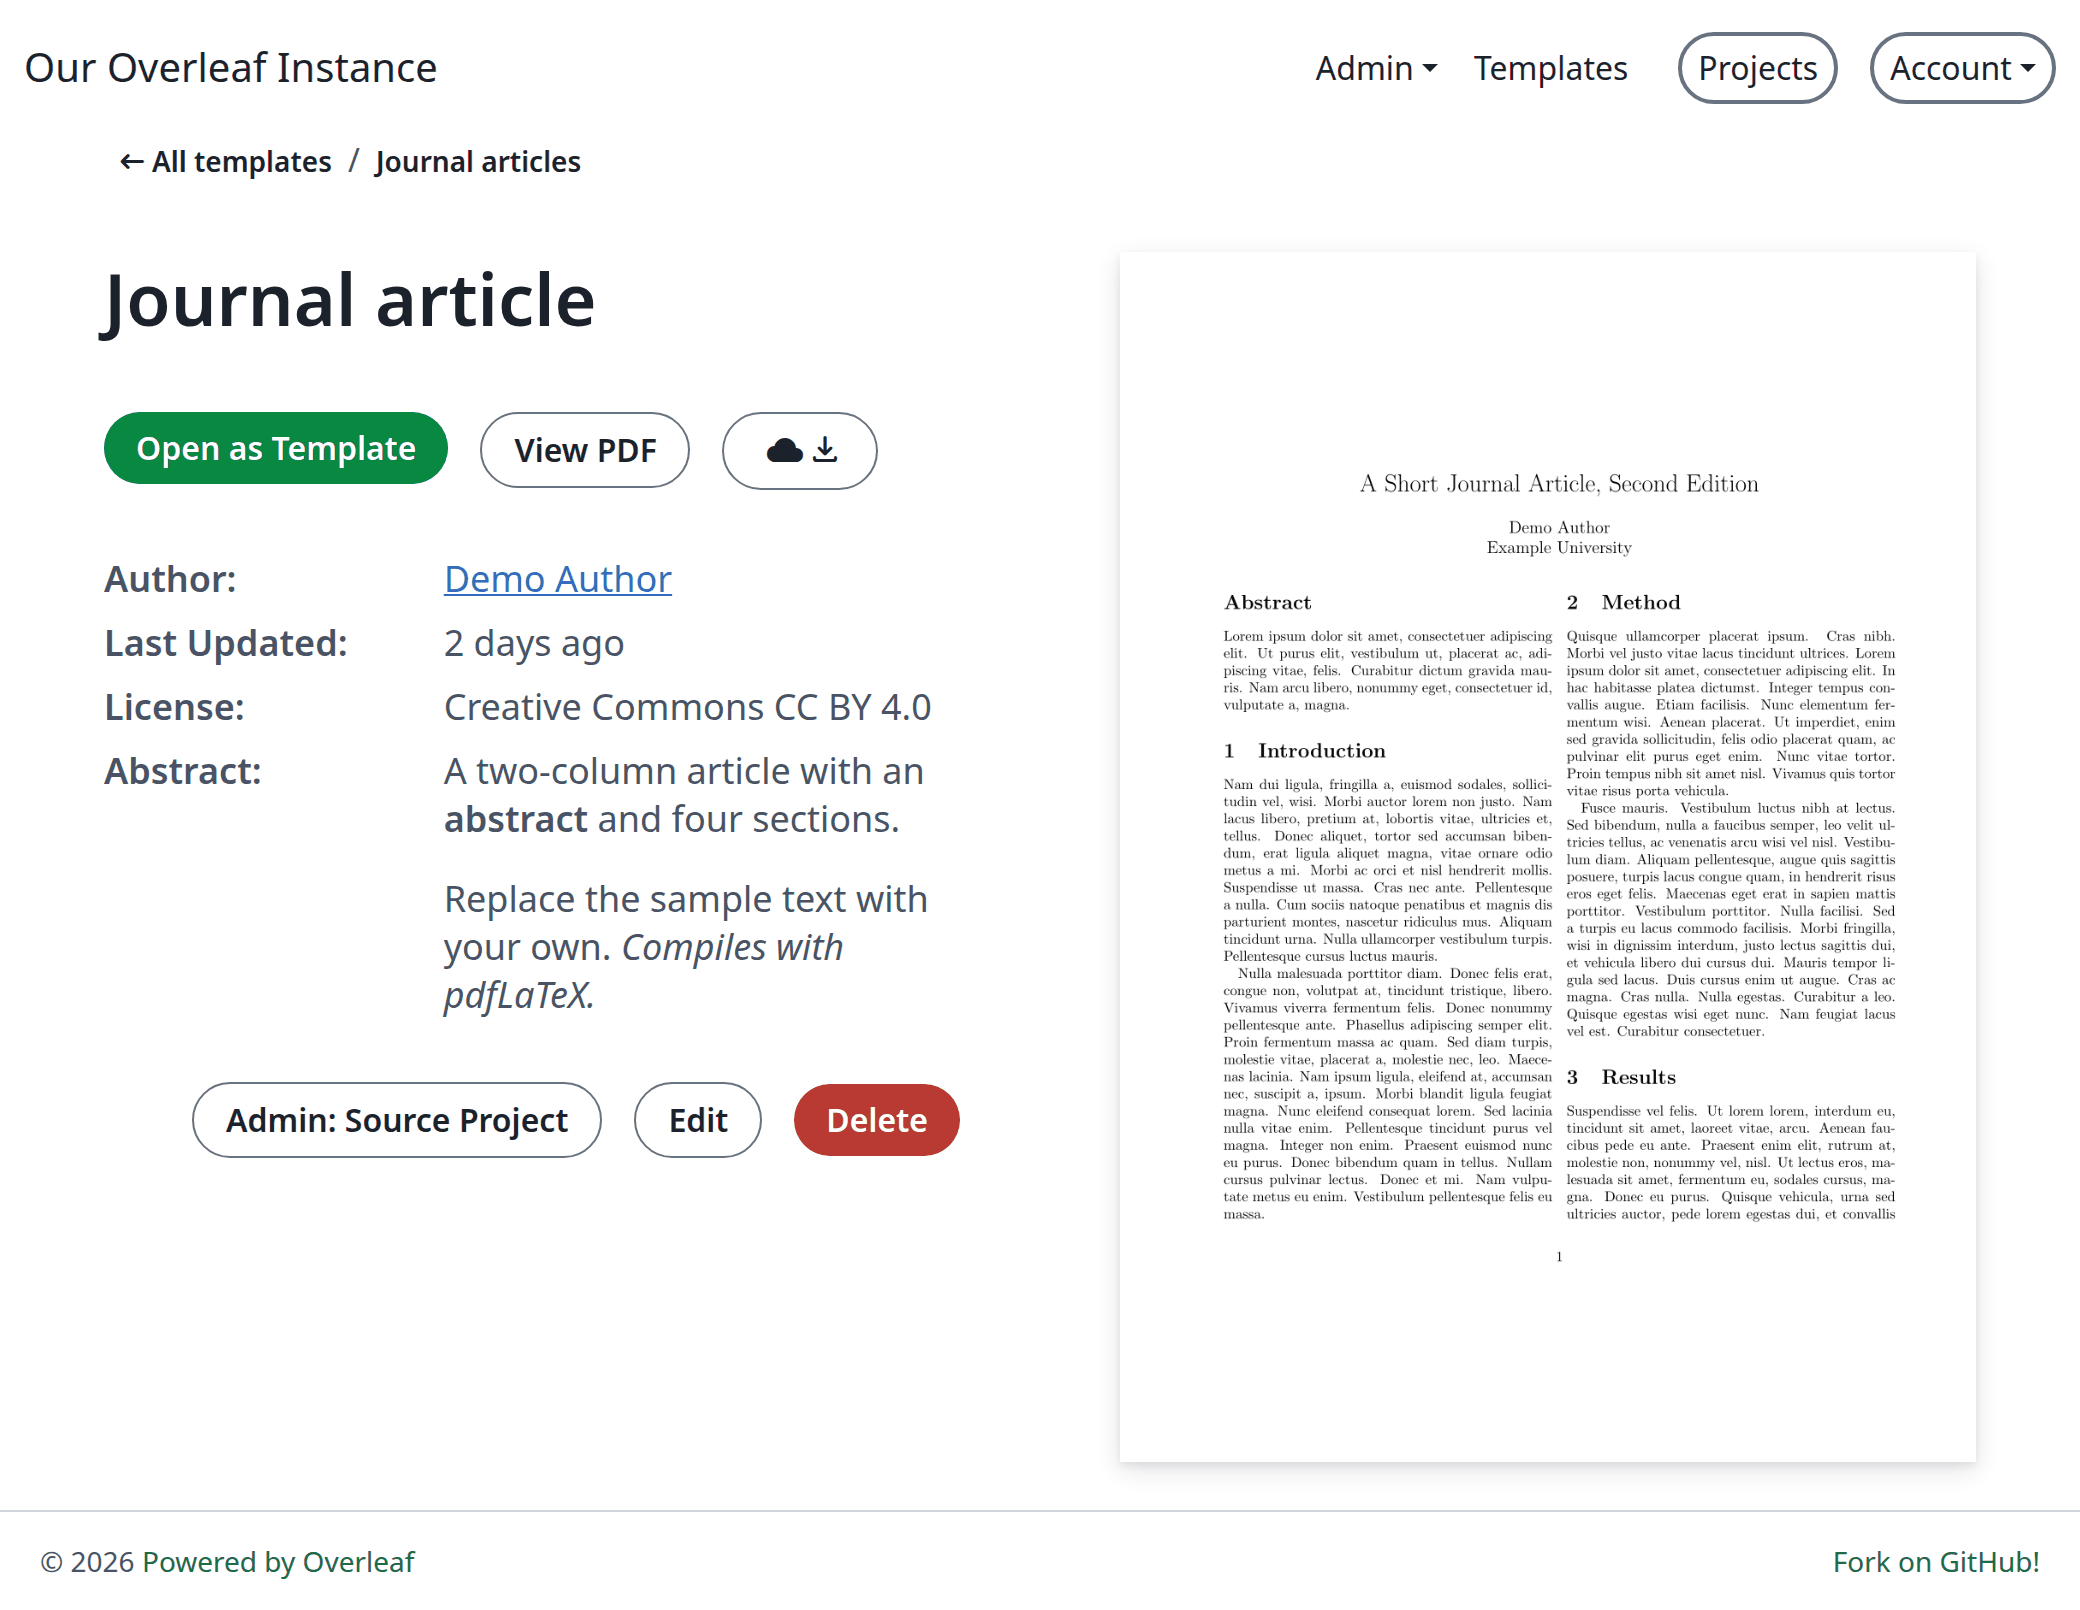
A template's page
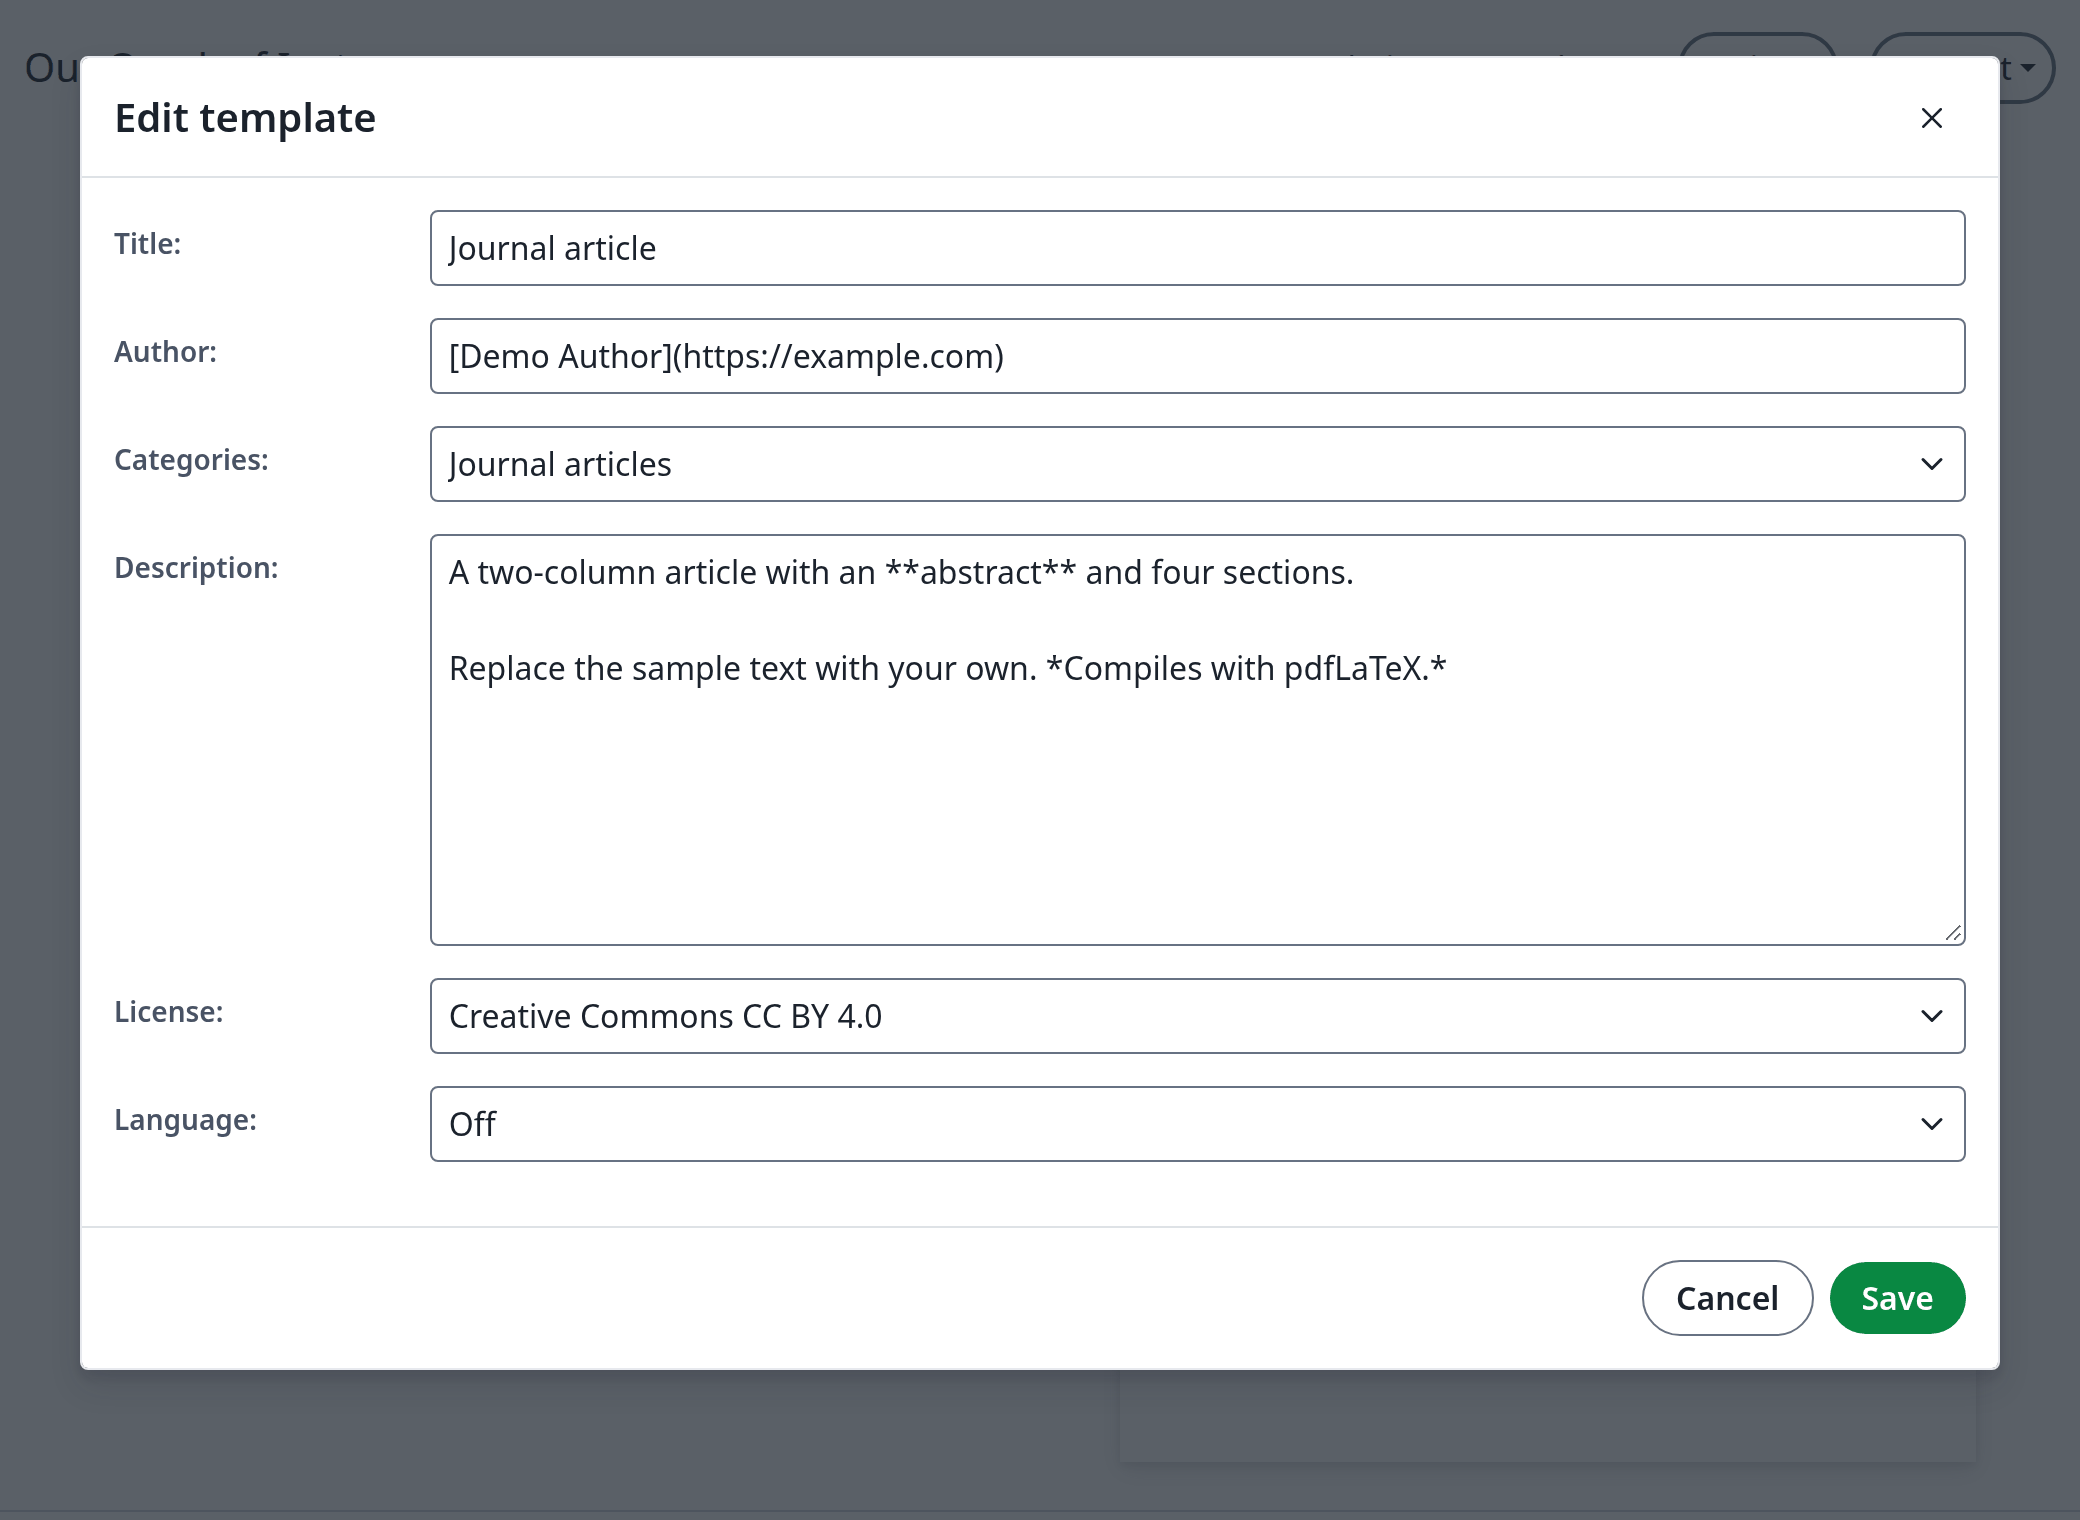
Editing a template's details
A gallery for your users
The gallery opens with a card for each category, and every category has its own page. The categories come from your Templates configuration, where you can also let a user who is not an administrator publish.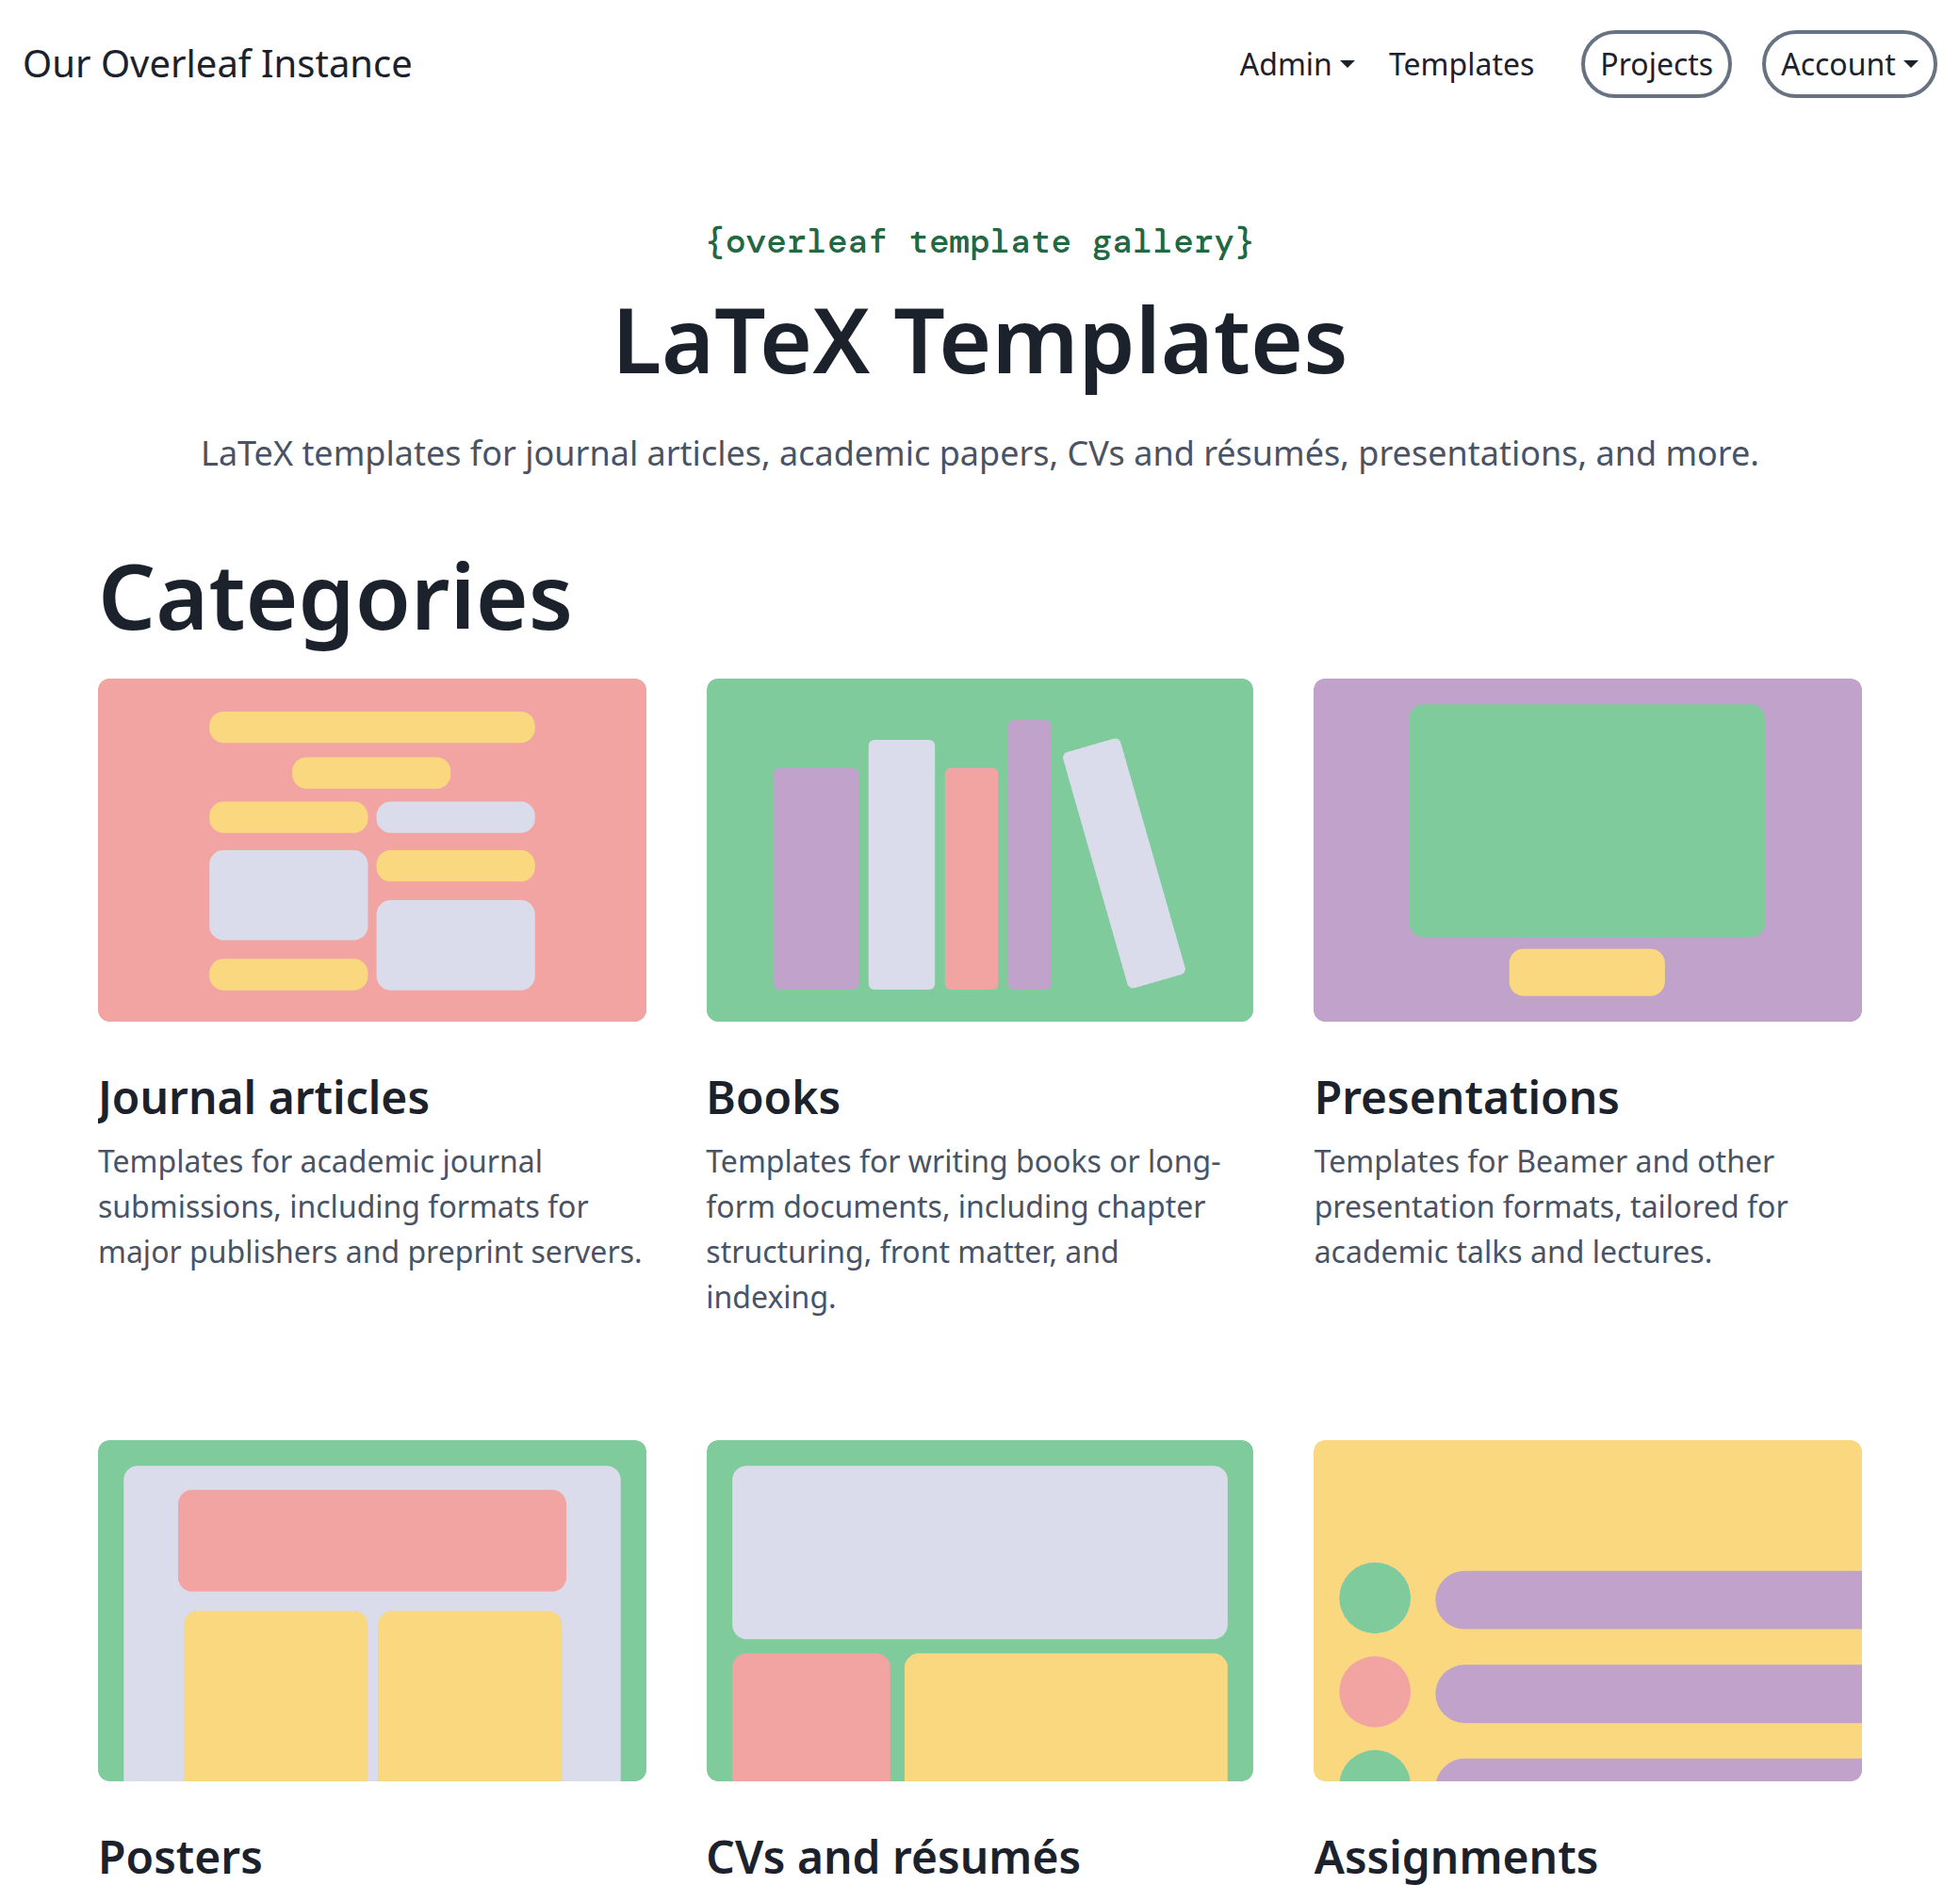
The template gallery
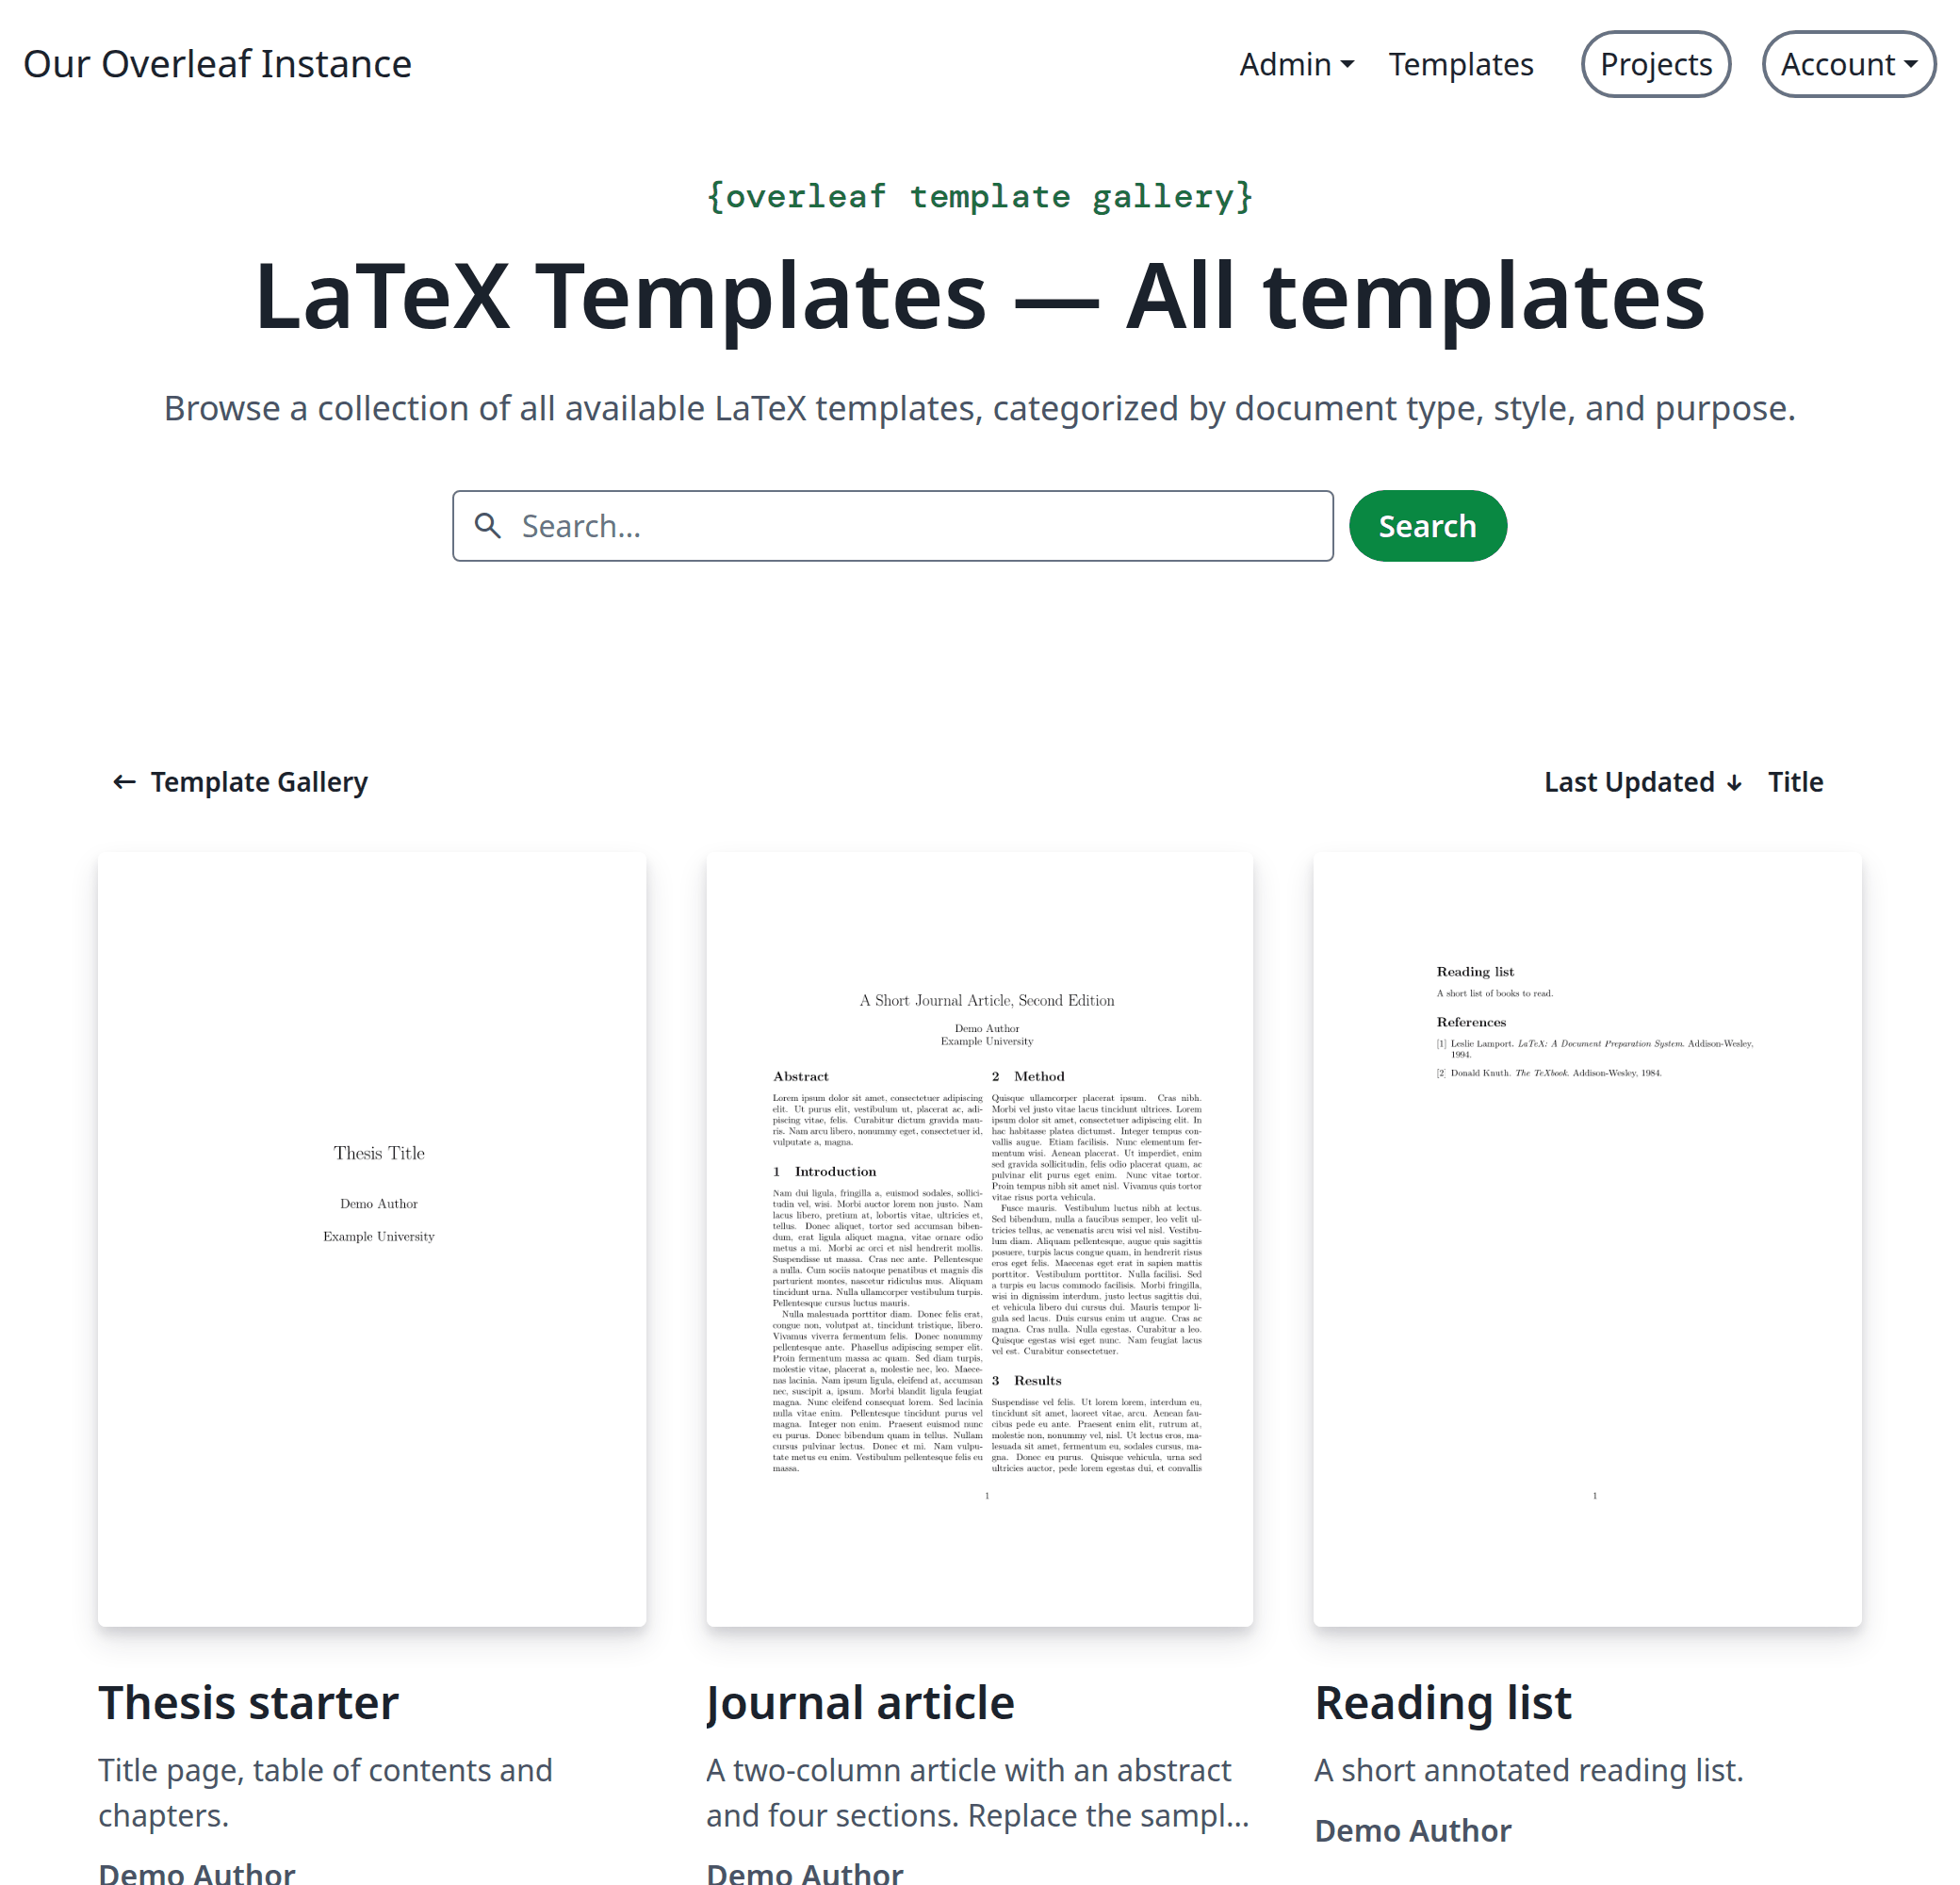
All templates
Audit logs: who did what, and when
This is the part we are most pleased with. Every account and every project now has its own audit log, and site administrators can read it right in the panel. Open the Audit logs tab on a user’s page. The newest entries come first.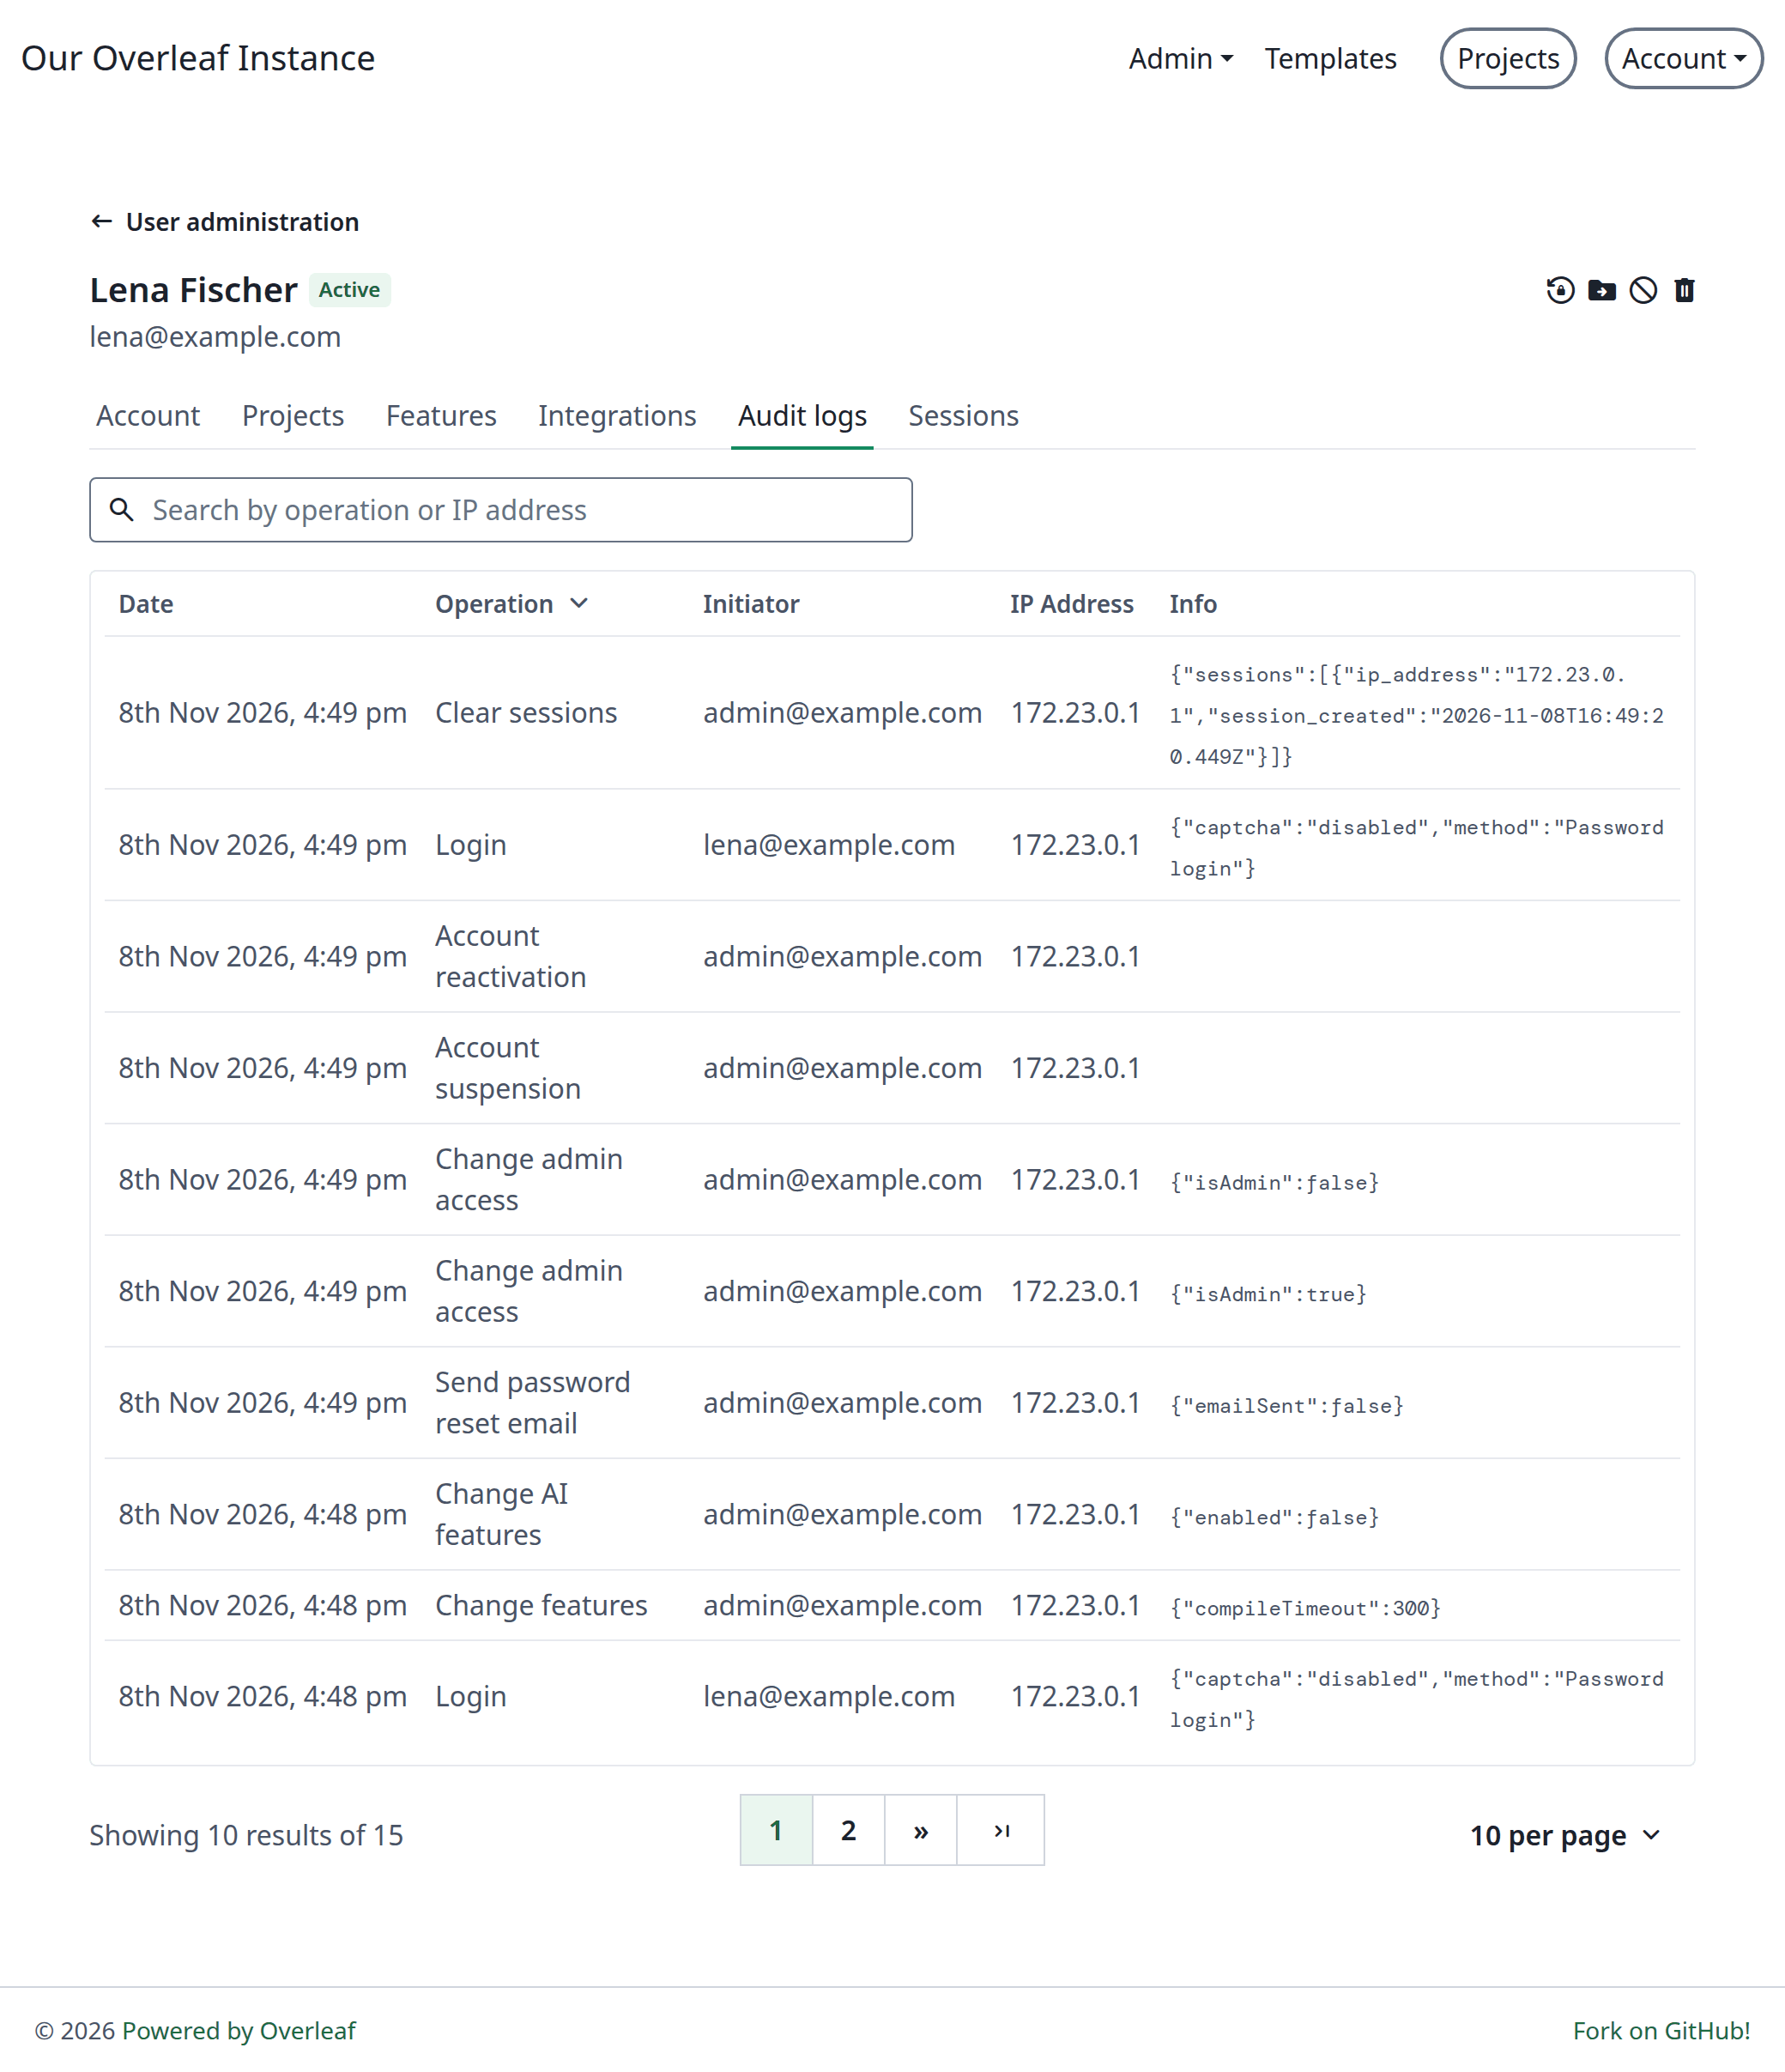
An account's audit log
Find the entry you need
Search by operation or by IP address. The Operation header is a filter that lists every operation in this log and how many times it happened.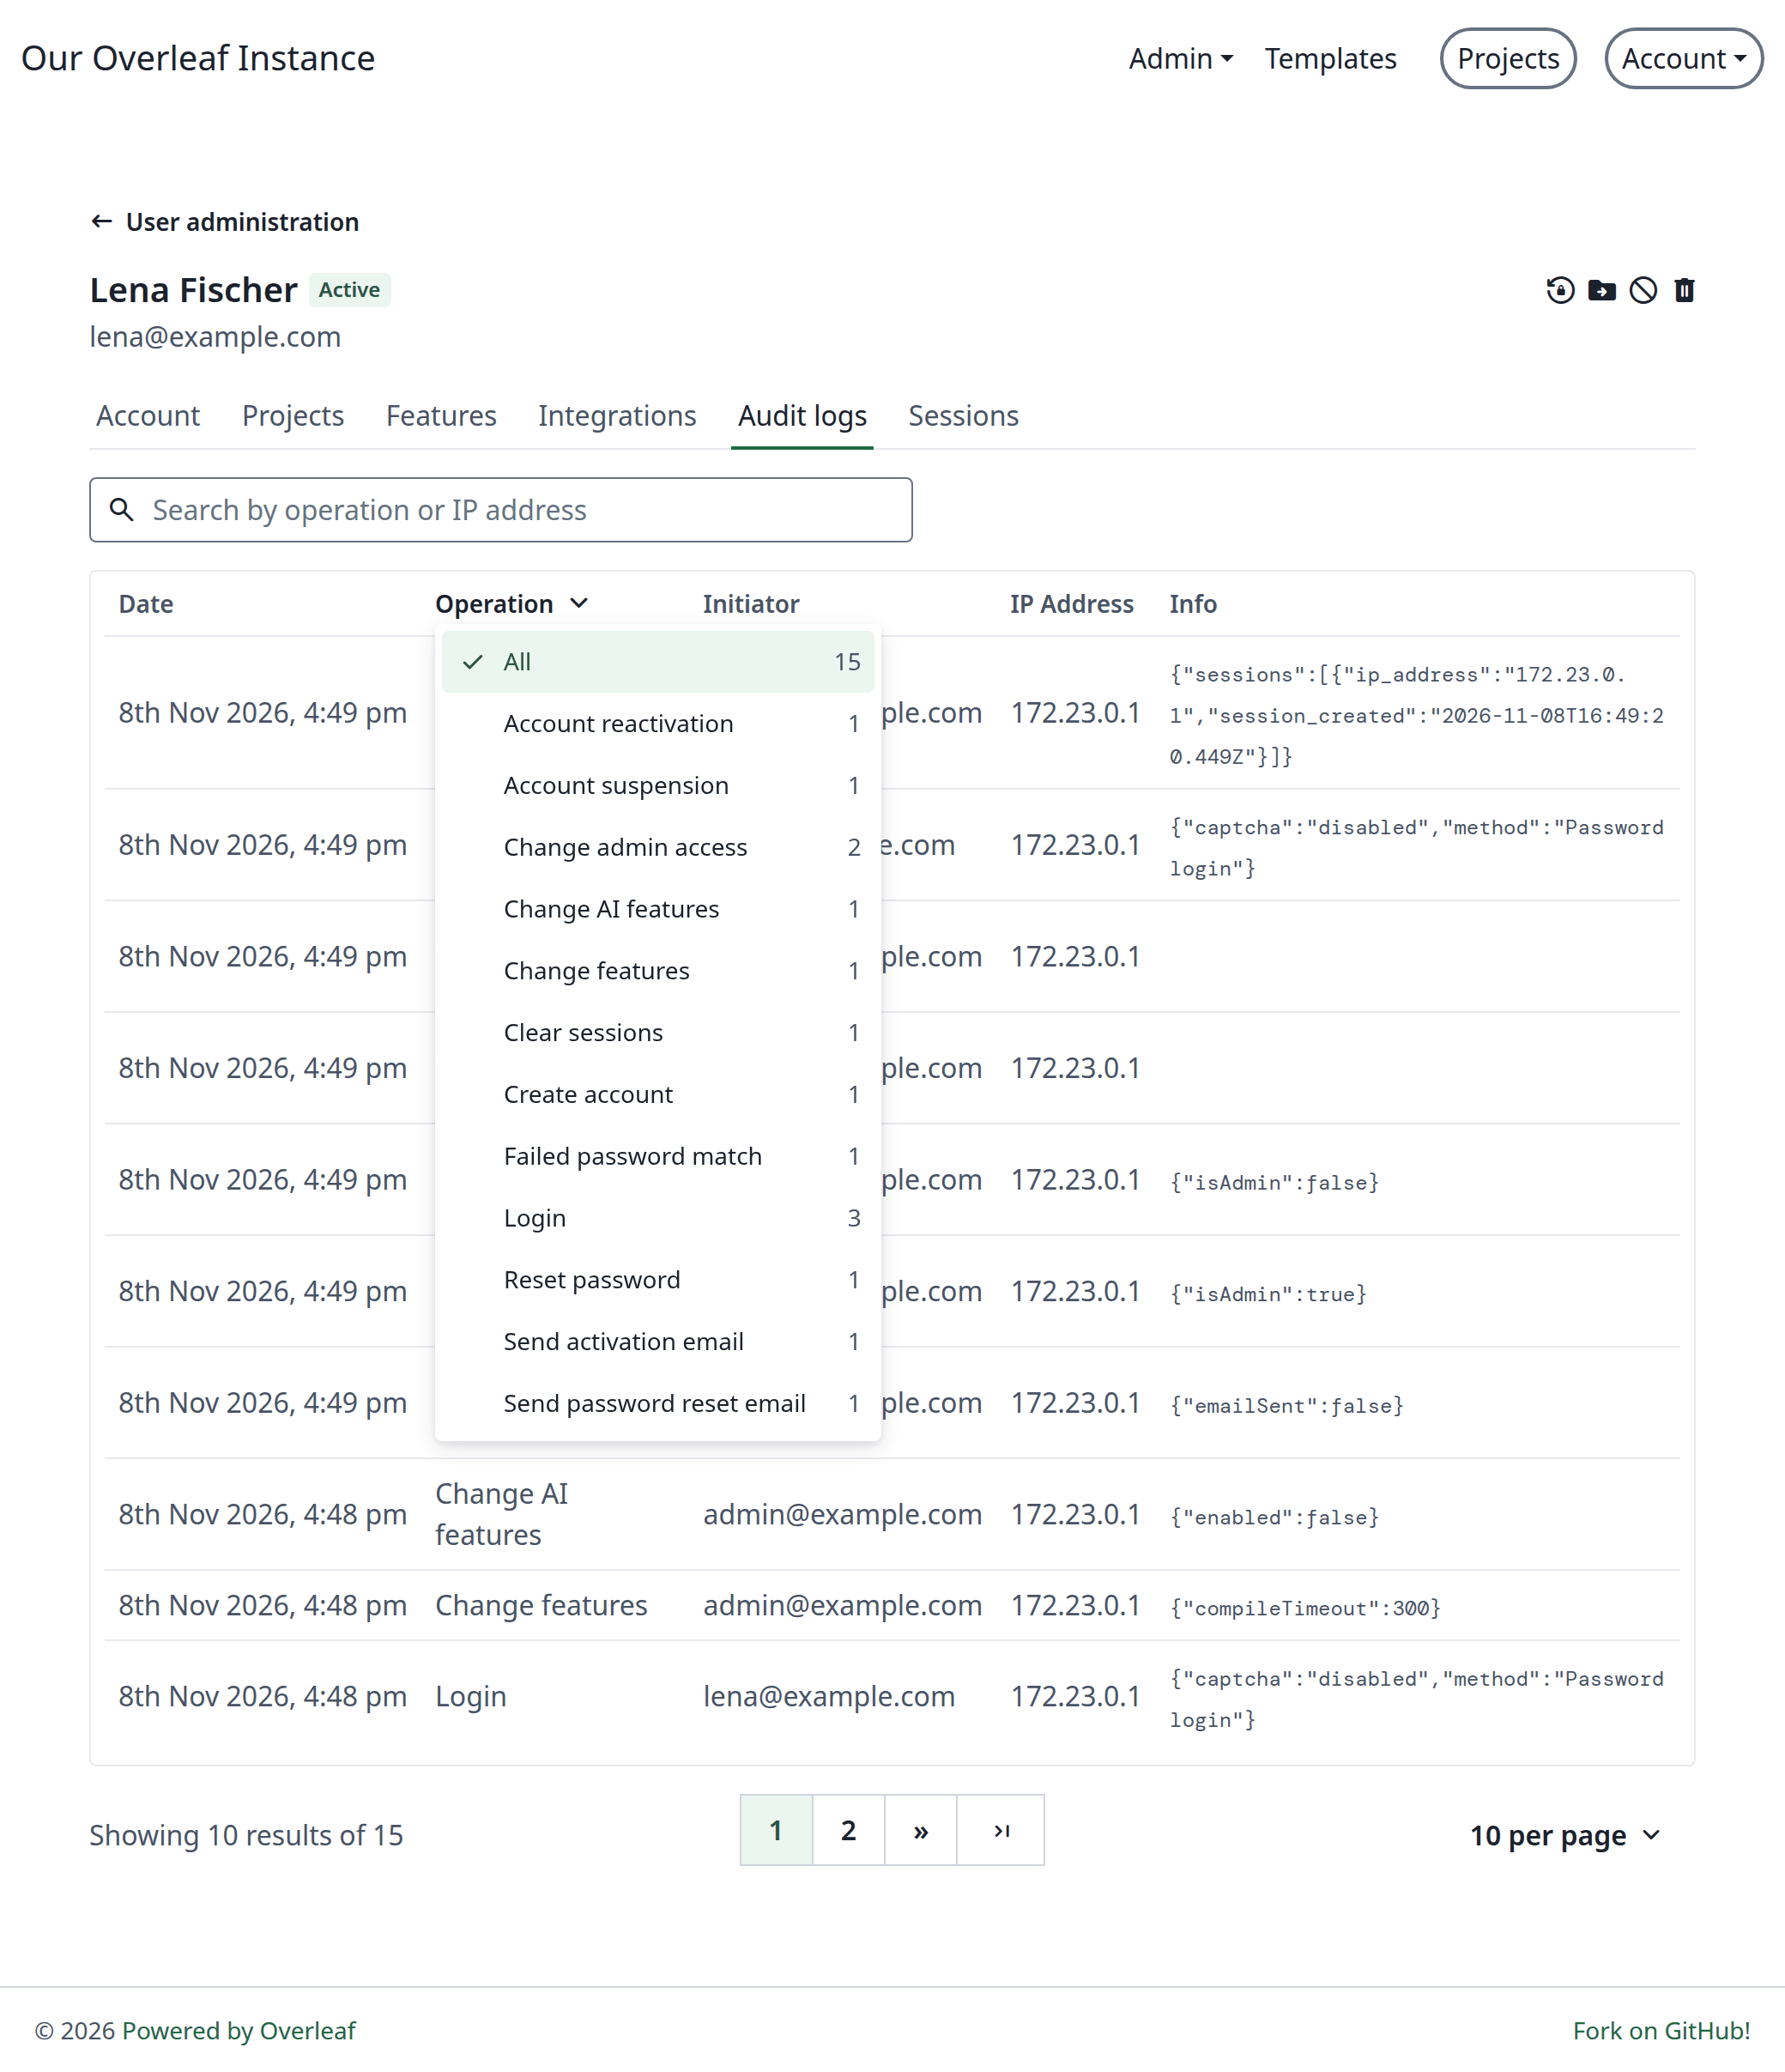
Filtering by operation
A log for every project
The project page has the same tab. It shows who was invited, who joined, whose role changed, who downloaded the project and who took it over.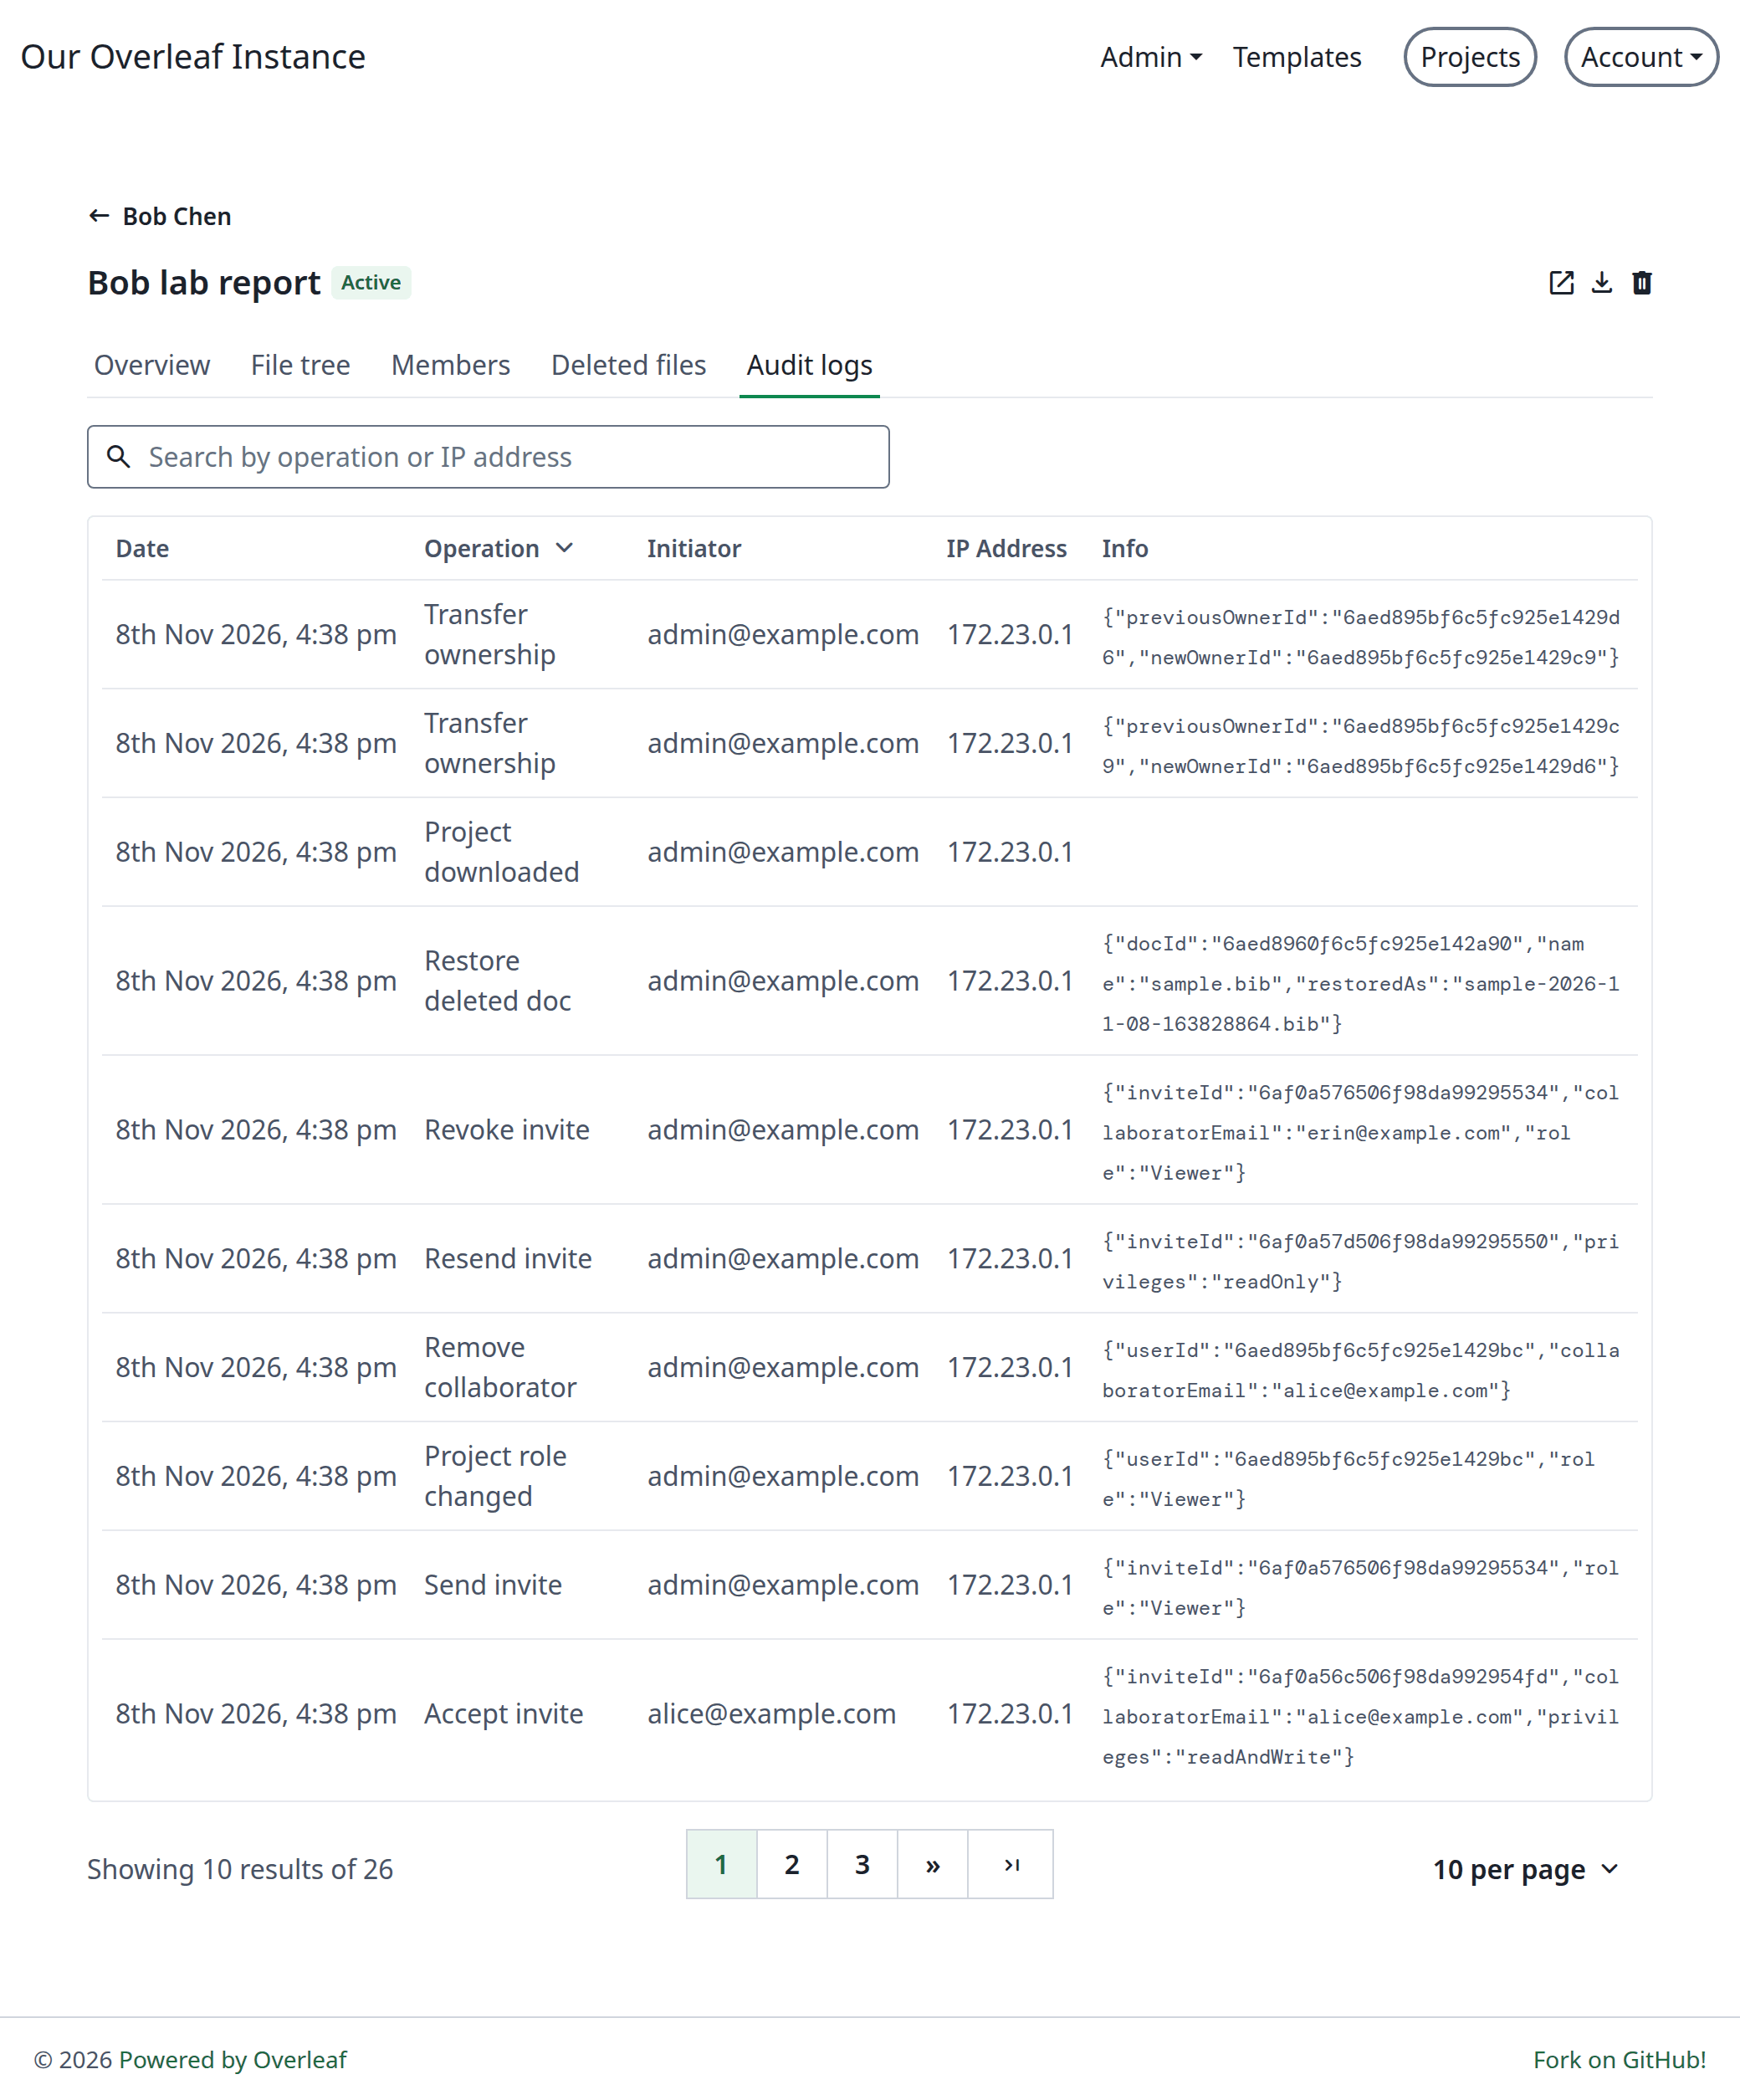
A project's audit log
What gets recorded
These are the main operations on each log, under the names you see in the panel.When there is no log left
Delete permanently removes an account or a project together with its log, and a template never had one. So these actions are written to the log of the administrator who did them, along with the email or ID of what was removed.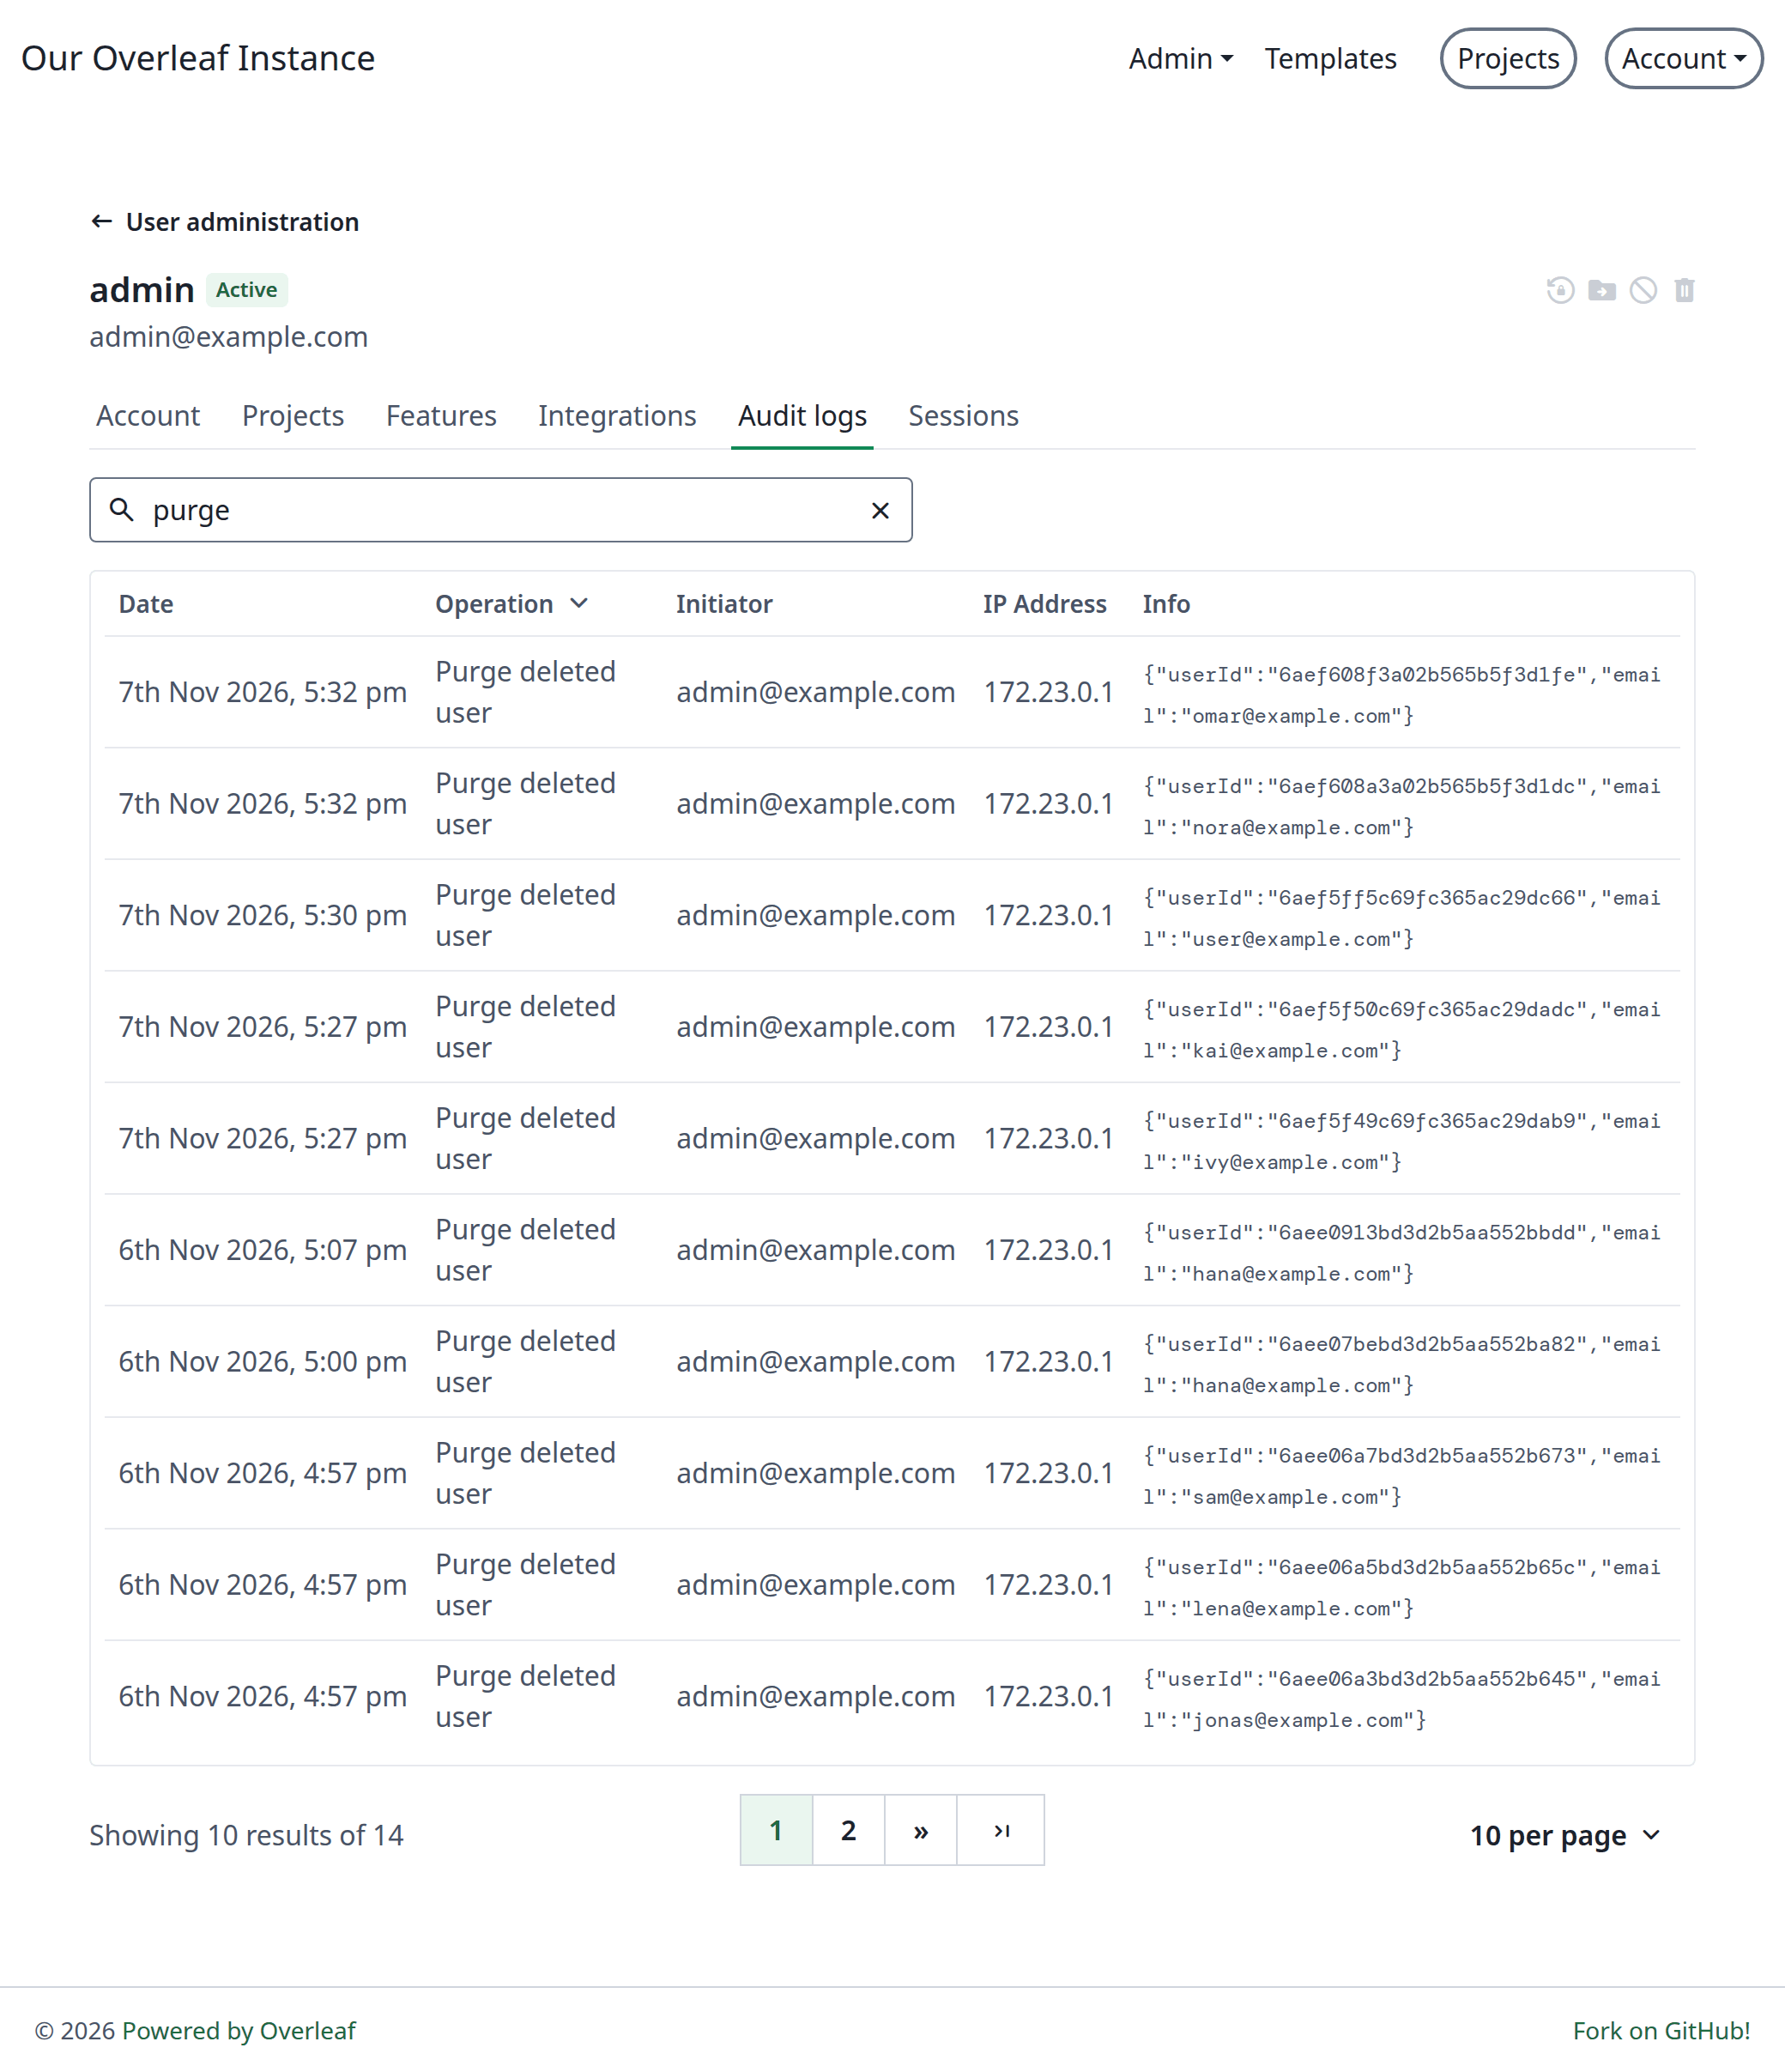
Permanent deletions on the administrator's own log
Good to know
- Entries are kept for two and a half years, then MongoDB removes them automatically.
- Behind a reverse proxy, set
OVERLEAF_TRUSTED_PROXY_IPSso that the log shows the visitor’s address and not the proxy’s. - Not everything is recorded yet. Git clone and push, edits to a project’s settings such as its name or compiler, and the projects an owner creates, archives, trashes or deletes do not appear in the project log.