> ## Documentation Index
> Fetch the complete documentation index at: https://ayakaleaf-pro.mintlify.site/llms.txt
> Use this file to discover all available pages before exploring further.
# 使用 GitHub Codespace
测试 Ayakaleaf Pro 最简单的方式是使用 GitHub Codespace,其中所有环境变量都已预先配置,确保你可以开箱即用。
使用 GitHub Codespaces 运行 Docker 容器时,Codespace 不会自动关闭,并会持续**计费**。有关 GitHub Codespaces 的计费规则,请参阅 [GitHub Codespaces 计费规则](https://docs.github.com/en/billing/concepts/product-billing/github-codespaces)。
要管理你的 GitHub Codespaces,请访问 [https://github.com/codespaces](https://github.com/codespaces)。当你不再需要时,请及时删除你的 Codespace。
我们已**预先配置**了以下功能:
* [x] 使用 TeXLive **Basic**(2024-2026)的沙箱化 LaTeX 编译
* [x] Pandoc 导入/导出(SaaS 平台功能)
* [x] Python 脚本运行器(SaaS 平台功能)
* [x] Git-Bridge 支持(Server Pro 功能)
* [x] 高级参考文献搜索(SaaS 平台功能)
* [x] 管理面板(全局用户/项目管理)
* [x] 修订追踪(含审阅和评论面板)
* [x] 完整的项目历史记录(支持恢复和下载)
* [x] 符号面板(Server Pro/SaaS 平台功能)
标准 GitHub Codespaces 提供 32 GB 存储空间,不足以安装我们的 `texlive-full`。如需测试完整镜像,请向 GitHub 提交支持工单,申请使用大型运行器(8 核以上)的 Codespace。
GitHub 同步、LDAP、OAuth、SSO、Zotero 集成等功能在此演练环境中 ***均未配置***。关于如何在你自己的部署中配置这些功能,可参阅 [Toolkit 设置](/zh-CN/on-premises/configuration/overleaf-toolkit/toolkit-settings)了解更多详情。
点击下面的按钮创建你的 GitHub Codespace。在服务器配置方面,对于测试用途,**2 核 8 GB 内存**通常已经足够。如果你计划使用 [**TeX Live Full**](https://github.com/ayaka-notes/texlive-full),我们建议选择 **8 核 64GB** 的配置。
[](https://codespaces.new/ayaka-notes/ayakaleaf-pro-playground)
Codespace 准备就绪后,在 bash 中运行以下命令来初始化你的 Overleaf 实例。
```bash title="bash" theme={null}
./init.sh
```
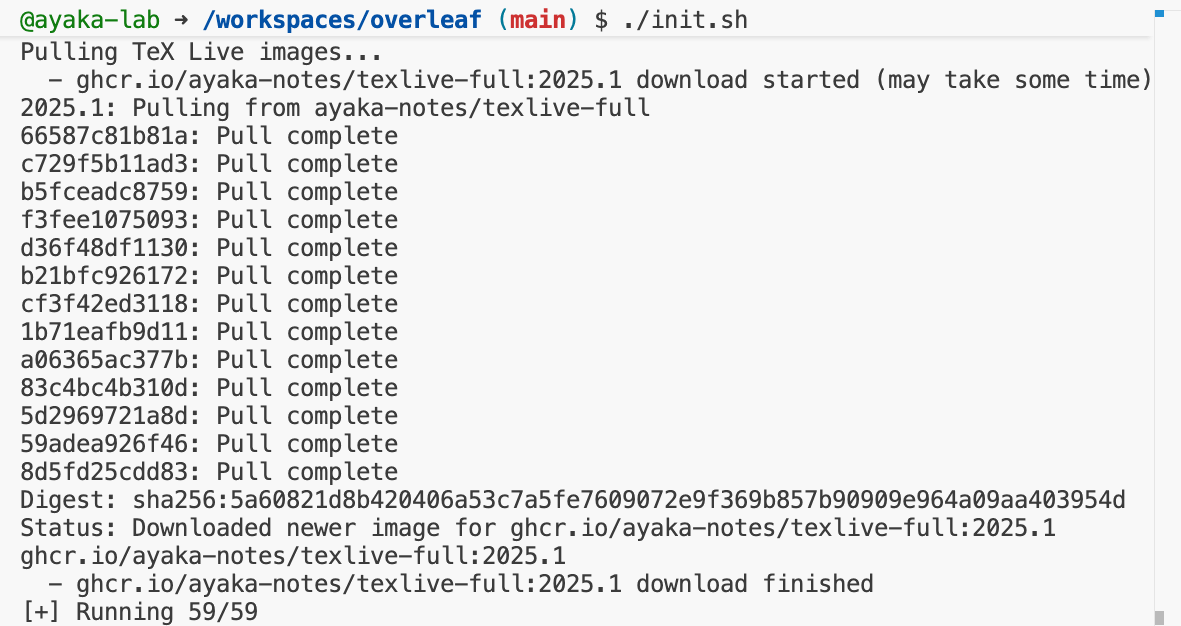
你可能需要等待至少 3 分钟,以便拉取所需的全部 Docker 镜像。
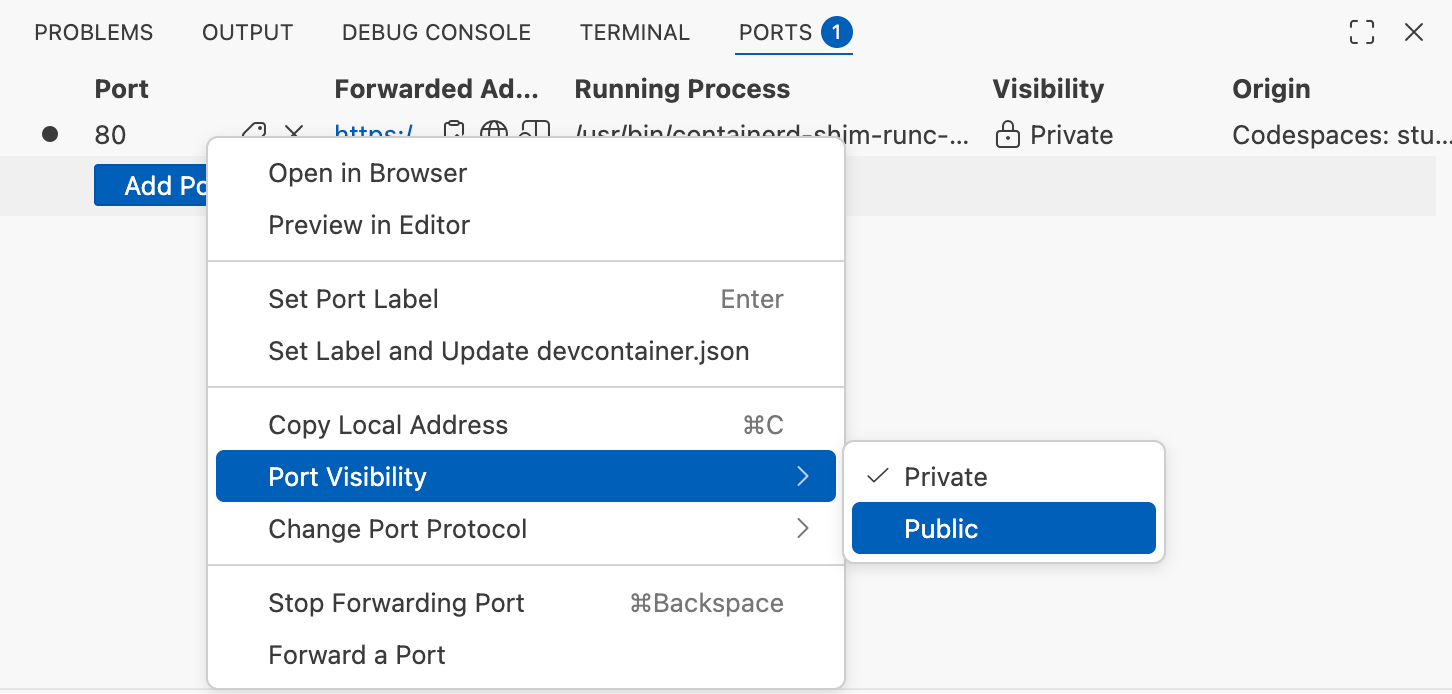
 切换到 **Ports** 标签页,然后按照以下步骤将 80 端口设为公开。
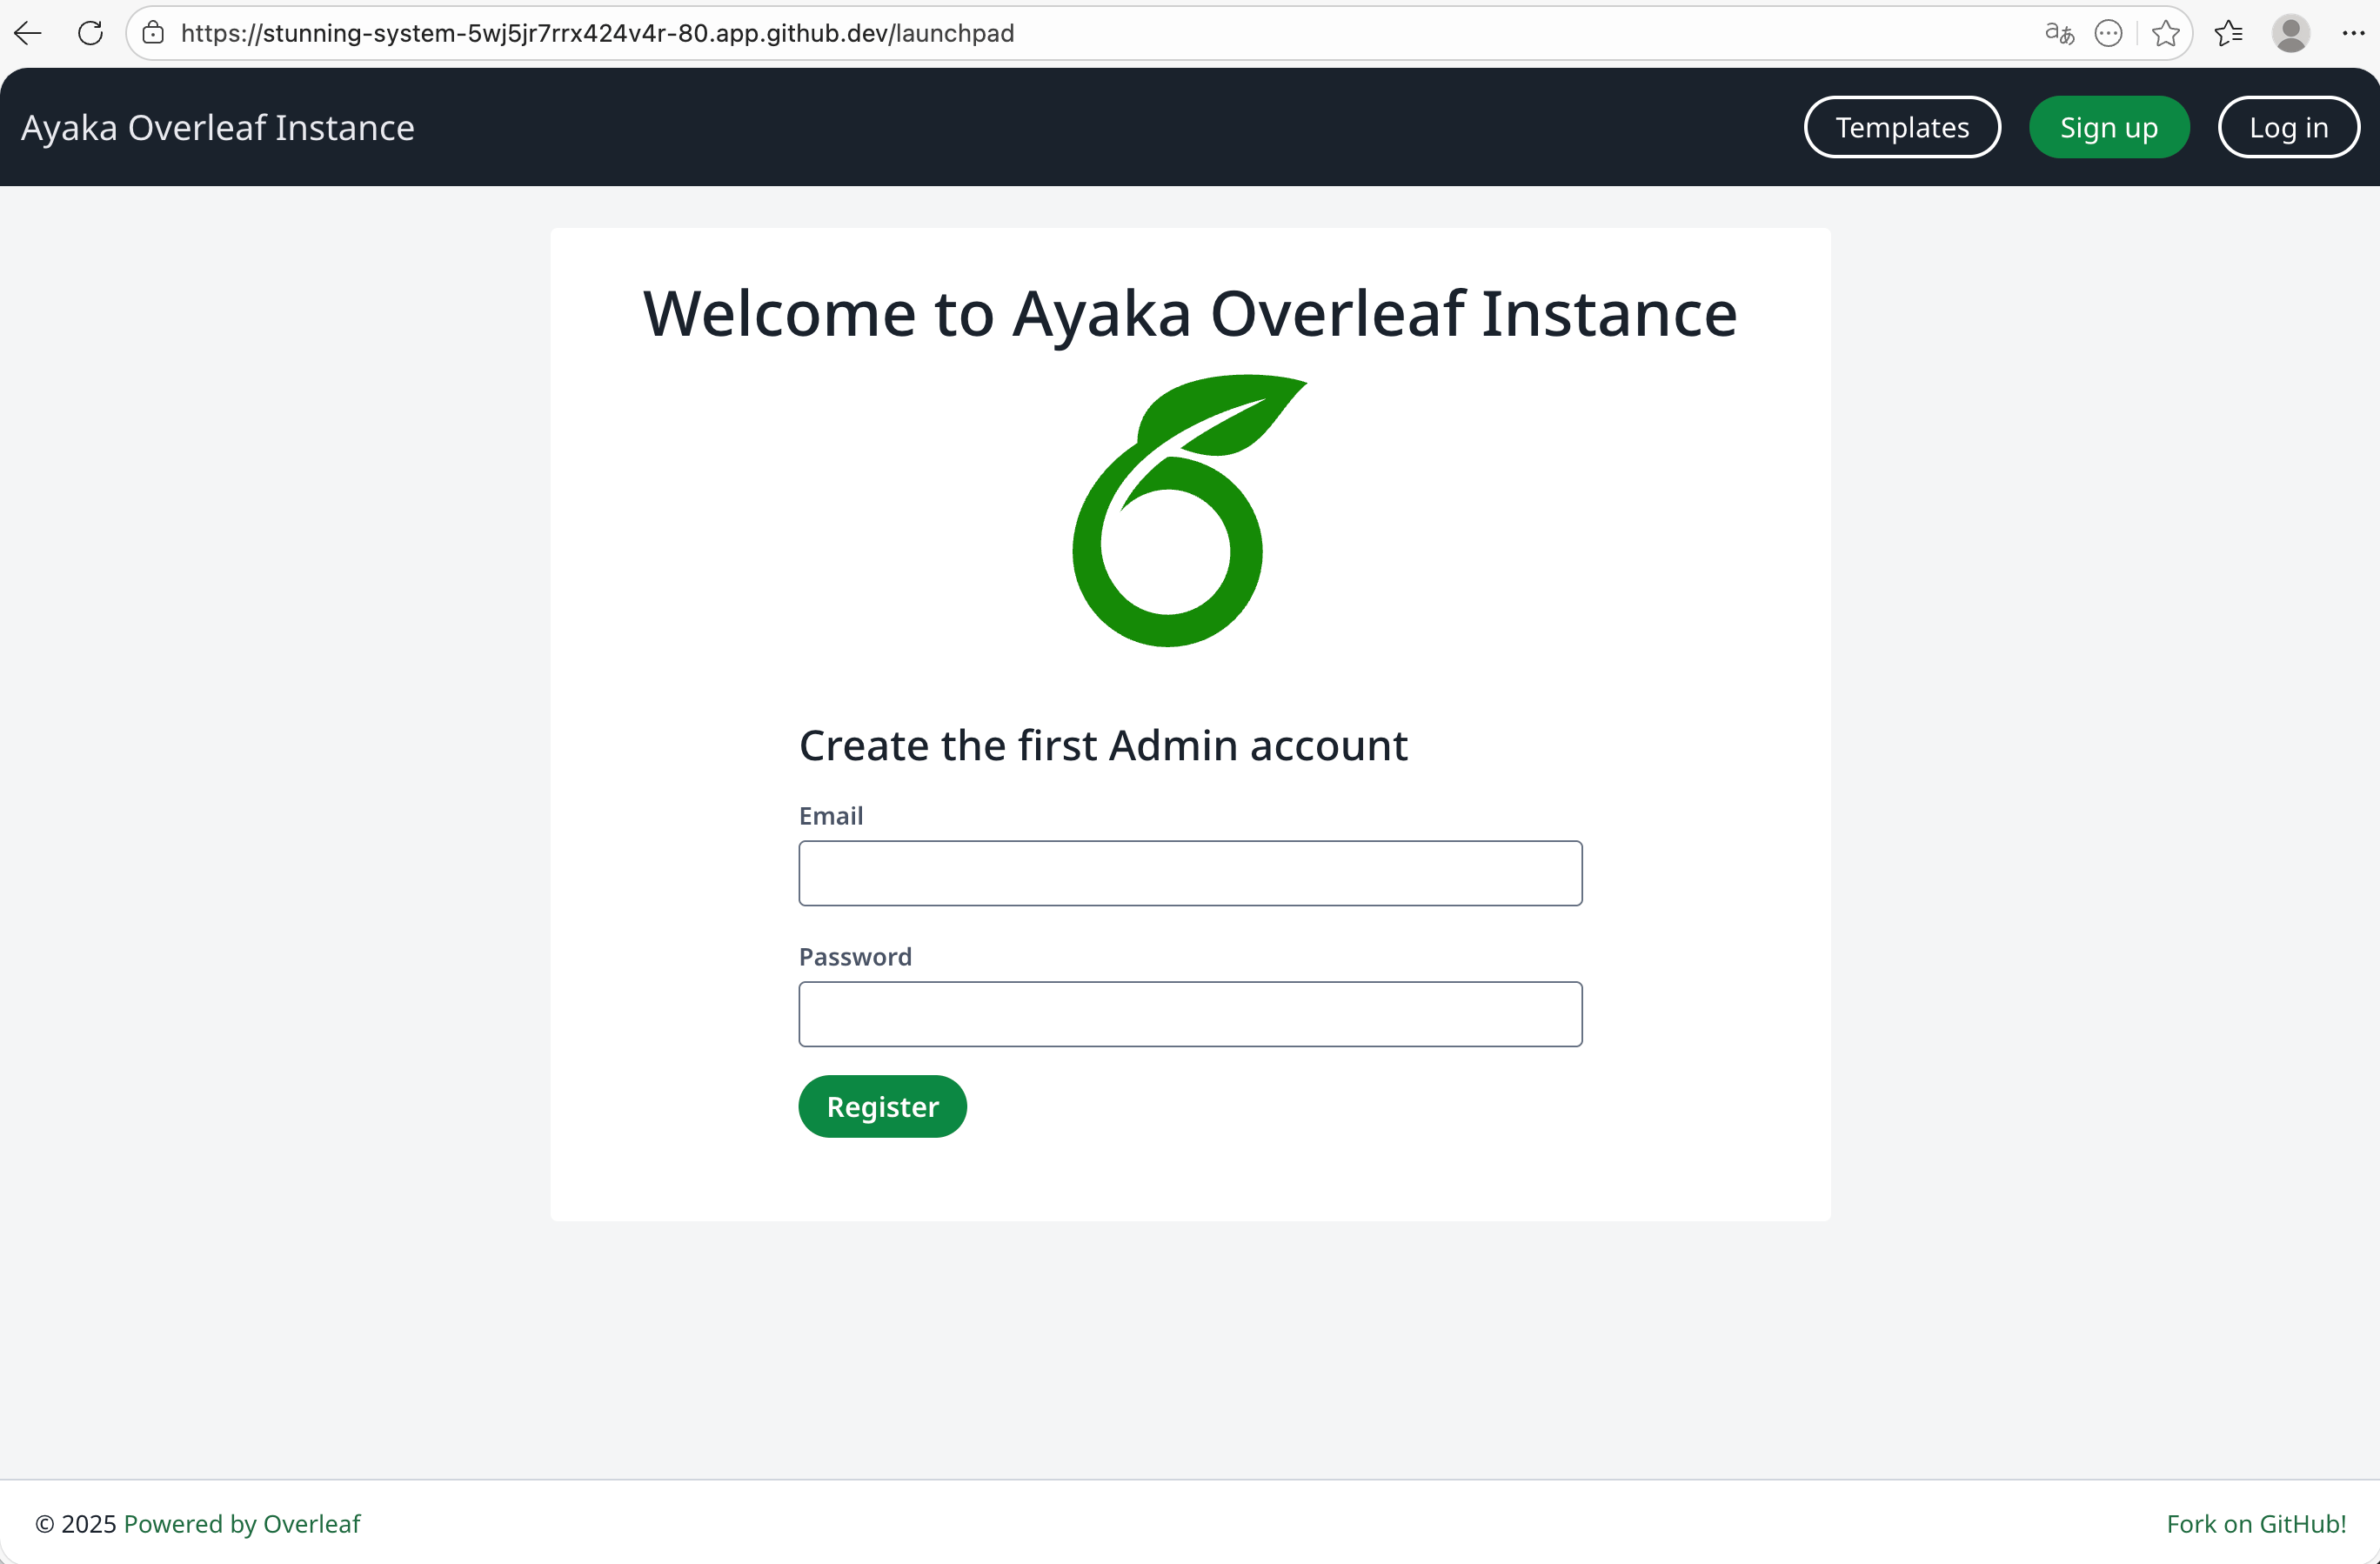
 之后,你可以点击 **Forwarded Address** 访问你的 Overleaf 实例。你可能需要在地址后添加 `/launchpad` 才能访问 Overleaf 欢迎页面。
输入管理员账户和密码,然后点击 Register 按钮。
之后,你可以点击 **Forwarded Address** 访问你的 Overleaf 实例。你可能需要在地址后添加 `/launchpad` 才能访问 Overleaf 欢迎页面。
输入管理员账户和密码,然后点击 Register 按钮。
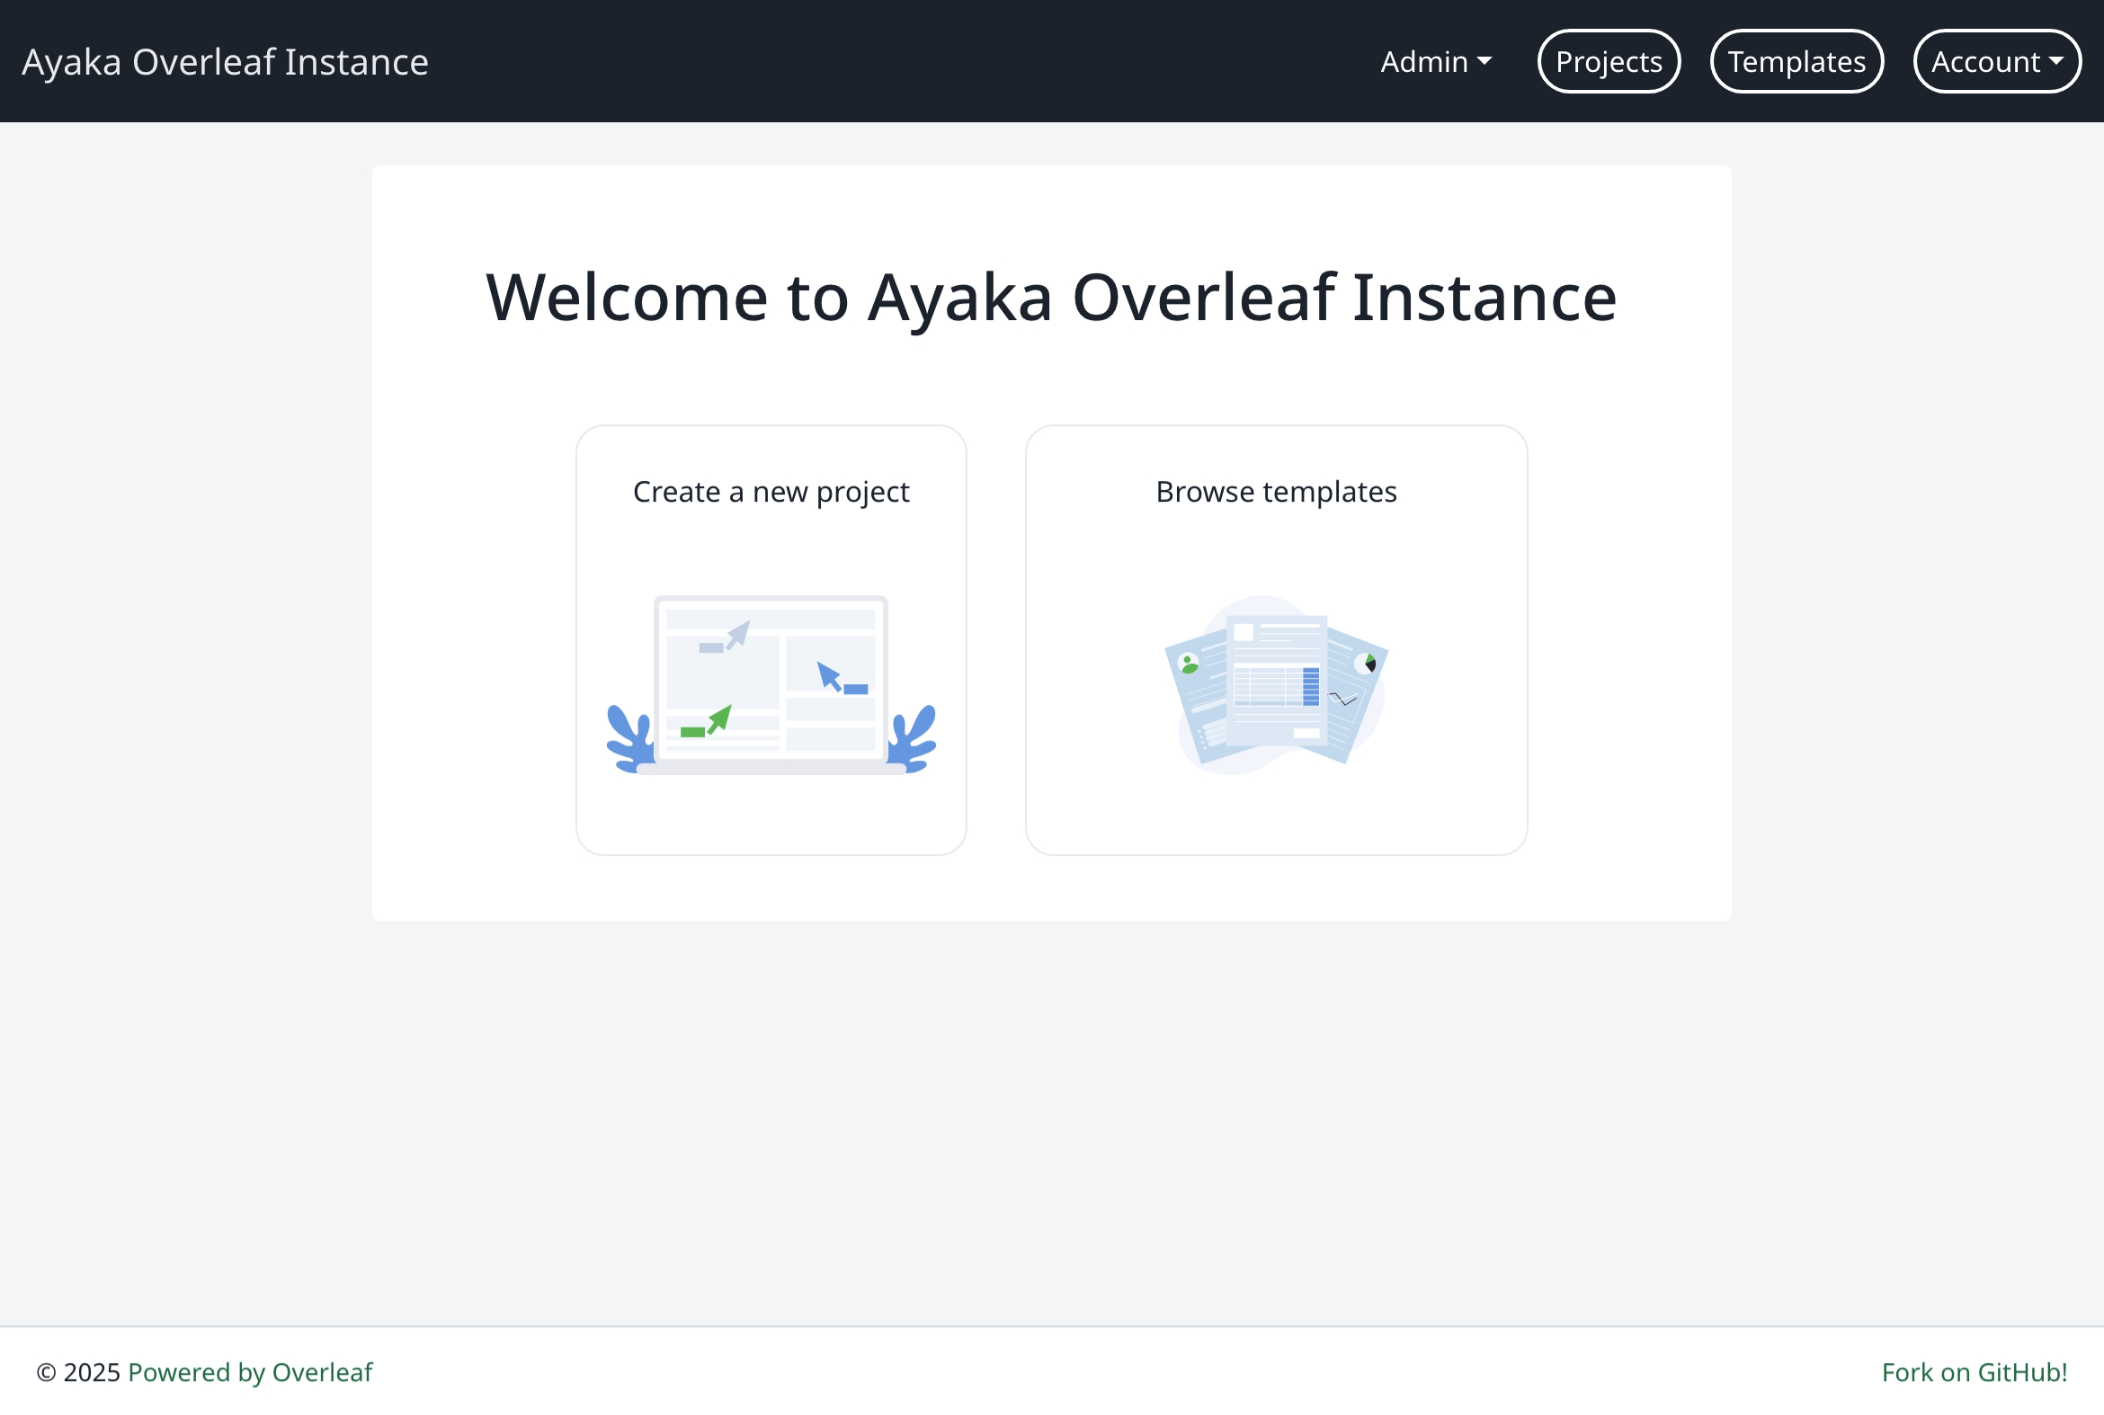
 现在,尽情享受 $\LaTeX$ 写作吧!
 #### 使用 TeXLive Full 镜像
如果你可以使用 8 核/64 GB 的 GitHub Codespaces,就可以在此演练环境中使用 TeXLive Full 镜像。你可以修改 `toolkit/config/variables.env` 文件中的以下环境变量,以使用 TeXLive Full 镜像代替 TeXLive Basic 镜像。
```dotenv wrap theme={null}
ALL_TEX_LIVE_DOCKER_IMAGES=ghcr.io/ayaka-notes/texlive-full:2026.1, ghcr.io/ayaka-notes/texlive-full:2025.1, ghcr.io/ayaka-notes/texlive-full:2024.1
ALL_TEX_LIVE_DOCKER_IMAGE_NAMES=Texlive 2026, Texlive 2025, Texlive 2024
TEX_LIVE_DOCKER_IMAGE=ghcr.io/ayaka-notes/texlive-full:2026.1
```
修改环境变量后,你需要重启 Toolkit 才能使更改生效。可以运行以下命令重启 Toolkit。
```bash theme={null}
cd toolkit && bin/up -d
```
This documentation is built and hosted on [Mintlify](https://mintlify.com), a developer documentation platform.
#### 使用 TeXLive Full 镜像
如果你可以使用 8 核/64 GB 的 GitHub Codespaces,就可以在此演练环境中使用 TeXLive Full 镜像。你可以修改 `toolkit/config/variables.env` 文件中的以下环境变量,以使用 TeXLive Full 镜像代替 TeXLive Basic 镜像。
```dotenv wrap theme={null}
ALL_TEX_LIVE_DOCKER_IMAGES=ghcr.io/ayaka-notes/texlive-full:2026.1, ghcr.io/ayaka-notes/texlive-full:2025.1, ghcr.io/ayaka-notes/texlive-full:2024.1
ALL_TEX_LIVE_DOCKER_IMAGE_NAMES=Texlive 2026, Texlive 2025, Texlive 2024
TEX_LIVE_DOCKER_IMAGE=ghcr.io/ayaka-notes/texlive-full:2026.1
```
修改环境变量后,你需要重启 Toolkit 才能使更改生效。可以运行以下命令重启 Toolkit。
```bash theme={null}
cd toolkit && bin/up -d
```
This documentation is built and hosted on [Mintlify](https://mintlify.com), a developer documentation platform.