> ## Documentation Index
> Fetch the complete documentation index at: https://ayakaleaf-pro.mintlify.site/llms.txt
> Use this file to discover all available pages before exploring further.
# TLS 代理
一个可选的 TLS 代理,使用 NGINX 终止 HTTPS 连接。
运行 `bin/init --tls` 以使用 NGINX 代理配置初始化本地配置,或将 NGINX 代理配置添加到现有的本地配置中。系统会在 `config/nginx/certs/overleaf_key.pem` 中创建一个**示例**私钥,并在 `config/nginx/certs/overleaf_certificate.pem` 中创建一个**虚拟**证书。你可以将它们替换为实际的私钥和证书,或者将 `TLS_PRIVATE_KEY_PATH` 和 `TLS_CERTIFICATE_PATH` 变量的值分别设置为实际私钥和证书的路径。
`config/nginx/nginx.conf` 中提供了 NGINX 的默认配置,你可以根据需要进行自定义。配置文件的路径可以通过 `NGINX_CONFIG_PATH` 变量更改。
如果你使用的是基于 **docker-compose.yml** 的部署,或自行管理 NGINX 反向代理,可以在[这里](https://github.com/overleaf/toolkit/blob/master/lib/config-seed/nginx.conf)查看 **nginx.conf** 示例文件。
如果 `config/overleaf.rc` 文件中还没有以下部分,请添加:
```text theme={null}
# TLS proxy configuration (optional)
NGINX_ENABLED=false
NGINX_CONFIG_PATH=config/nginx/nginx.conf
NGINX_HTTP_PORT=80
# Replace these IP addresses with the external IP address of your host
NGINX_HTTP_LISTEN_IP=127.0.1.1
NGINX_TLS_LISTEN_IP=127.0.1.1
TLS_PRIVATE_KEY_PATH=config/nginx/certs/overleaf_key.pem
TLS_CERTIFICATE_PATH=config/nginx/certs/overleaf_certificate.pem
TLS_PORT=443
```
如果你使用的是外部 TLS 代理(即不由 Overleaf Toolkit 管理),请确保在 `config/variables.env` 中设置了 `OVERLEAF_TRUSTED_PROXY_IPS=loopback,`,例如 `OVERLEAF_TRUSTED_PROXY_IPS=loopback,192.168.13.37`。
如果你的本地网络使用的是 `172.16.0.0/12`(Docker 网络的默认子网)中的子网,你需要在 `config/variables.env` 中设置 `OVERLEAF_TRUSTED_PROXY_IPS=loopback,`。其中 `` 是 `docker inspect overleaf_default` 中 `IPAM -> Config -> Subnet` 的值,例如 `OVERLEAF_TRUSTED_PROXY_IPS=loopback,172.19.0.0/16`。这是为了防止 `X-Forwarded` 请求头被伪造。
如果未手动设置 `OVERLEAF_TRUSTED_PROXY_IPS`,其默认值为 `loopback`。如果手动设置,你必须确保包含 `loopback`(或 `127.0.0.1`),以信任运行在 **sharelatex** 容器内的 **nginx** 实例。只接受 IP 地址和 CIDR 范围:不要添加 `localhost` 之类的主机名,否则 Overleaf 将无法启动并返回 `502 Bad Gateway`。
如果你正确配置了受信任的代理 IP,应该能在 `/user/sessions` 页面上看到你的公网 IP 地址,如下所示:
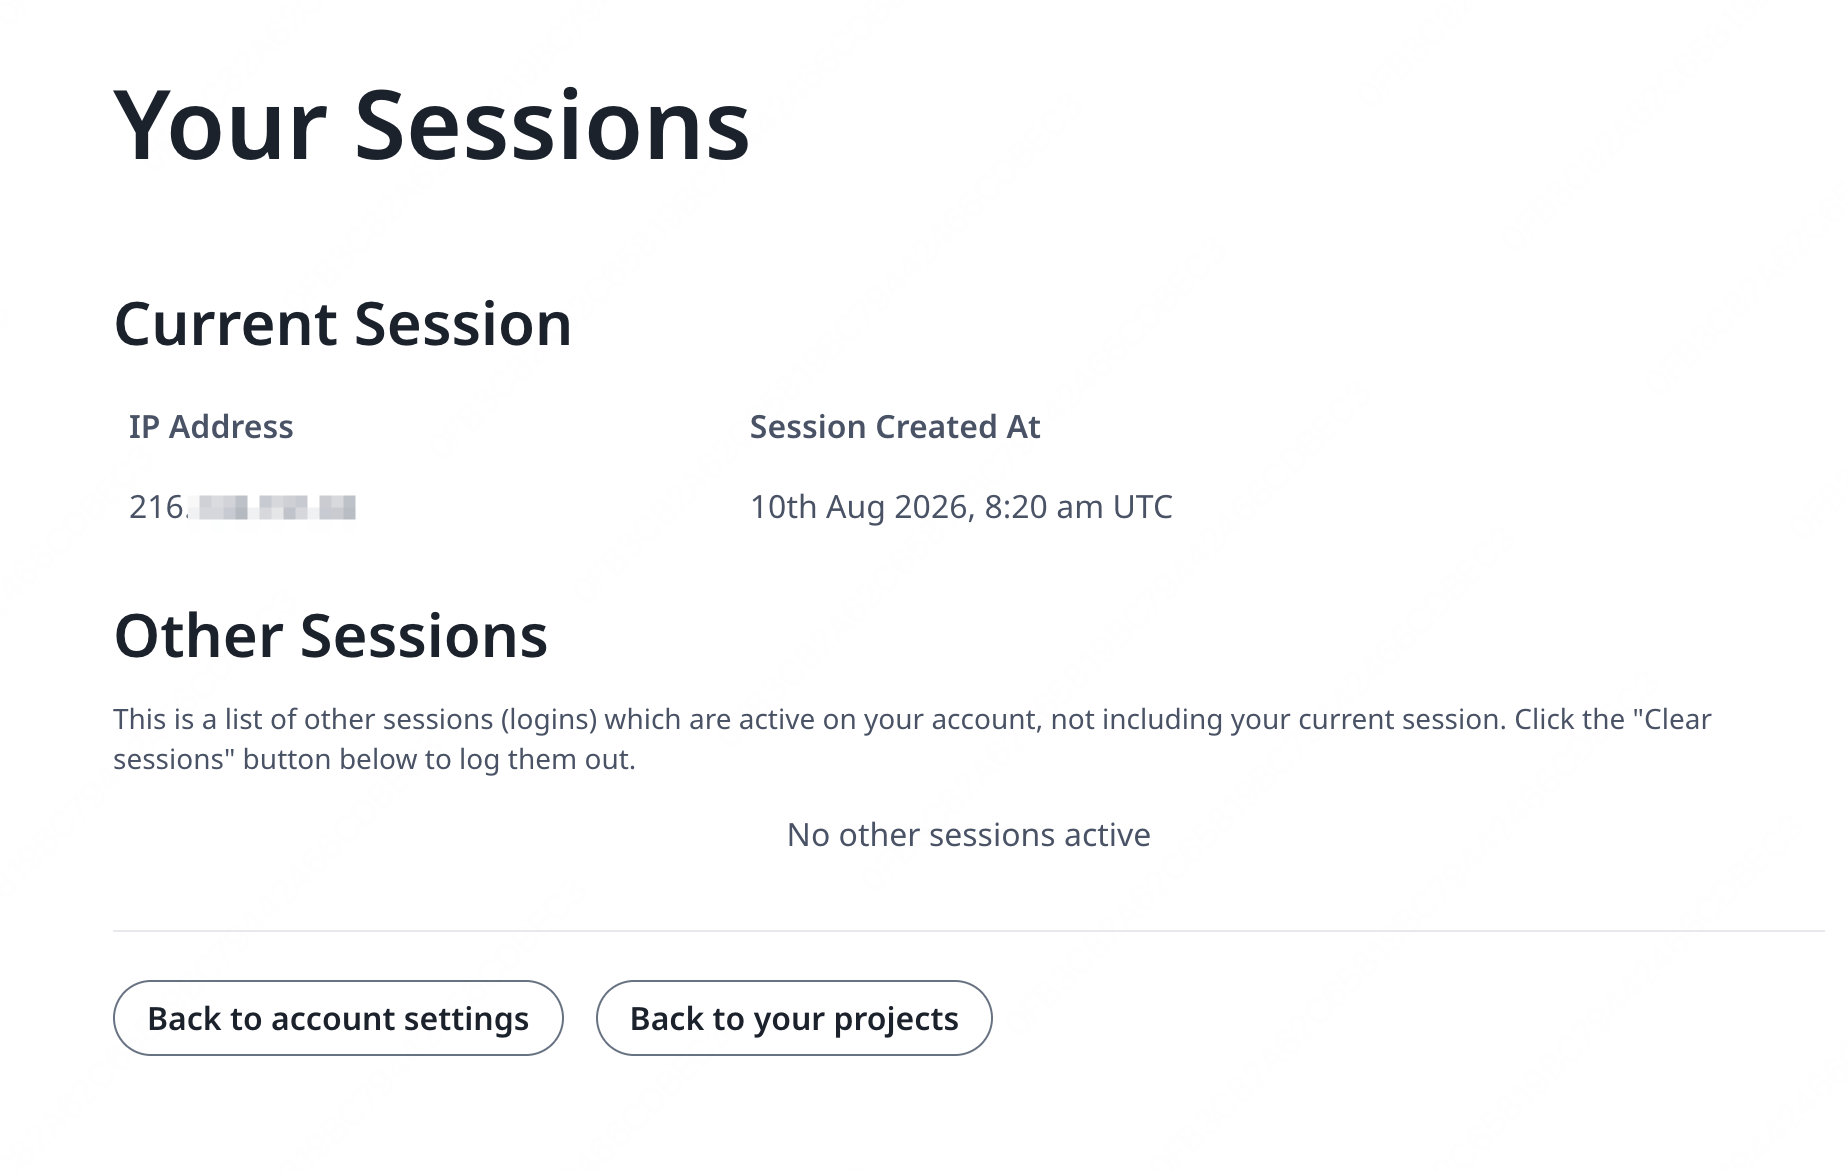 如果上面显示的 IP 地址仍然是 `127.0.0.1` 或私有/本地网络 IP 地址之类的值,请检查你的受信任代理配置,尤其是 `OVERLEAF_TRUSTED_PROXY_IPS` 的值。
要运行代理,请将 `config/overleaf.rc` 中 `NGINX_ENABLED` 变量的值从 `false` 改为 `true`,然后重新运行 `bin/up`。
默认情况下,HTTPS Web 界面可通过 `https://127.0.1.1:443` 访问。对 `http://127.0.1.1:80` 的连接将被重定向到 `https://127.0.1.1:443`。要更改 NGINX 监听的 IP 地址,请设置 `NGINX_HTTP_LISTEN_IP` 和 `NGINX_TLS_LISTEN_IP` 变量。端口可以通过 `NGINX_HTTP_PORT` 和 `TLS_PORT` 变量更改。
如果 NGINX 启动失败并显示错误信息 `Error starting userland proxy: listen tcp4 ... bind: address already in use`,请确保 `OVERLEAF_LISTEN_IP:OVERLEAF_PORT` 与 `NGINX_HTTP_LISTEN_IP:NGINX_HTTP_PORT` 不重叠。
```mermaid theme={null}
sequenceDiagram
participant user as 用户
participant external as 宿主机外部
participant internal as 宿主机内部
participant nginx as nginx
participant sharelatex as sharelatex
participant git-bridge as git-bridge
%% 用户连接到外部主机 HTTP
user->>+ external: HTTP
note over external: NGINX_HTTP_LISTEN_IP:NGINX_HTTP_PORT
external->>+ nginx: HTTP
note over nginx: nginx:80
nginx-->>-external: 301
%% 用户连接到外部主机 HTTPS
user->>+ external: HTTPS
note over external: NGINX_TLS_LISTEN_IP:TLS_PORT
external->>+ nginx: HTTPS
note over nginx: nginx:443
nginx->>+ sharelatex: HTTP
note over sharelatex: sharlatex:80
%% 用户连接到 localhost HTTP
user->>+ internal: HTTP
note over internal: OVERLEAF_LISTEN_IP:OVERLEAF_PORT
internal->>+sharelatex: HTTP
note over sharelatex: sharlatex:80
%% sharelatex 连接到 git-bridge
sharelatex->>+git-bridge: HTTP /git/
note over git-bridge: git-bridge:8000
note over sharelatex: GIT_BRIDGE_HOST:GIT_BRIDGE_PORT
git-bridge->>+sharelatex: WEB/WEB-API:3000
git-bridge->>+sharelatex: HISTORY-V1:3100
```
This documentation is built and hosted on [Mintlify](https://mintlify.com), a developer documentation platform.
如果上面显示的 IP 地址仍然是 `127.0.0.1` 或私有/本地网络 IP 地址之类的值,请检查你的受信任代理配置,尤其是 `OVERLEAF_TRUSTED_PROXY_IPS` 的值。
要运行代理,请将 `config/overleaf.rc` 中 `NGINX_ENABLED` 变量的值从 `false` 改为 `true`,然后重新运行 `bin/up`。
默认情况下,HTTPS Web 界面可通过 `https://127.0.1.1:443` 访问。对 `http://127.0.1.1:80` 的连接将被重定向到 `https://127.0.1.1:443`。要更改 NGINX 监听的 IP 地址,请设置 `NGINX_HTTP_LISTEN_IP` 和 `NGINX_TLS_LISTEN_IP` 变量。端口可以通过 `NGINX_HTTP_PORT` 和 `TLS_PORT` 变量更改。
如果 NGINX 启动失败并显示错误信息 `Error starting userland proxy: listen tcp4 ... bind: address already in use`,请确保 `OVERLEAF_LISTEN_IP:OVERLEAF_PORT` 与 `NGINX_HTTP_LISTEN_IP:NGINX_HTTP_PORT` 不重叠。
```mermaid theme={null}
sequenceDiagram
participant user as 用户
participant external as 宿主机外部
participant internal as 宿主机内部
participant nginx as nginx
participant sharelatex as sharelatex
participant git-bridge as git-bridge
%% 用户连接到外部主机 HTTP
user->>+ external: HTTP
note over external: NGINX_HTTP_LISTEN_IP:NGINX_HTTP_PORT
external->>+ nginx: HTTP
note over nginx: nginx:80
nginx-->>-external: 301
%% 用户连接到外部主机 HTTPS
user->>+ external: HTTPS
note over external: NGINX_TLS_LISTEN_IP:TLS_PORT
external->>+ nginx: HTTPS
note over nginx: nginx:443
nginx->>+ sharelatex: HTTP
note over sharelatex: sharlatex:80
%% 用户连接到 localhost HTTP
user->>+ internal: HTTP
note over internal: OVERLEAF_LISTEN_IP:OVERLEAF_PORT
internal->>+sharelatex: HTTP
note over sharelatex: sharlatex:80
%% sharelatex 连接到 git-bridge
sharelatex->>+git-bridge: HTTP /git/
note over git-bridge: git-bridge:8000
note over sharelatex: GIT_BRIDGE_HOST:GIT_BRIDGE_PORT
git-bridge->>+sharelatex: WEB/WEB-API:3000
git-bridge->>+sharelatex: HISTORY-V1:3100
```
This documentation is built and hosted on [Mintlify](https://mintlify.com), a developer documentation platform.