> ## Documentation Index
> Fetch the complete documentation index at: https://ayakaleaf-pro.mintlify.site/llms.txt
> Use this file to discover all available pages before exploring further.
# Using GitHub Codespace
The easiest way to test our Ayakaleaf Pro is to use GitHub Codespace, where all environment variables are pre-configured to ensure you can use it out of the box.
When you run Docker containers using GitHub Codespaces, the Codespace will not automatically shut down and will continue to be **billed**. For GitHub Codespaces billing rules, please refer to [github codespaces billing rules](https://docs.github.com/en/billing/concepts/product-billing/github-codespaces).
To manage your GitHub Codespaces, please visit [https://github.com/codespaces](https://github.com/codespaces). When you no longer need it, please delete your Codespace in time.
We have **pre-configured** the following features:
* [x] Sandboxed LaTeX compilation with TeXLive **Basic** (2024-2026)
* [x] Pandoc Import/Export (Features in SaaS Platform)
* [x] Python Script Runner (Features in SaaS Platform)
* [x] Git-Bridge Support (Features in Server Pro)
* [x] Advanced Reference Search (Features in SaaS Platform)
* [x] Admin Panel (Global Users/Projects management)
* [x] Track Changes (With Review and Comment Panel)
* [x] Full Project History(With Restore and Download)
* [x] Symbol Palette (Features in Server Pro/SaaS Platform)
Standard GitHub Codespaces provide 32 GB of storage. This is insufficient for our `texlive-full` installation. To test the full image, submit a GitHub support ticket for a Codespace with large runners(8 cores+).
GitHub Sync, LDAP, OAuth, SSO, Zotero Integration, and other features are ***not configured*** in this playground. You can refer to the [toolkit settings](/on-premises/configuration/overleaf-toolkit/toolkit-settings) for more details on how to configure these features in your own deployment.
Click the following button to create your GitHub Codespace. In terms of server configuration, **2 cores with 8 GB of RAM** are generally sufficient for a test case. If you plan to use [**TeX Live Full**](https://github.com/ayaka-notes/texlive-full), we recommend choosing a configuration with **8 cores 64GB**.
[](https://codespaces.new/ayaka-notes/ayakaleaf-pro-playground)
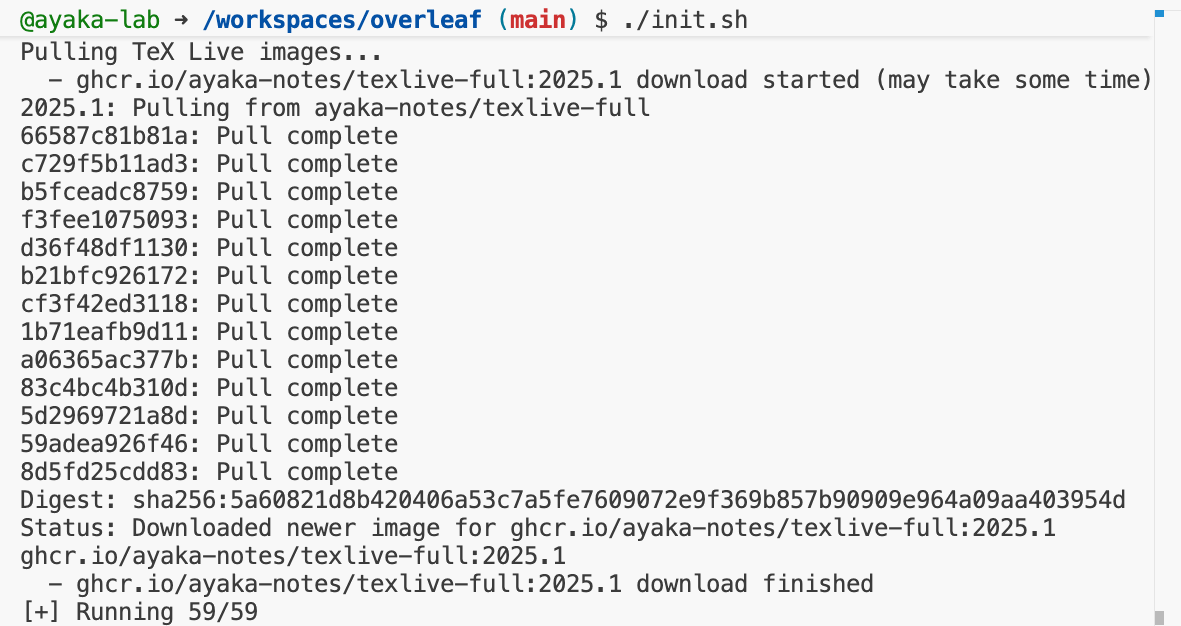
When your codespace is ready, run the following command in your bash to Initialize your overleaf instance.
```bash title="bash" theme={null}
./init.sh
```
You may need to wait for at least 3 mins before we pull all the docker images you need.
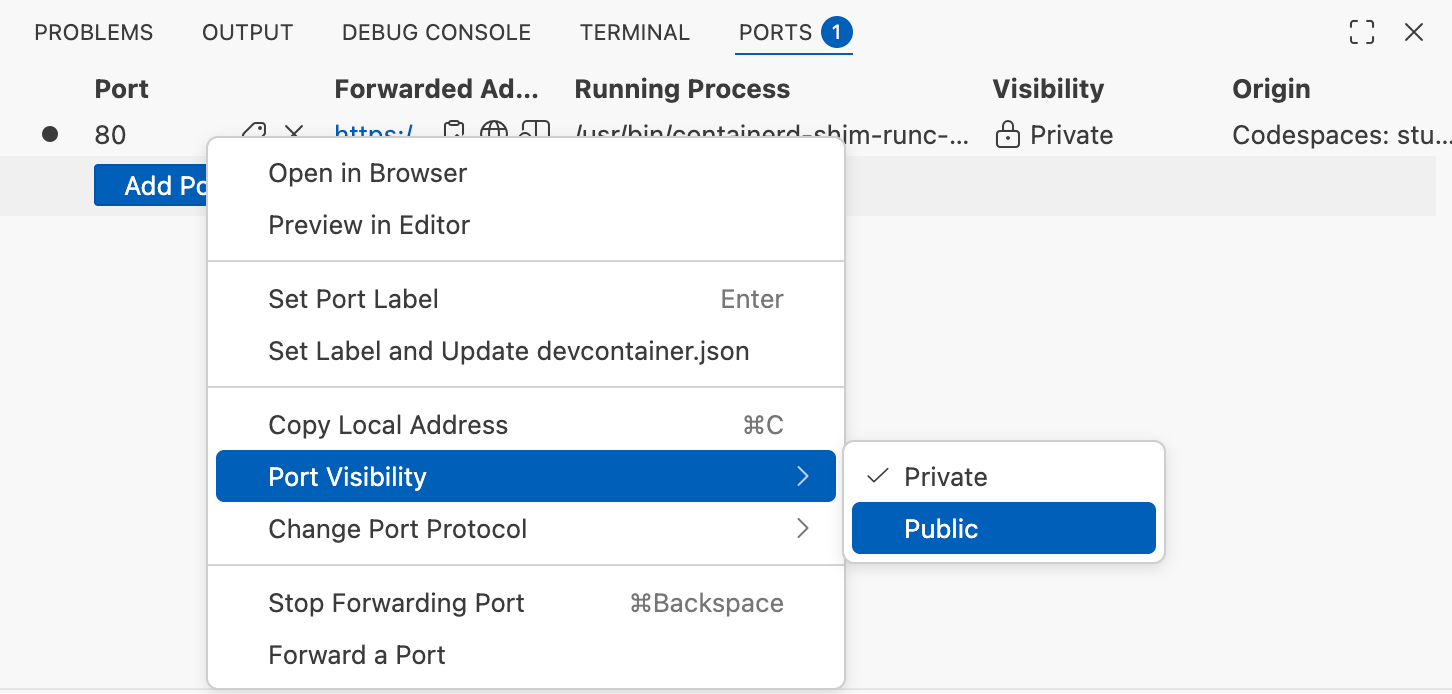
 Switch to the **Ports** tab, and then follow these steps to make port 80 public.
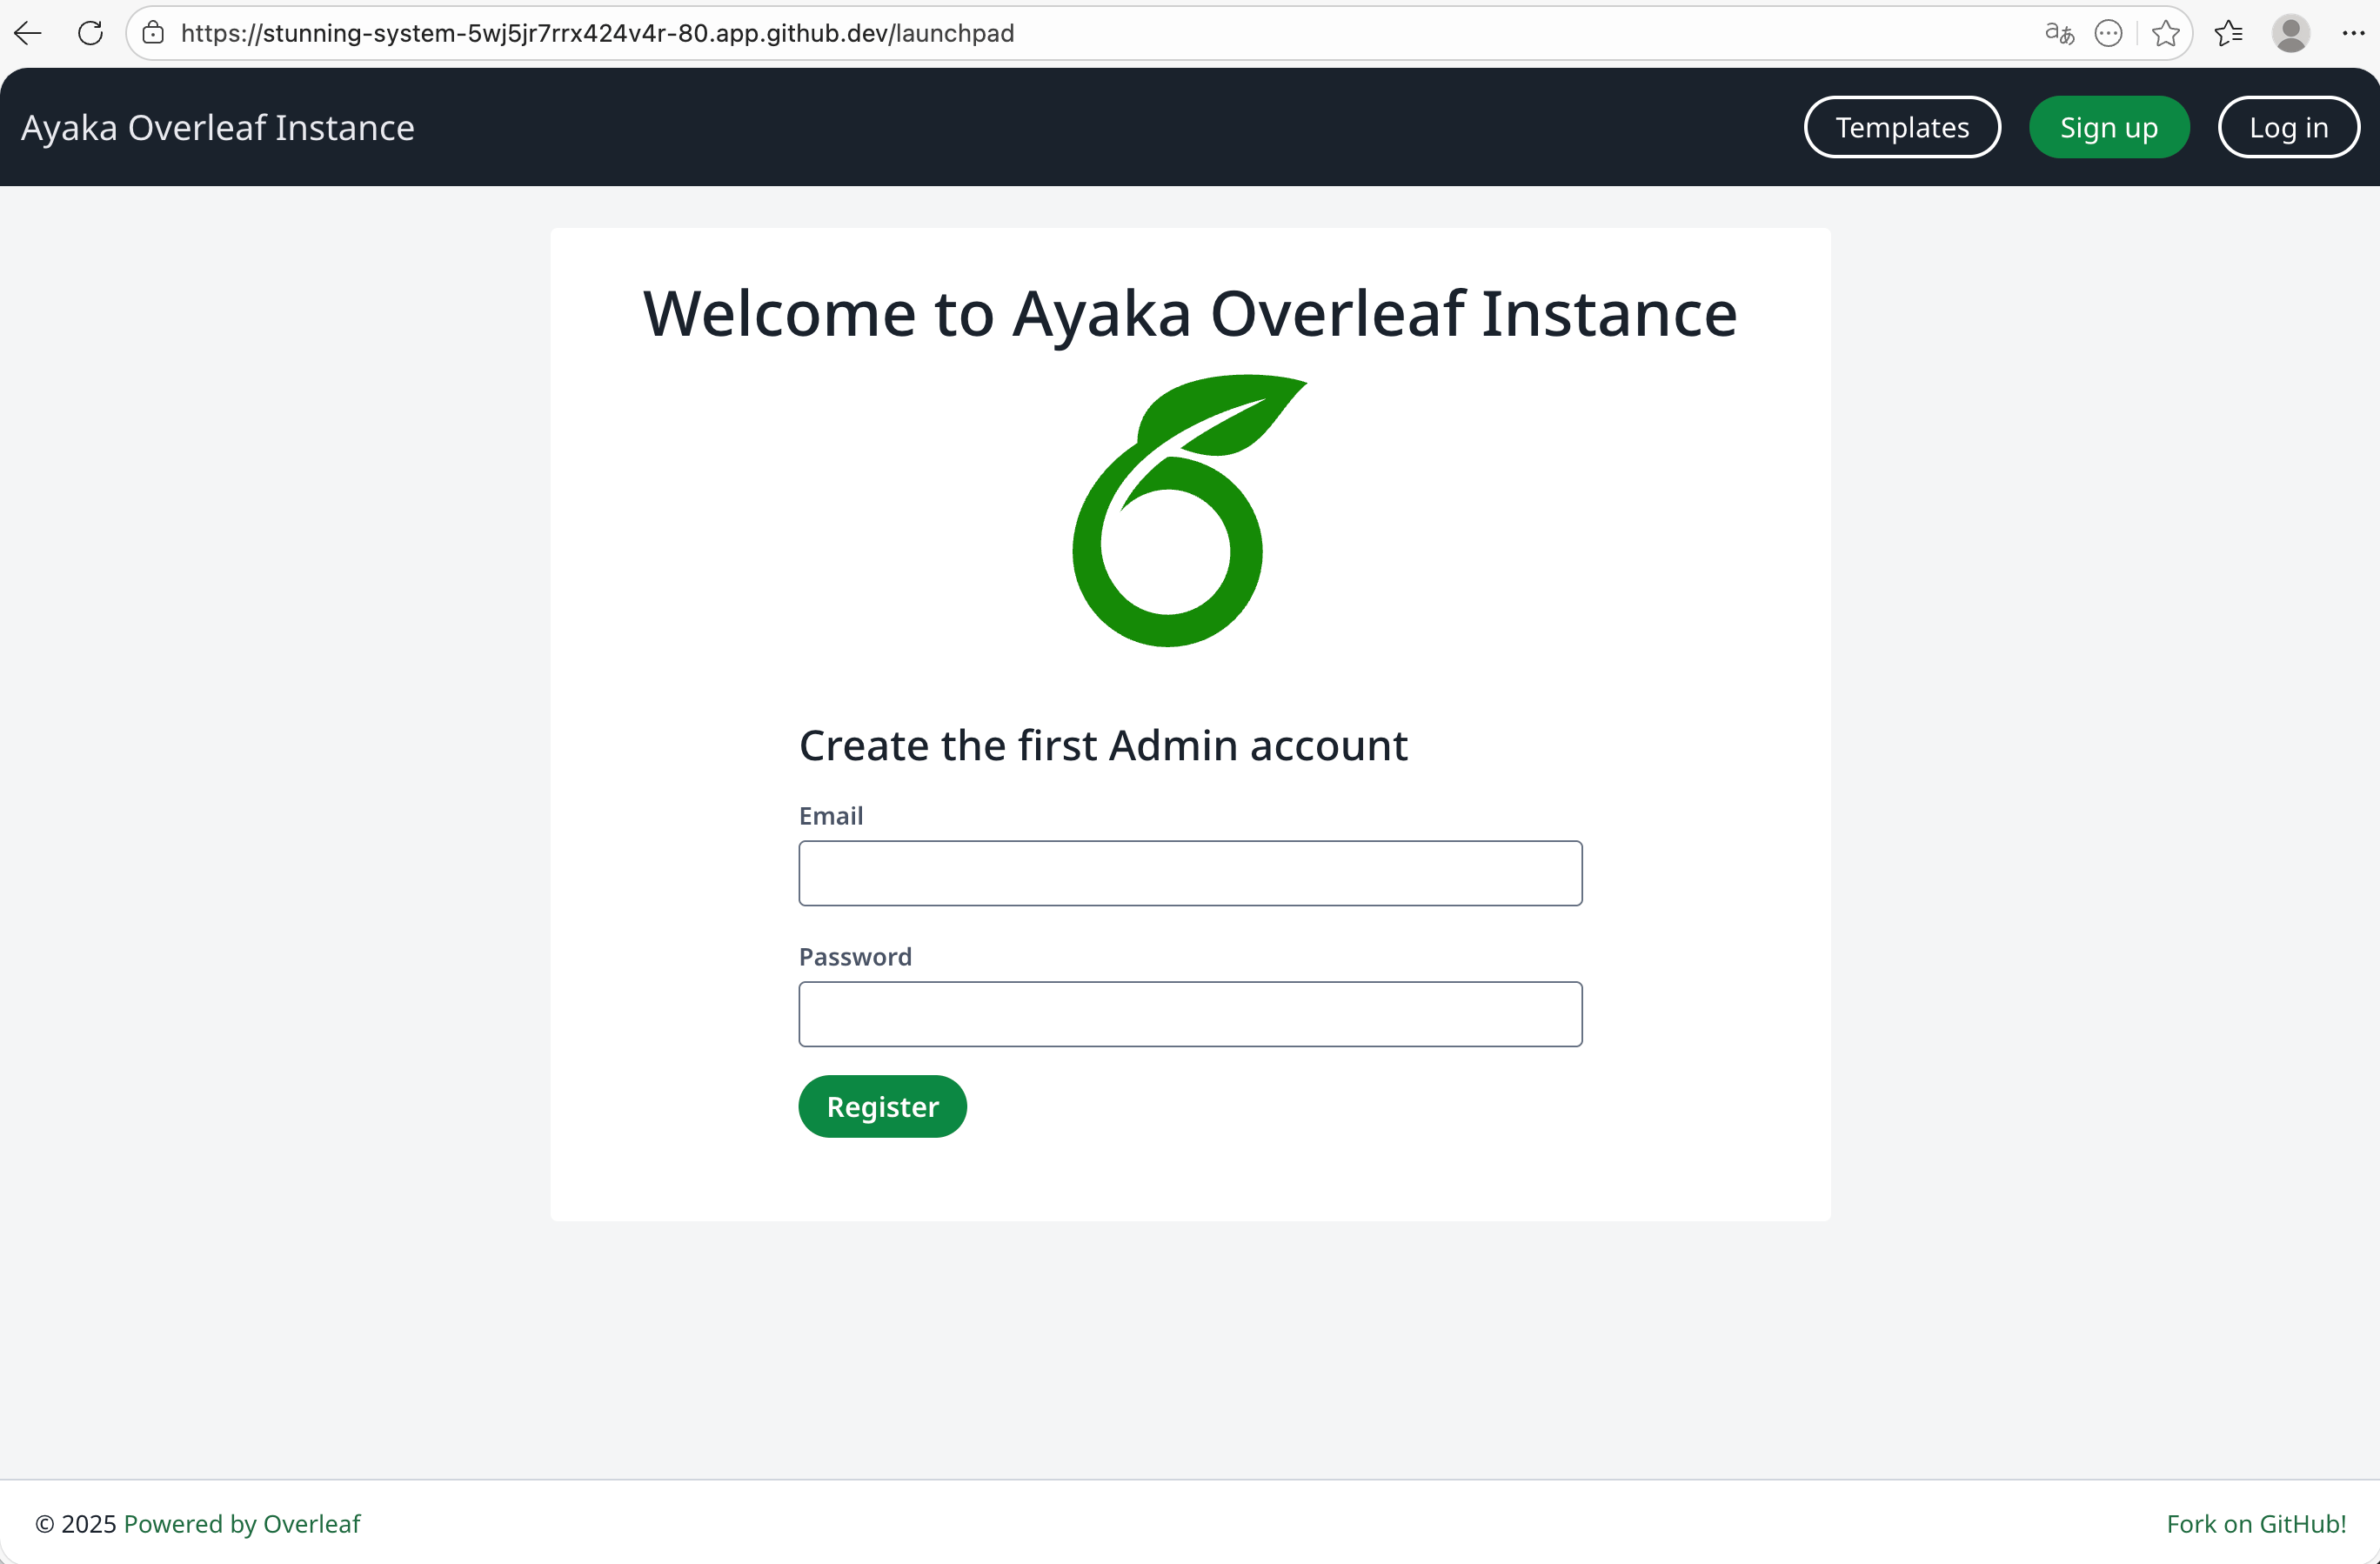
 After that, you can click the **Forwarded Address** to visit your overleaf instance. You may need to add `/launchpad` to visit the overleaf welcome page.
Input your admin account and password, then click Register button.
After that, you can click the **Forwarded Address** to visit your overleaf instance. You may need to add `/launchpad` to visit the overleaf welcome page.
Input your admin account and password, then click Register button.
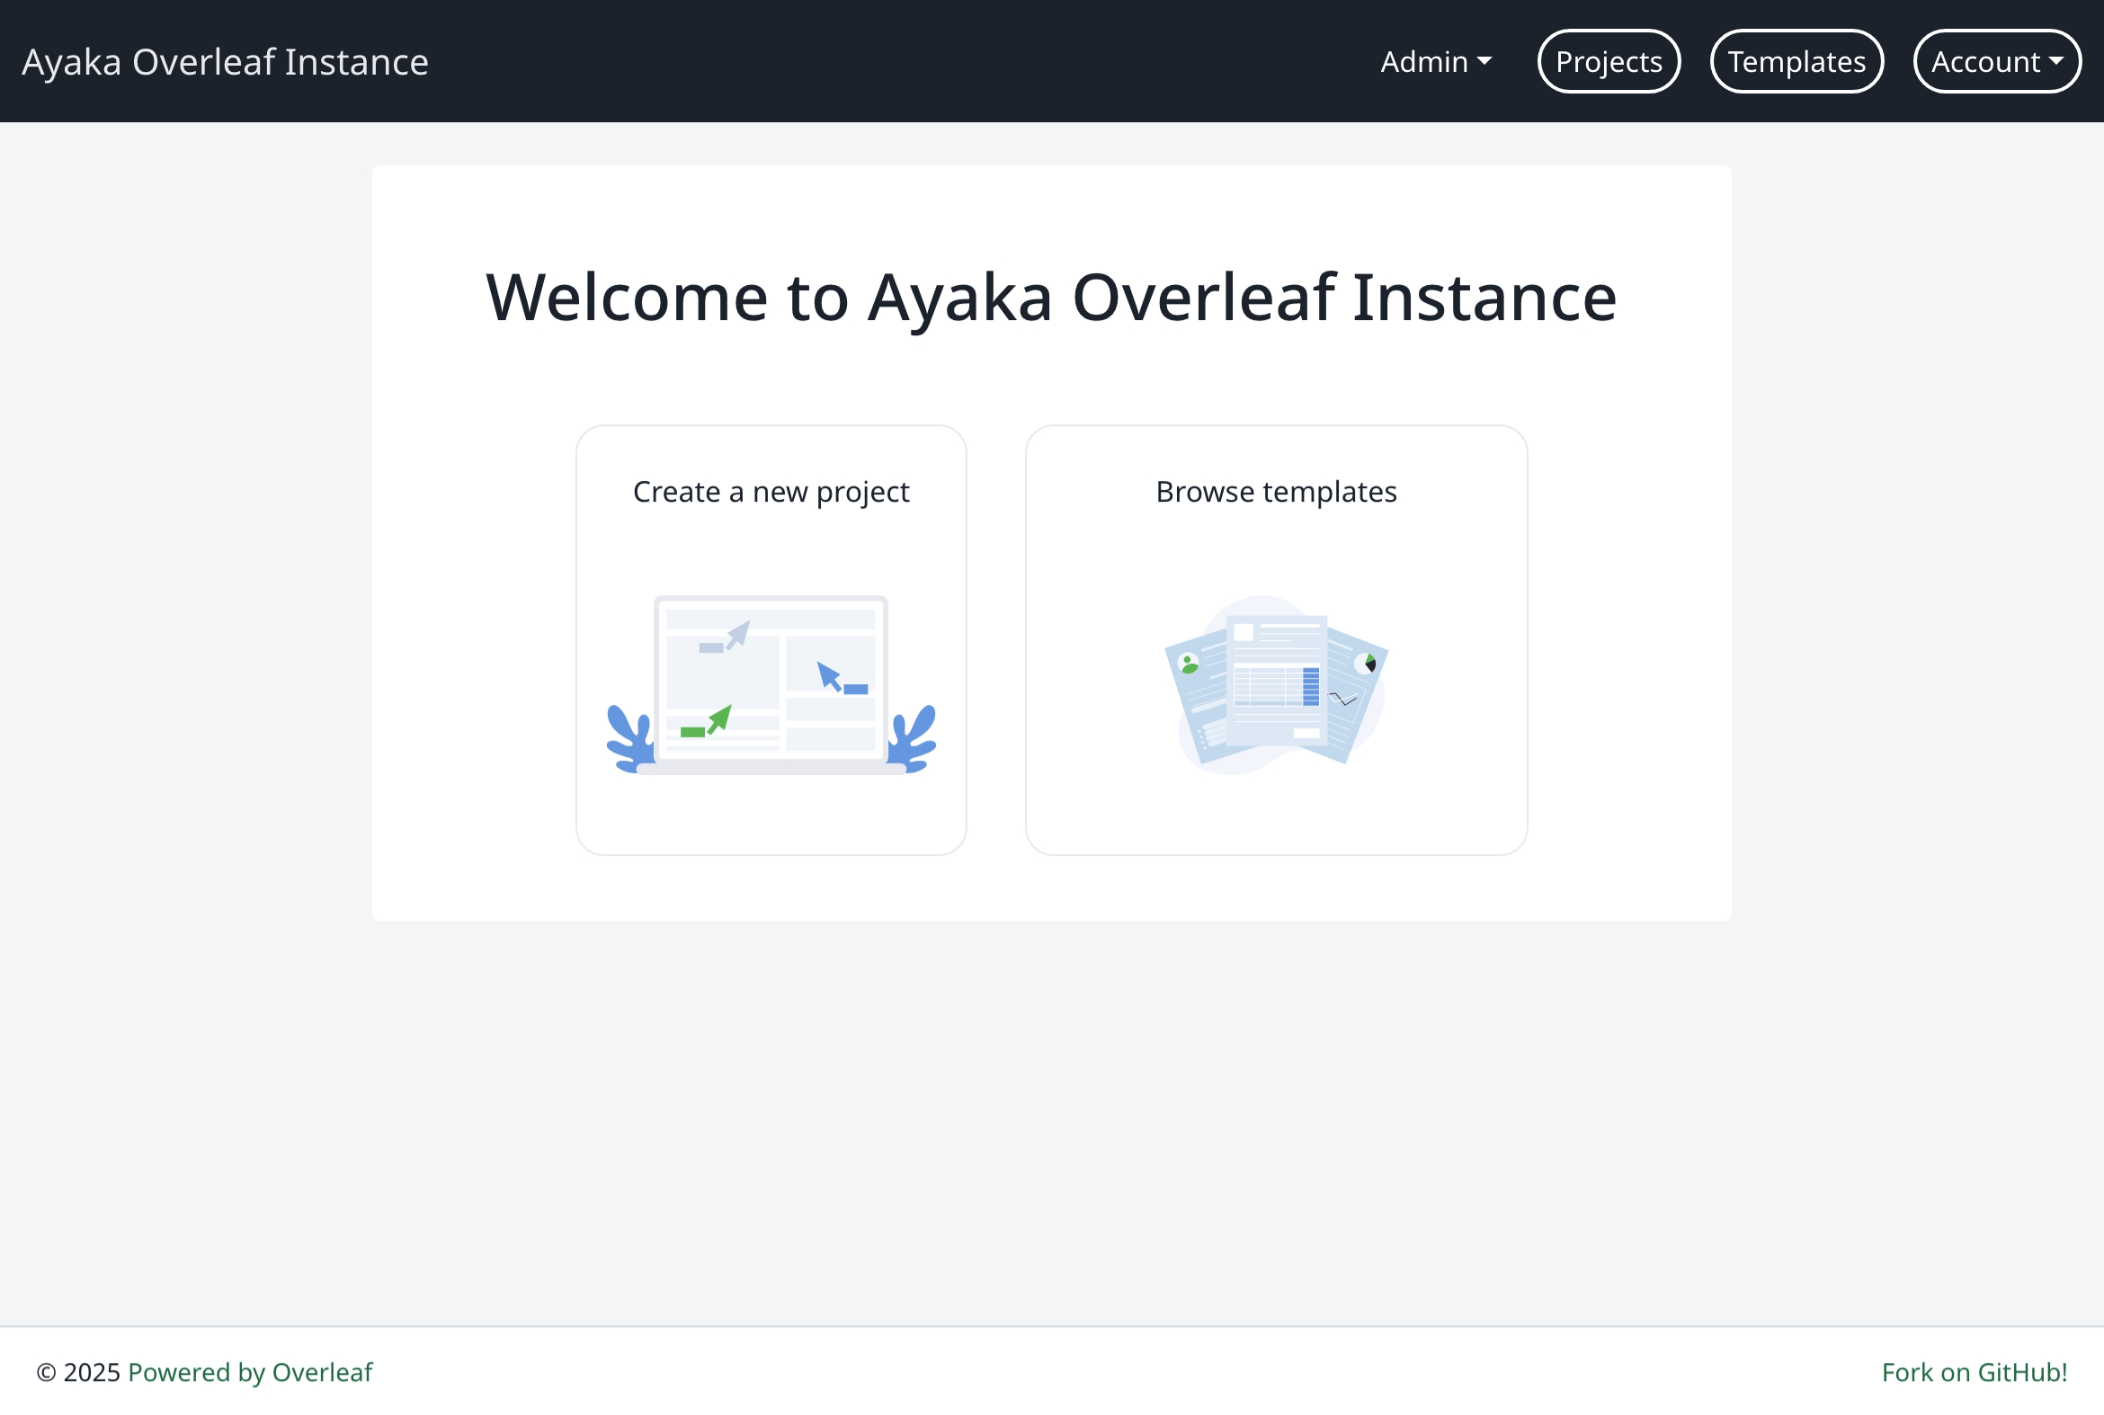
 Now, time to enjoy your $\LaTeX$ writing!
 #### Use TeXLive Full Image
If you have access to 8-core/64 GB GitHub Codespaces, you can use the TeXLive Full image in this playground. You can change the following environment variables in `toolkit/config/variables.env` file to use TeXLive Full image instead of TeXLive Basic image.
```dotenv wrap theme={null}
ALL_TEX_LIVE_DOCKER_IMAGES=ghcr.io/ayaka-notes/texlive-full:2026.1, ghcr.io/ayaka-notes/texlive-full:2025.1, ghcr.io/ayaka-notes/texlive-full:2024.1
ALL_TEX_LIVE_DOCKER_IMAGE_NAMES=Texlive 2026, Texlive 2025, Texlive 2024
TEX_LIVE_DOCKER_IMAGE=ghcr.io/ayaka-notes/texlive-full:2026.1
```
After changing the environment variables, you need to restart the toolkit to apply the changes. You can run the following command to restart the toolkit.
```bash theme={null}
cd toolkit && bin/up -d
```
This documentation is built and hosted on [Mintlify](https://mintlify.com), a developer documentation platform.
#### Use TeXLive Full Image
If you have access to 8-core/64 GB GitHub Codespaces, you can use the TeXLive Full image in this playground. You can change the following environment variables in `toolkit/config/variables.env` file to use TeXLive Full image instead of TeXLive Basic image.
```dotenv wrap theme={null}
ALL_TEX_LIVE_DOCKER_IMAGES=ghcr.io/ayaka-notes/texlive-full:2026.1, ghcr.io/ayaka-notes/texlive-full:2025.1, ghcr.io/ayaka-notes/texlive-full:2024.1
ALL_TEX_LIVE_DOCKER_IMAGE_NAMES=Texlive 2026, Texlive 2025, Texlive 2024
TEX_LIVE_DOCKER_IMAGE=ghcr.io/ayaka-notes/texlive-full:2026.1
```
After changing the environment variables, you need to restart the toolkit to apply the changes. You can run the following command to restart the toolkit.
```bash theme={null}
cd toolkit && bin/up -d
```
This documentation is built and hosted on [Mintlify](https://mintlify.com), a developer documentation platform.