> ## Documentation Index
> Fetch the complete documentation index at: https://ayakaleaf-pro.mintlify.site/llms.txt
> Use this file to discover all available pages before exploring further.
# GitHub Codespace 사용하기
Ayakaleaf Pro를 테스트하는 가장 쉬운 방법은 GitHub Codespace를 사용하는 것입니다. 모든 환경 변수가 미리 구성되어 있어 바로 사용할 수 있습니다.
GitHub Codespaces에서 Docker 컨테이너를 실행하면 Codespace가 자동으로 종료되지 않으며 계속 **요금이 청구**됩니다. GitHub Codespaces 청구 규칙은 [github codespaces 청구 규칙](https://docs.github.com/en/billing/concepts/product-billing/github-codespaces)을 참고하세요.
GitHub Codespaces를 관리하려면 [https://github.com/codespaces](https://github.com/codespaces)를 방문하세요. 더 이상 필요하지 않으면 Codespace를 제때 삭제하세요.
다음 기능이 **미리 구성**되어 있습니다.
* [x] TeXLive **Basic**(2024-2026)을 사용한 샌드박스 LaTeX 컴파일
* [x] Pandoc 가져오기/내보내기(SaaS 플랫폼 기능)
* [x] Python 스크립트 실행기(SaaS 플랫폼 기능)
* [x] Git-Bridge 지원(Server Pro 기능)
* [x] 고급 참고문헌 검색(SaaS 플랫폼 기능)
* [x] 관리자 패널(전역 사용자/프로젝트 관리)
* [x] 변경 내용 추적(리뷰 및 댓글 패널 포함)
* [x] 전체 프로젝트 히스토리(복원 및 다운로드 포함)
* [x] 기호 팔레트(Server Pro/SaaS 플랫폼 기능)
표준 GitHub Codespaces는 32 GB의 스토리지를 제공합니다. 이는 `texlive-full` 설치에 충분하지 않습니다. 전체 이미지를 테스트하려면 GitHub 지원 티켓을 제출하여 대형 러너(8코어 이상)가 있는 Codespace를 요청하세요.
GitHub 동기화, LDAP, OAuth, SSO, Zotero 통합 및 기타 기능은 이 플레이그라운드에 ***구성되어 있지 않습니다***. 자체 배포에서 이러한 기능을 구성하는 방법에 대한 자세한 내용은 [toolkit 설정](/ko/on-premises/configuration/overleaf-toolkit/toolkit-settings)을 참고하세요.
다음 버튼을 클릭하여 GitHub Codespace를 만드세요. 서버 구성 측면에서 테스트 용도로는 일반적으로 **2코어, 8 GB RAM**이면 충분합니다. [**TeX Live Full**](https://github.com/ayaka-notes/texlive-full)을 사용할 계획이라면 **8코어 64GB** 구성을 선택하는 것을 권장합니다.
[](https://codespaces.new/ayaka-notes/ayakaleaf-pro-playground)
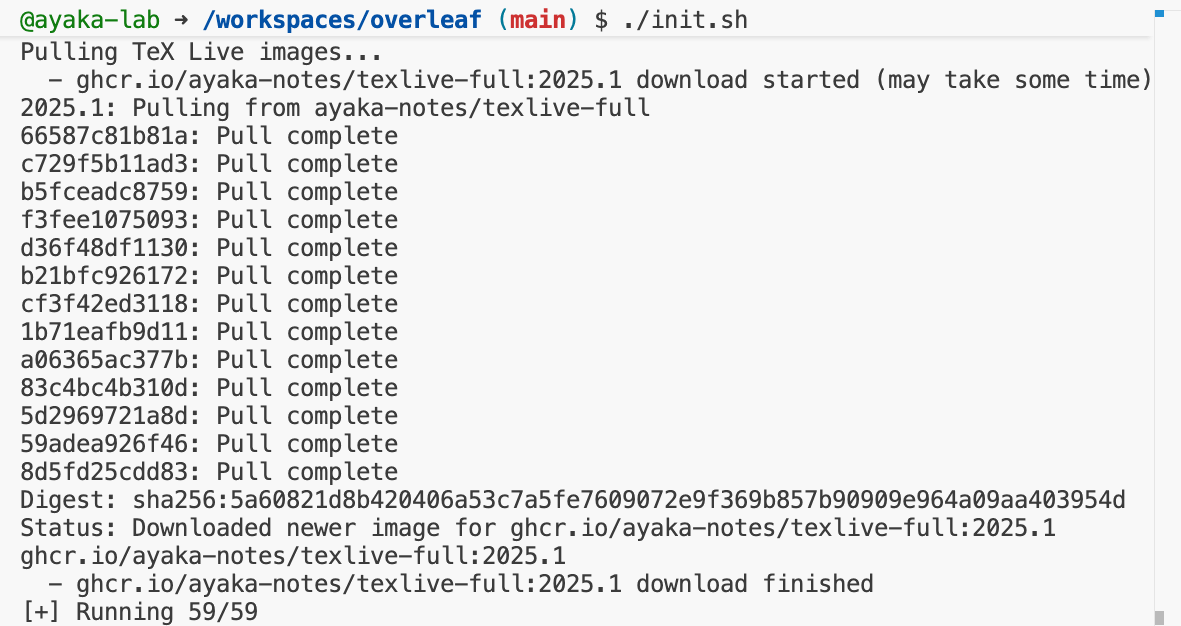
Codespace가 준비되면 bash에서 다음 명령을 실행하여 overleaf 인스턴스를 초기화하세요.
```bash title="bash" theme={null}
./init.sh
```
필요한 모든 docker 이미지를 가져오기까지 최소 3분 정도 기다려야 할 수 있습니다.
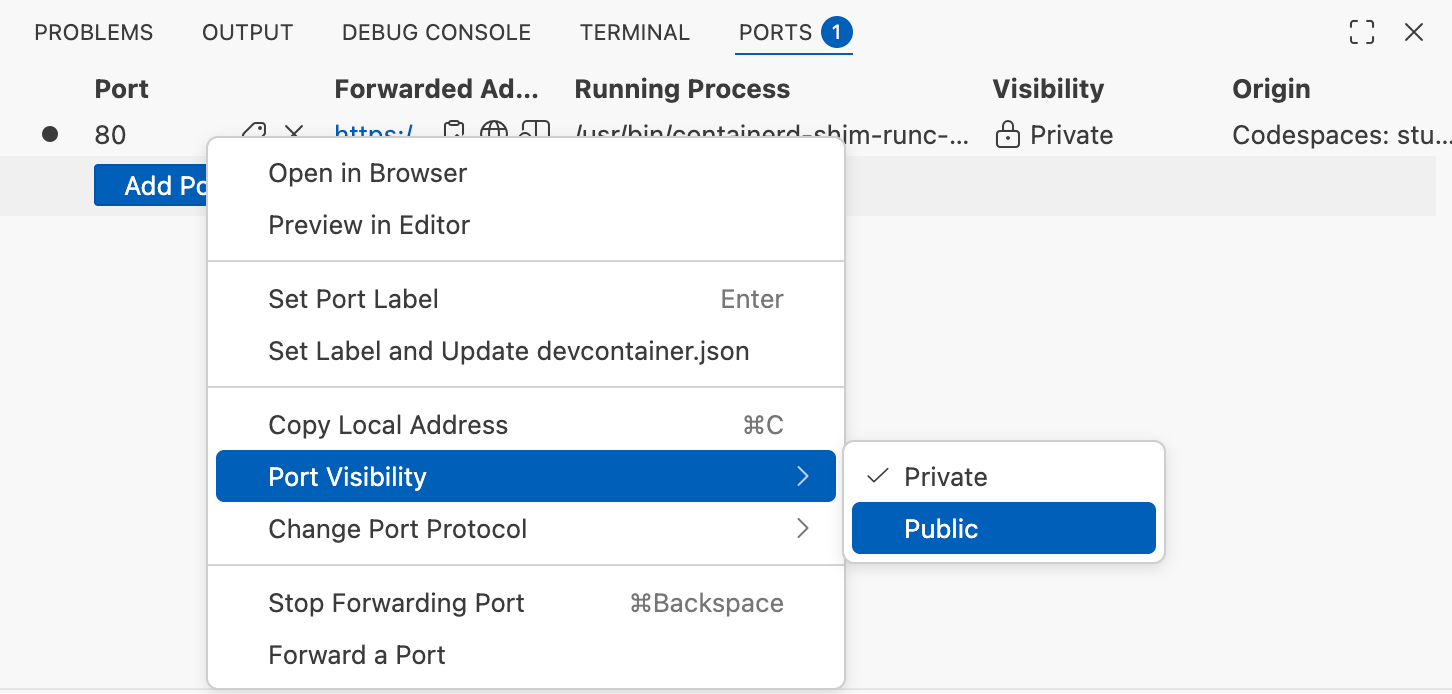
 **Ports** 탭으로 전환한 다음, 아래 단계에 따라 포트 80을 공개로 설정하세요.
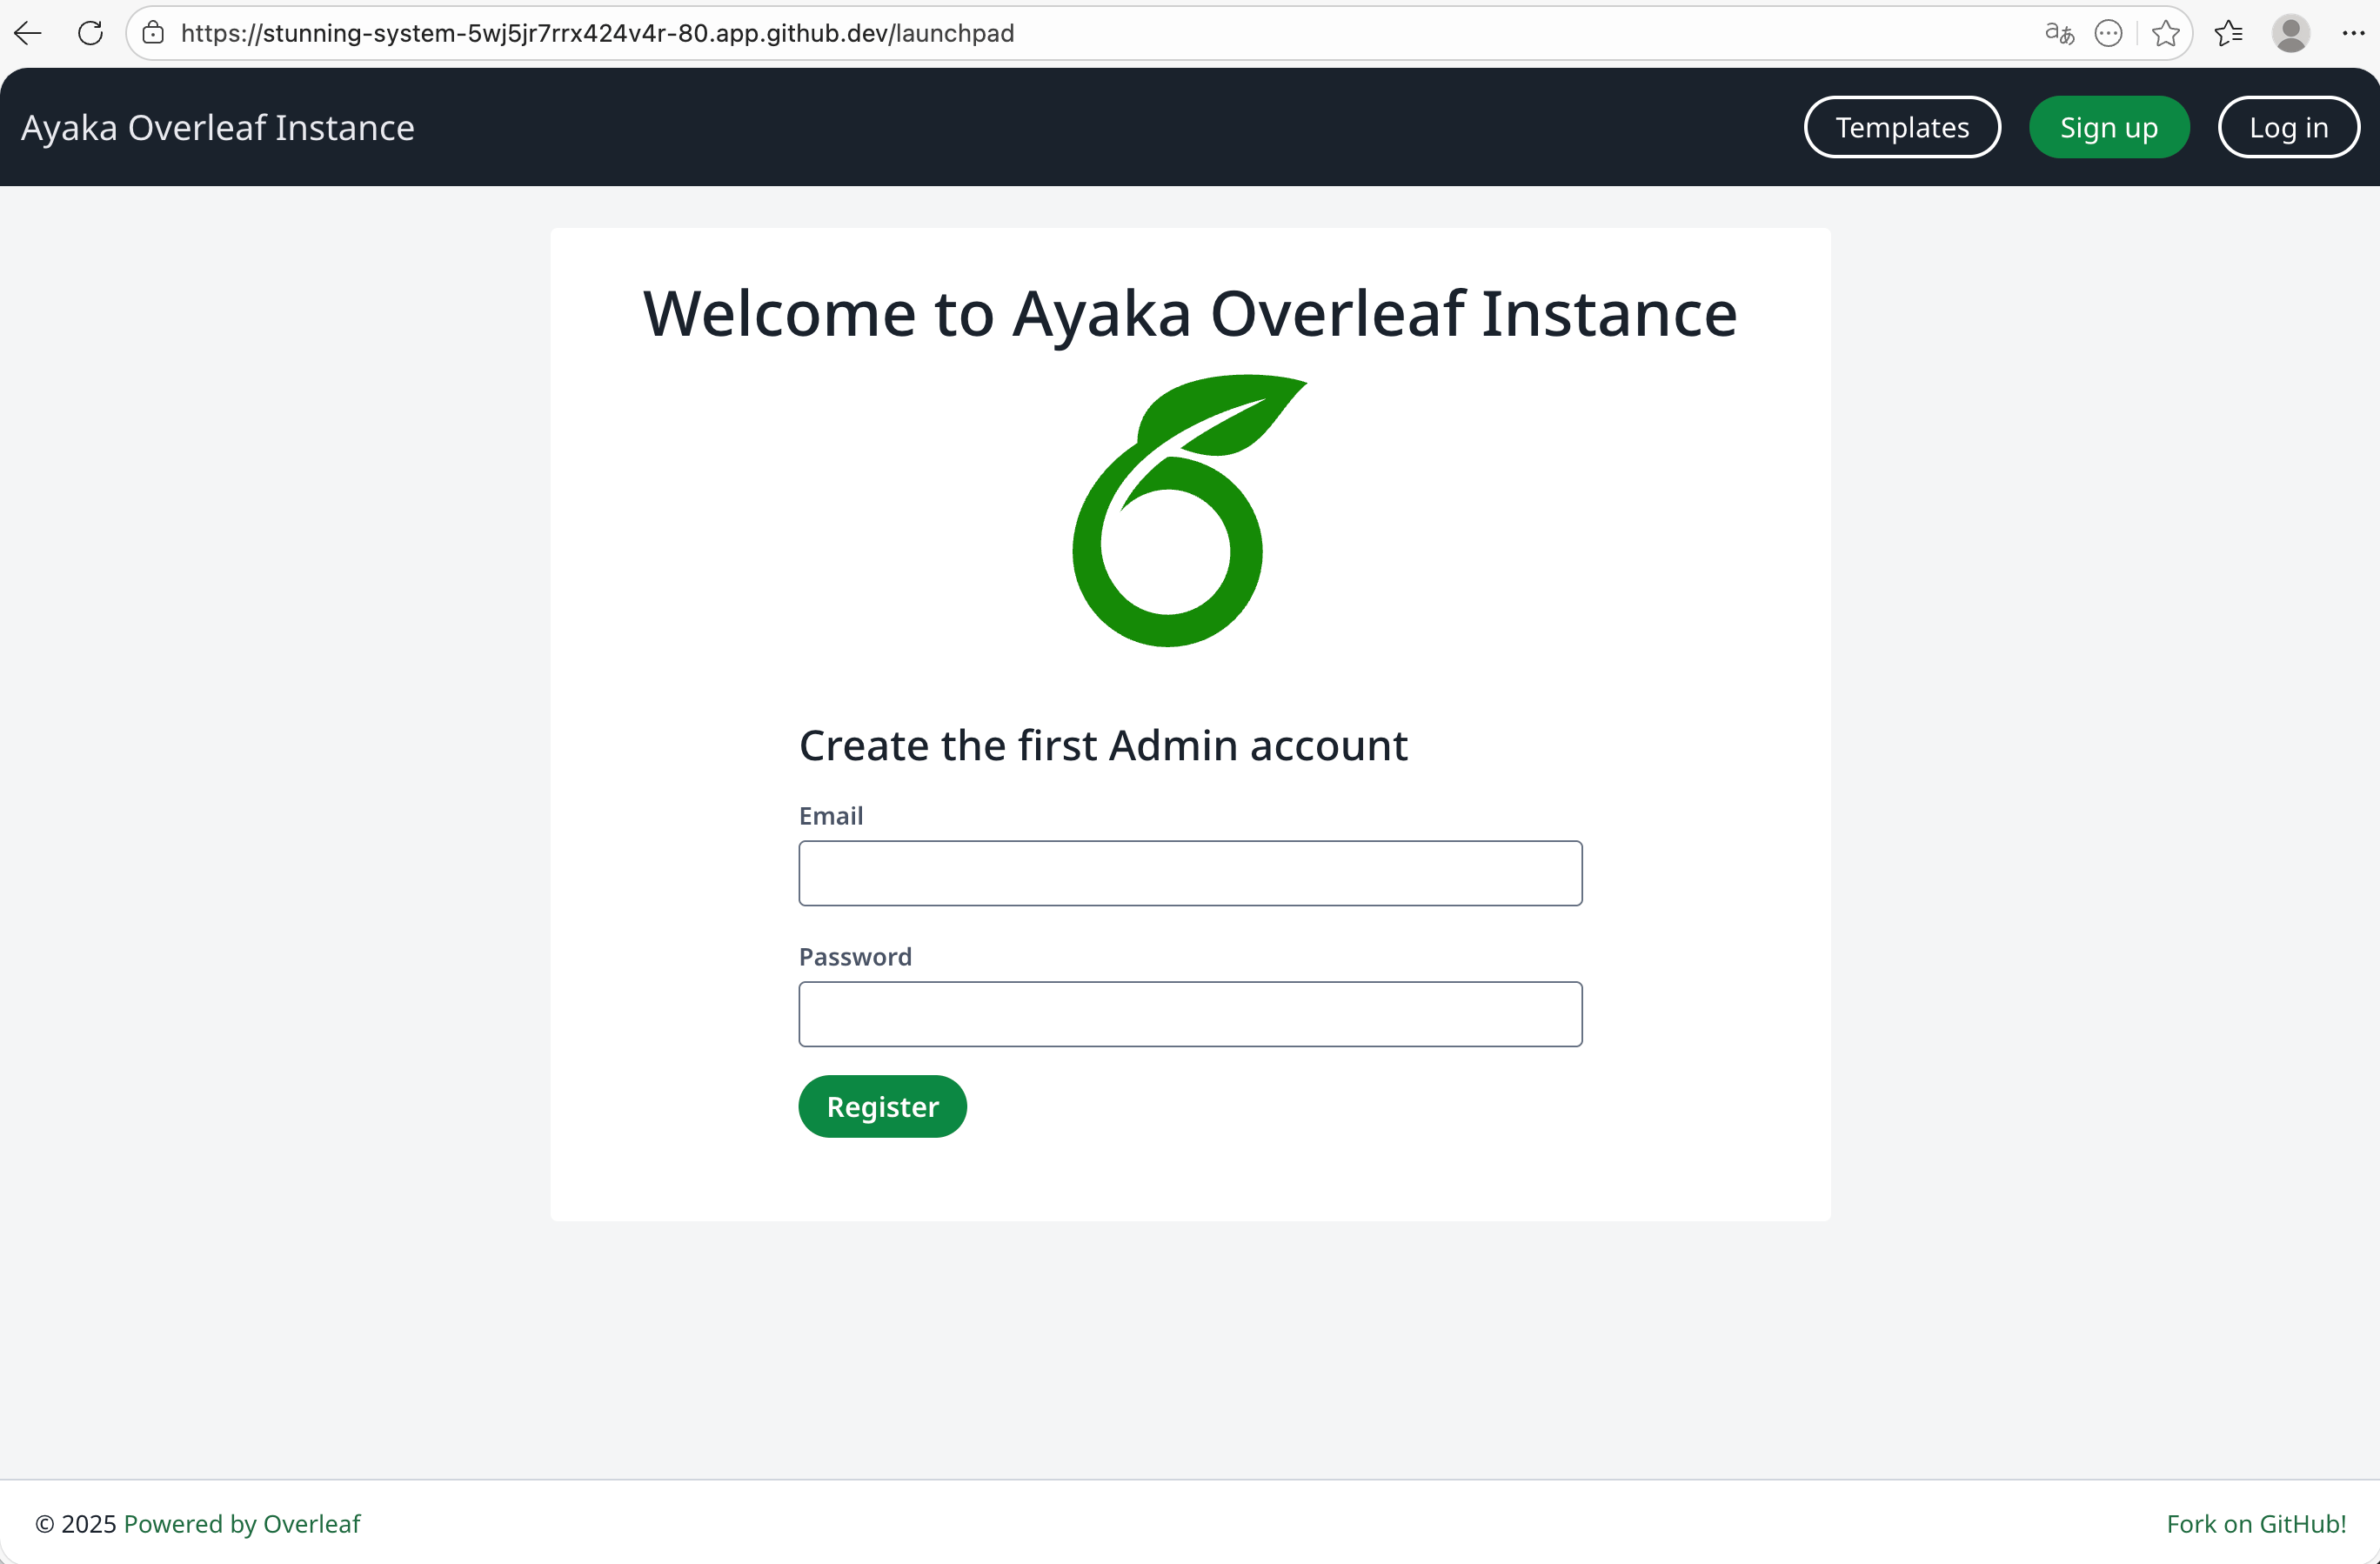
 그런 다음 **Forwarded Address**를 클릭하여 overleaf 인스턴스에 방문할 수 있습니다. overleaf 시작 페이지에 방문하려면 `/launchpad`를 덧붙여야 할 수 있습니다.
관리자 계정과 비밀번호를 입력한 다음 Register 버튼을 클릭하세요.
그런 다음 **Forwarded Address**를 클릭하여 overleaf 인스턴스에 방문할 수 있습니다. overleaf 시작 페이지에 방문하려면 `/launchpad`를 덧붙여야 할 수 있습니다.
관리자 계정과 비밀번호를 입력한 다음 Register 버튼을 클릭하세요.
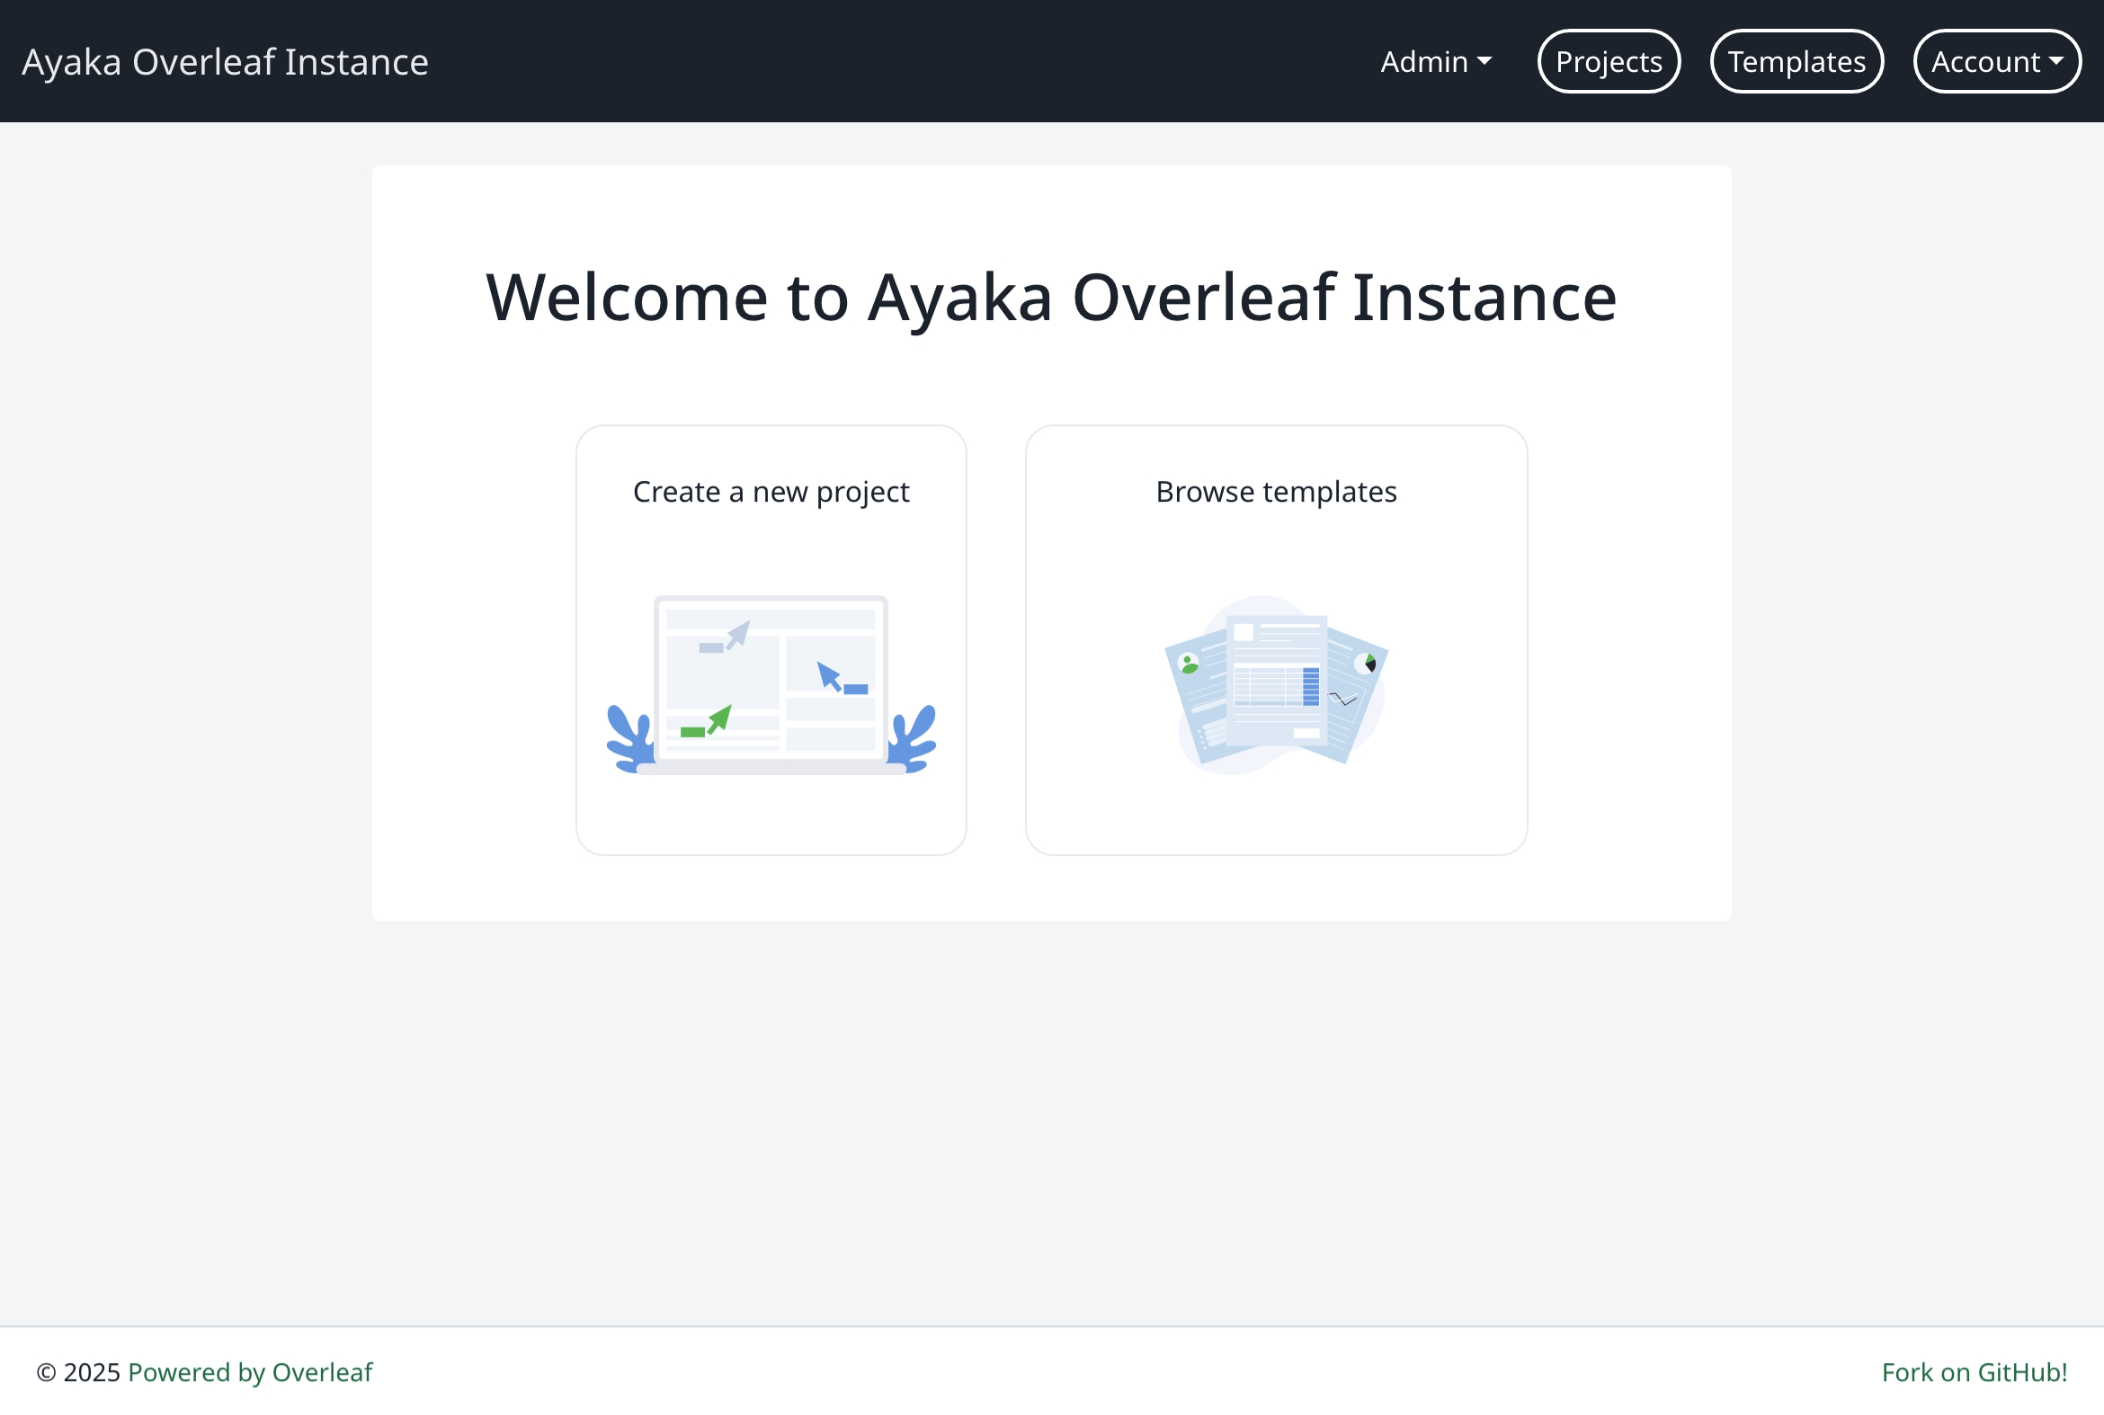
 이제 $\LaTeX$ 글쓰기를 즐길 시간입니다!
 #### TeXLive Full 이미지 사용하기
8코어/64 GB GitHub Codespaces를 사용할 수 있다면 이 플레이그라운드에서 TeXLive Full 이미지를 사용할 수 있습니다. `toolkit/config/variables.env` 파일에서 다음 환경 변수를 변경하여 TeXLive Basic 이미지 대신 TeXLive Full 이미지를 사용하세요.
```dotenv wrap theme={null}
ALL_TEX_LIVE_DOCKER_IMAGES=ghcr.io/ayaka-notes/texlive-full:2026.1, ghcr.io/ayaka-notes/texlive-full:2025.1, ghcr.io/ayaka-notes/texlive-full:2024.1
ALL_TEX_LIVE_DOCKER_IMAGE_NAMES=Texlive 2026, Texlive 2025, Texlive 2024
TEX_LIVE_DOCKER_IMAGE=ghcr.io/ayaka-notes/texlive-full:2026.1
```
환경 변수를 변경한 후에는 변경 사항을 적용하기 위해 toolkit을 다시 시작해야 합니다. 다음 명령을 실행하여 toolkit을 다시 시작할 수 있습니다.
```bash theme={null}
cd toolkit && bin/up -d
```
This documentation is built and hosted on [Mintlify](https://mintlify.com), a developer documentation platform.
#### TeXLive Full 이미지 사용하기
8코어/64 GB GitHub Codespaces를 사용할 수 있다면 이 플레이그라운드에서 TeXLive Full 이미지를 사용할 수 있습니다. `toolkit/config/variables.env` 파일에서 다음 환경 변수를 변경하여 TeXLive Basic 이미지 대신 TeXLive Full 이미지를 사용하세요.
```dotenv wrap theme={null}
ALL_TEX_LIVE_DOCKER_IMAGES=ghcr.io/ayaka-notes/texlive-full:2026.1, ghcr.io/ayaka-notes/texlive-full:2025.1, ghcr.io/ayaka-notes/texlive-full:2024.1
ALL_TEX_LIVE_DOCKER_IMAGE_NAMES=Texlive 2026, Texlive 2025, Texlive 2024
TEX_LIVE_DOCKER_IMAGE=ghcr.io/ayaka-notes/texlive-full:2026.1
```
환경 변수를 변경한 후에는 변경 사항을 적용하기 위해 toolkit을 다시 시작해야 합니다. 다음 명령을 실행하여 toolkit을 다시 시작할 수 있습니다.
```bash theme={null}
cd toolkit && bin/up -d
```
This documentation is built and hosted on [Mintlify](https://mintlify.com), a developer documentation platform.