> ## Documentation Index
> Fetch the complete documentation index at: https://ayakaleaf-pro.mintlify.site/llms.txt
> Use this file to discover all available pages before exploring further.
# {Minted}
この記事では、[`minted` パッケージ](https://ctan.org/pkg/minted?lang=en)を使って、LaTeX ドキュメント内でプログラミング言語のソースコードを整形し、シンタックスハイライトする方法を紹介します。まずは例を見てみましょう。
```latex theme={null}
\documentclass{article}
\usepackage{minted}
\begin{document}
\begin{minted}{python}
import numpy as np
def incmatrix(genl1,genl2):
m = len(genl1)
n = len(genl2)
M = None #to become the incidence matrix
VT = np.zeros((n*m,1), int) #dummy variable
#compute the bitwise xor matrix
M1 = bitxormatrix(genl1)
M2 = np.triu(bitxormatrix(genl2),1)
for i in range(m-1):
for j in range(i+1, m):
[r,c] = np.where(M2 == M1[i,j])
for k in range(len(r)):
VT[(i)*n + r[k]] = 1;
VT[(i)*n + c[k]] = 1;
VT[(j)*n + r[k]] = 1;
VT[(j)*n + c[k]] = 1;
if M is None:
M = np.copy(VT)
else:
M = np.concatenate((M, VT), 1)
VT = np.zeros((n*m,1), int)
return M
\end{minted}
\end{document}
```
この例の出力は次のとおりです。
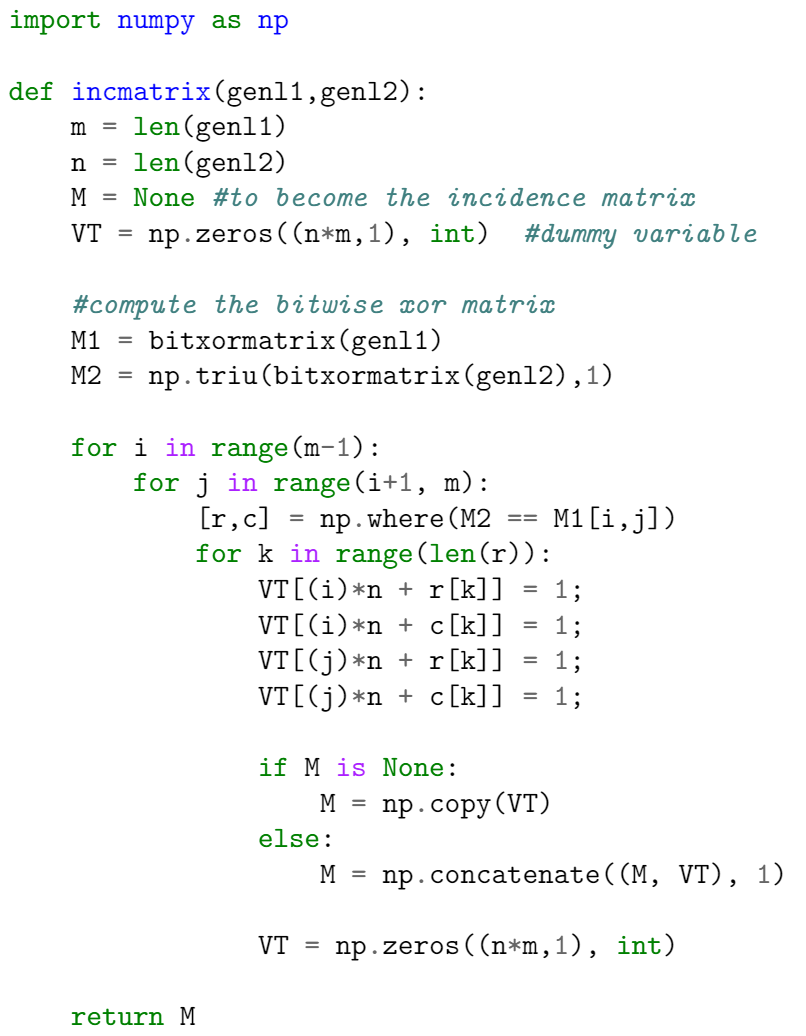
ここでは 2 つの重要なコマンドがあります。プリアンブルでは、次のように記述してパッケージを読み込みます。
```latex theme={null}
\usepackage{minted}
```
次に、`\begin{minted}{python}` と `\end{minted}` のタグで環境を区切ります。この環境ではテキストが等幅フォントでそのまま(verbatim)出力され、コメント、キーワード、関数に色が付けられます。パラメーター `python` は、ソースコードが書かれているプログラミング言語です。`minted` は 150 以上のプログラミング言語やマークアップ言語、設定ファイルをサポートしています。サポートされている言語の一覧は[リファレンスガイド](https://www.overleaf.com/learn/latex/Code_Highlighting_with_minted#Reference_guide)を参照してください。
**注意**:*ローカル*の LaTeX ディストリビューションで `minted` を動作させるには、[Pygments](https://pygments.org/) という追加のプログラムをインストールする必要があります。[Overleaf](https://www.overleaf.com/) を使えば、それをインストールしたり、ドキュメントをコンパイルするために特別なコマンドを実行したりする手間が省けます。Overleaf では、`minted` を使用するドキュメントは「そのまますぐに」動作します。
### 基本的な使い方
次の例で示すように、`minted` 環境を設定して、組版されるコードの見た目を変更できます。ここでは、`minted` 環境で `key=value` 形式のパラメーターをカンマ区切りでいくつか使用しています。
```latex theme={null}
\documentclass{article}
\usepackage{minted}
\usepackage{xcolor} % to access the named colour LightGray
\definecolor{LightGray}{gray}{0.9}
\begin{document}
\begin{minted}
[
frame=lines,
framesep=2mm,
baselinestretch=1.2,
bgcolor=LightGray,
fontsize=\footnotesize,
linenos
]
{python}
import numpy as np
def incmatrix(genl1,genl2):
m = len(genl1)
n = len(genl2)
M = None #to become the incidence matrix
VT = np.zeros((n*m,1), int) #dummy variable
#compute the bitwise xor matrix
M1 = bitxormatrix(genl1)
M2 = np.triu(bitxormatrix(genl2),1)
for i in range(m-1):
for j in range(i+1, m):
[r,c] = np.where(M2 == M1[i,j])
for k in range(len(r)):
VT[(i)*n + r[k]] = 1;
VT[(i)*n + c[k]] = 1;
VT[(j)*n + r[k]] = 1;
VT[(j)*n + c[k]] = 1;
if M is None:
M = np.copy(VT)
else:
M = np.concatenate((M, VT), 1)
VT = np.zeros((n*m,1), int)
return M
\end{minted}
\end{document}
```
この例の出力は次のとおりです。
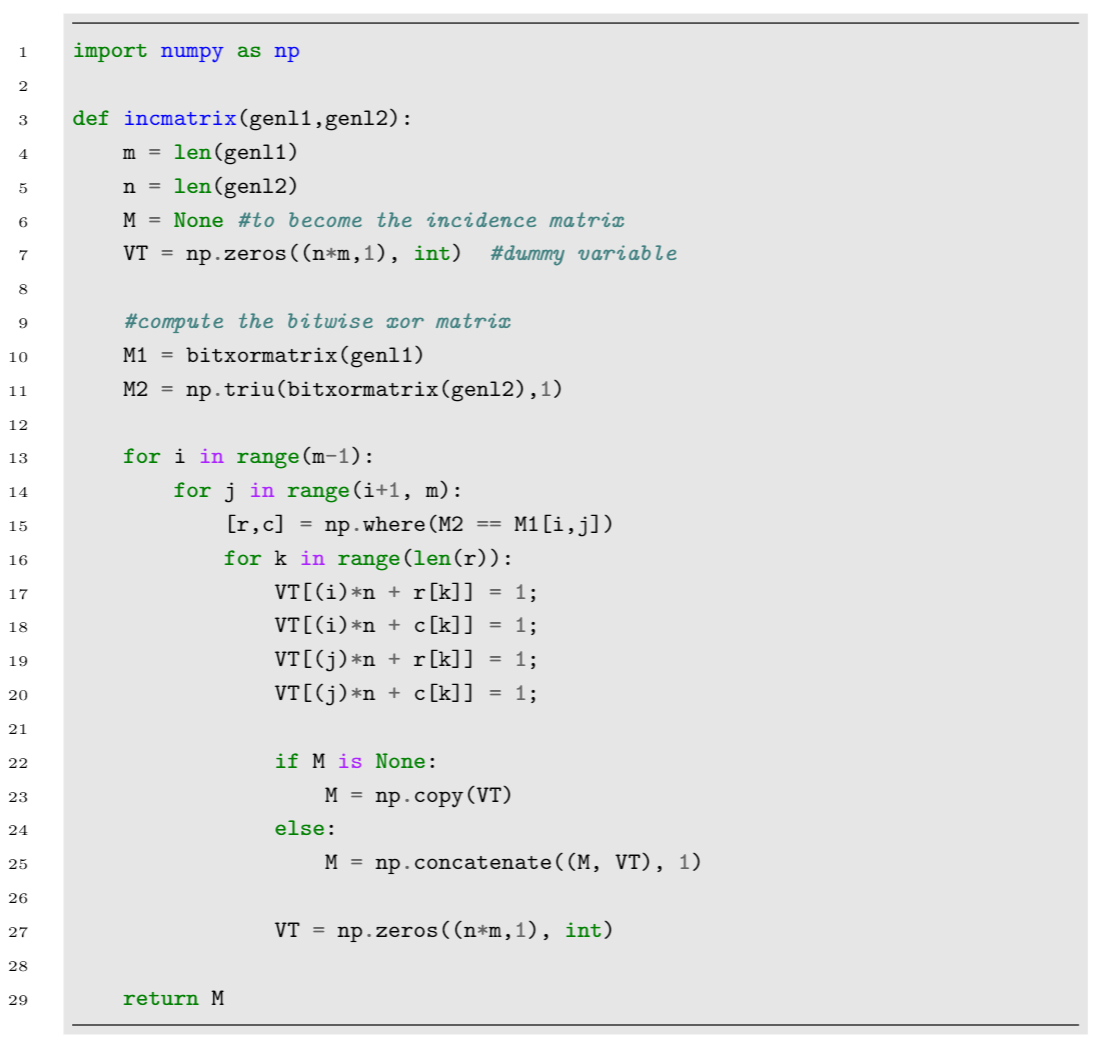
この例で使用しているパラメーターは次のとおりです。
* `frame=lines`:コードの上下に 2 本の線を引いて枠を作ります。他に指定できる値は `leftline`、`topline`、`bottomline`、`single` です。
* `framesep=2mm`:枠との間隔を 2mm に設定します。他の[長さの単位](https://www.overleaf.com/learn/latex/Lengths_in_LaTeX)も使用できます。
* `baselinestretch=1.2`:コードの行間を 1.2 に設定します。
* `bgcolor=LightGray`:背景色を `LightGray` に設定します。これを機能させるには `xcolor` パッケージを読み込む必要があります。色の操作について詳しくは [LaTeX で色を使う](https://www.overleaf.com/learn/latex/Using_colours_in_LaTeX)を参照してください。
* `fontsize=\footnotesize`:フォントサイズを `footnotesize` に設定します。他の任意の[フォントサイズ](https://www.overleaf.com/learn/latex/Font_sizes_and_kinds%23Reference_guide)も設定できます。
* `linenos`:行番号を有効にします。
その他の便利なオプションは次のとおりです。
* `mathescape`:コードのコメント内で数式モードを有効にします。
* `rulecolor`:枠の色を変更します。
* `showspaces`:スペースを可視化する特殊文字を有効にします。
### ファイルからコードを読み込む
コードは通常ソースファイルに保存されているため、次の例で示すように、ファイルからコードを自動的に読み込むコマンドはとても便利です。
```latex theme={null}
\documentclass{article}
\usepackage{minted}
\title{Importing files using minted}
\begin{document}
The next code will be directly imported from a file:
\inputminted{octave}{BitXorMatrix.m}
\end{document}
```
この例の出力は次のとおりです。
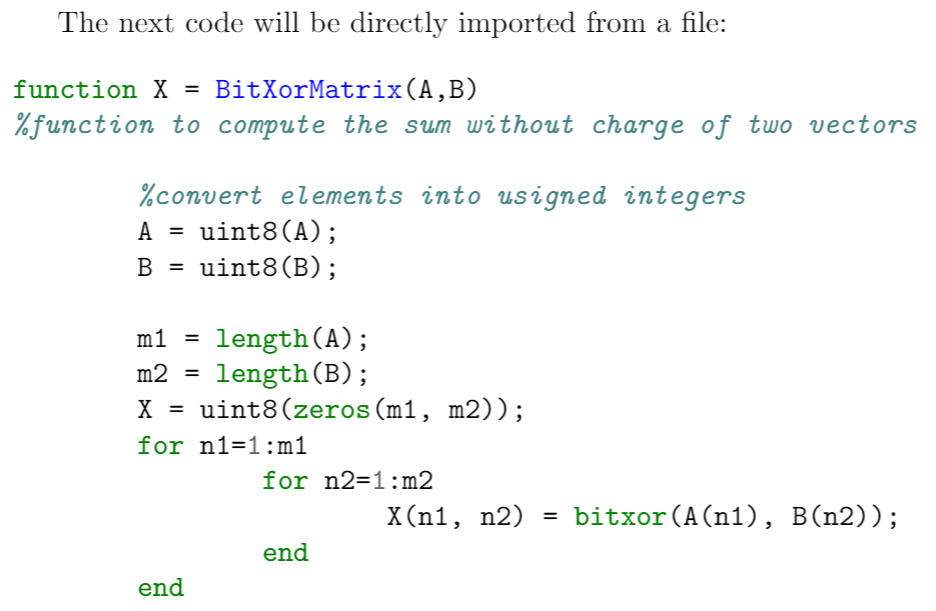 コマンド `\inputminted{octave}{BitXorMatrix.m}` はファイル `BitXorMatrix.m` からコードを読み込みます。パラメーター `octave` は、コードのプログラミング言語を LaTeX に伝えます。このコマンドには、ファイルの一部だけを読み込むための追加パラメーターを 2 つ指定できます。たとえば、2 行目から 12 行目までのコードを読み込むには、コマンドは次のようになります。
```latex theme={null}
\inputminted[firstline=2, lastline=12]{octave}{BitXorMatrix.m}
```
### 1 行のコード
1 行だけのコードを入力したい場合は、次の例に示す構文のコマンド `\mint` が使えます。
```latex wrap theme={null}
One-line code formatting also works with \texttt{minted}. For example, a small fragment of HTML like this:
\mint{html}|
コマンド `\inputminted{octave}{BitXorMatrix.m}` はファイル `BitXorMatrix.m` からコードを読み込みます。パラメーター `octave` は、コードのプログラミング言語を LaTeX に伝えます。このコマンドには、ファイルの一部だけを読み込むための追加パラメーターを 2 つ指定できます。たとえば、2 行目から 12 行目までのコードを読み込むには、コマンドは次のようになります。
```latex theme={null}
\inputminted[firstline=2, lastline=12]{octave}{BitXorMatrix.m}
```
### 1 行のコード
1 行だけのコードを入力したい場合は、次の例に示す構文のコマンド `\mint` が使えます。
```latex wrap theme={null}
One-line code formatting also works with \texttt{minted}. For example, a small fragment of HTML like this:
\mint{html}|Something here
|
\noindent can be formatted correctly.
```
この例の出力は次のとおりです。
 波括弧内のパラメーターはプログラミング言語(この場合はマークアップ言語の `html`)を指定し、実際に整形されるテキストは '|' 文字で区切られます。
### セルフホストの Overleaf での問題
サンドボックスコンパイルを使用し、かつ Overleaf サーバーで Overleaf をデプロイしている場合、minted がうまく動作しないことがあります。詳細については [issues/131](https://github.com/yu-i-i/overleaf-cep/issues/131) を参照してください。minted を動作させるには、arm 命令プロファイルといくつかのシステムコールを有効にする必要があります。
This documentation is built and hosted on [Mintlify](https://mintlify.com), a developer documentation platform.
波括弧内のパラメーターはプログラミング言語(この場合はマークアップ言語の `html`)を指定し、実際に整形されるテキストは '|' 文字で区切られます。
### セルフホストの Overleaf での問題
サンドボックスコンパイルを使用し、かつ Overleaf サーバーで Overleaf をデプロイしている場合、minted がうまく動作しないことがあります。詳細については [issues/131](https://github.com/yu-i-i/overleaf-cep/issues/131) を参照してください。minted を動作させるには、arm 命令プロファイルといくつかのシステムコールを有効にする必要があります。
This documentation is built and hosted on [Mintlify](https://mintlify.com), a developer documentation platform.