> ## Documentation Index
> Fetch the complete documentation index at: https://ayakaleaf-pro.mintlify.site/llms.txt
> Use this file to discover all available pages before exploring further.
# GitHub Codespace の利用
Ayakaleaf Pro を試す最も簡単な方法は GitHub Codespace を使うことです。すべての環境変数があらかじめ設定されているため、すぐに使い始めることができます。
GitHub Codespaces で Docker コンテナを実行すると、Codespace は自動的に停止せず、**課金**され続けます。GitHub Codespaces の課金ルールについては、[GitHub Codespaces の課金ルール](https://docs.github.com/en/billing/concepts/product-billing/github-codespaces) を参照してください。
GitHub Codespaces を管理するには、[https://github.com/codespaces](https://github.com/codespaces) にアクセスしてください。不要になったら、速やかに Codespace を削除してください。
以下の機能が**あらかじめ設定**されています。
* [x] TeXLive **Basic**(2024〜2026)によるサンドボックス化された LaTeX コンパイル
* [x] Pandoc インポート/エクスポート(SaaS プラットフォームの機能)
* [x] Python スクリプトランナー(SaaS プラットフォームの機能)
* [x] Git-Bridge のサポート(Server Pro の機能)
* [x] 高度な文献検索(SaaS プラットフォームの機能)
* [x] 管理パネル(ユーザー/プロジェクトの全体管理)
* [x] 変更履歴(レビューパネルとコメントパネル付き)
* [x] 完全なプロジェクト履歴(復元とダウンロードに対応)
* [x] シンボルパレット(Server Pro/SaaS プラットフォームの機能)
標準の GitHub Codespaces では 32 GB のストレージが提供されますが、`texlive-full` のインストールには不十分です。フルイメージを試すには、GitHub サポートにチケットを送信して、大容量ランナー(8 コア以上)の Codespace を申請してください。
GitHub 同期、LDAP、OAuth、SSO、Zotero 連携などの機能は、このプレイグラウンドでは ***設定されていません***。ご自身のデプロイでこれらの機能を設定する方法の詳細は、[Toolkit の設定](/ja/on-premises/configuration/overleaf-toolkit/toolkit-settings) を参照してください。
次のボタンをクリックして GitHub Codespace を作成します。サーバー構成としては、テスト用途であれば通常 **2 コア・8 GB RAM** で十分です。[**TeX Live Full**](https://github.com/ayaka-notes/texlive-full) を使用する予定がある場合は、**8 コア・64GB** の構成を選択することをおすすめします。
[](https://codespaces.new/ayaka-notes/ayakaleaf-pro-playground)
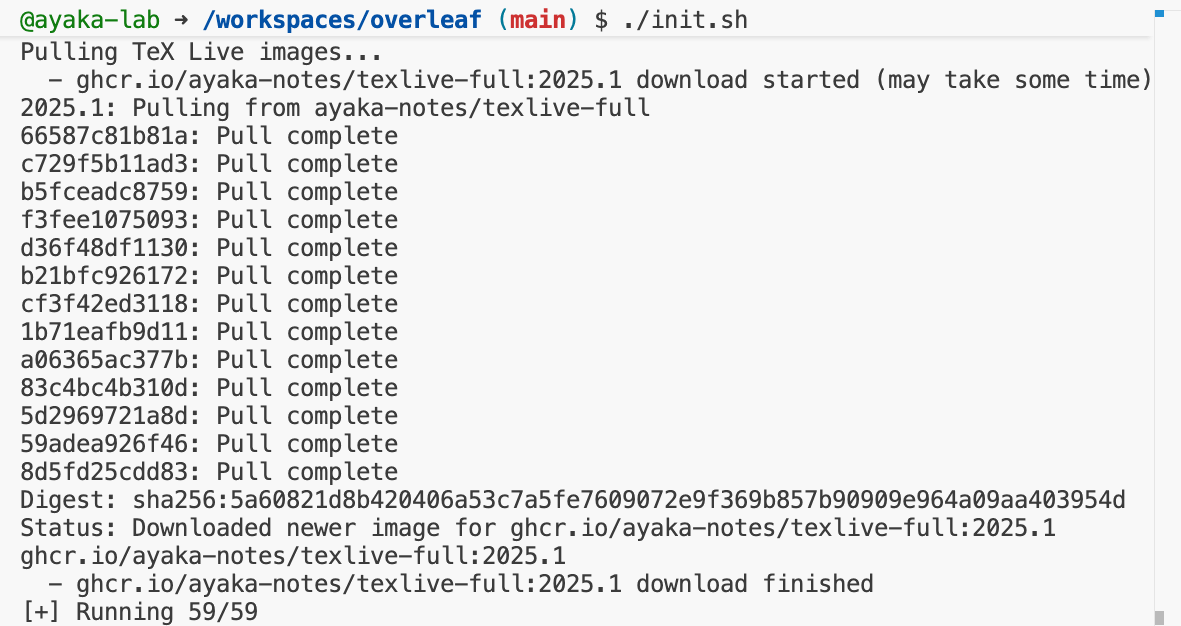
Codespace の準備ができたら、bash で次のコマンドを実行して Overleaf インスタンスを初期化します。
```bash title="bash" theme={null}
./init.sh
```
必要なすべての Docker イメージをプルし終えるまで、少なくとも 3 分ほど待つ必要がある場合があります。
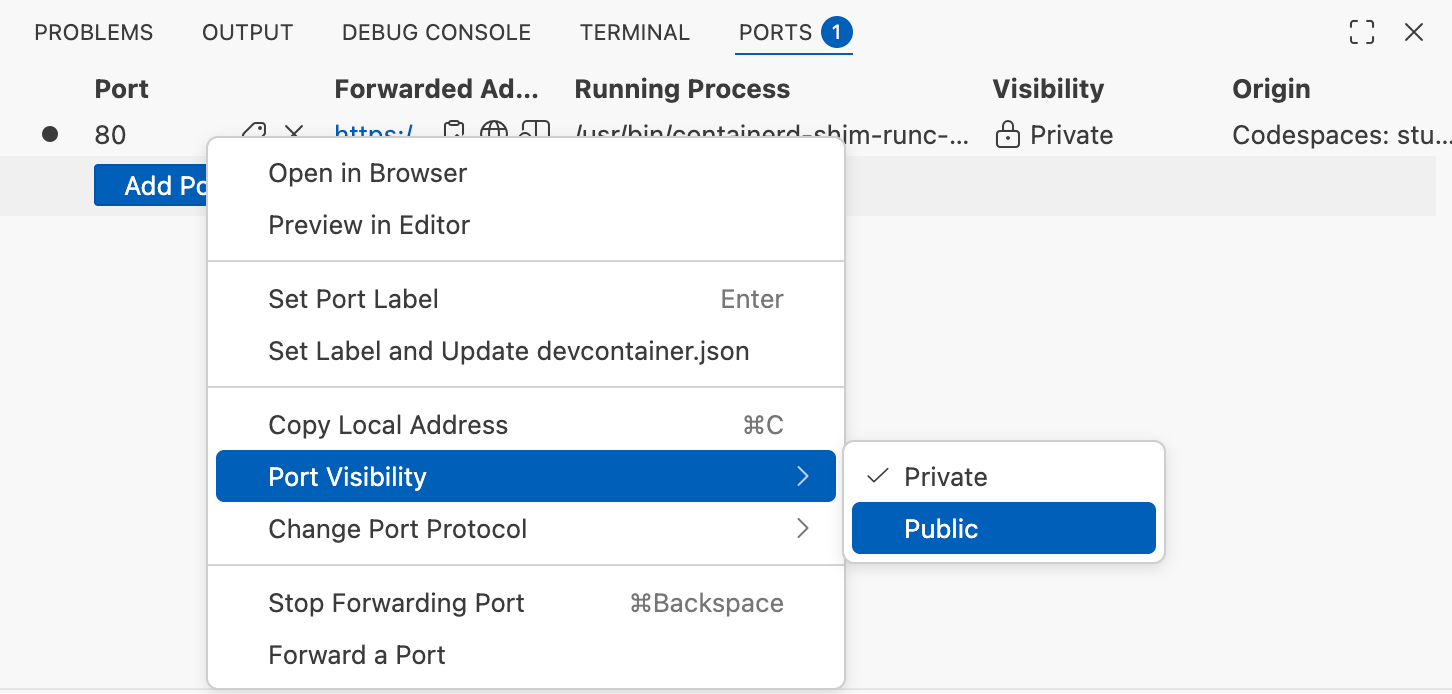
 **Ports** タブに切り替え、次の手順に従ってポート 80 を公開します。
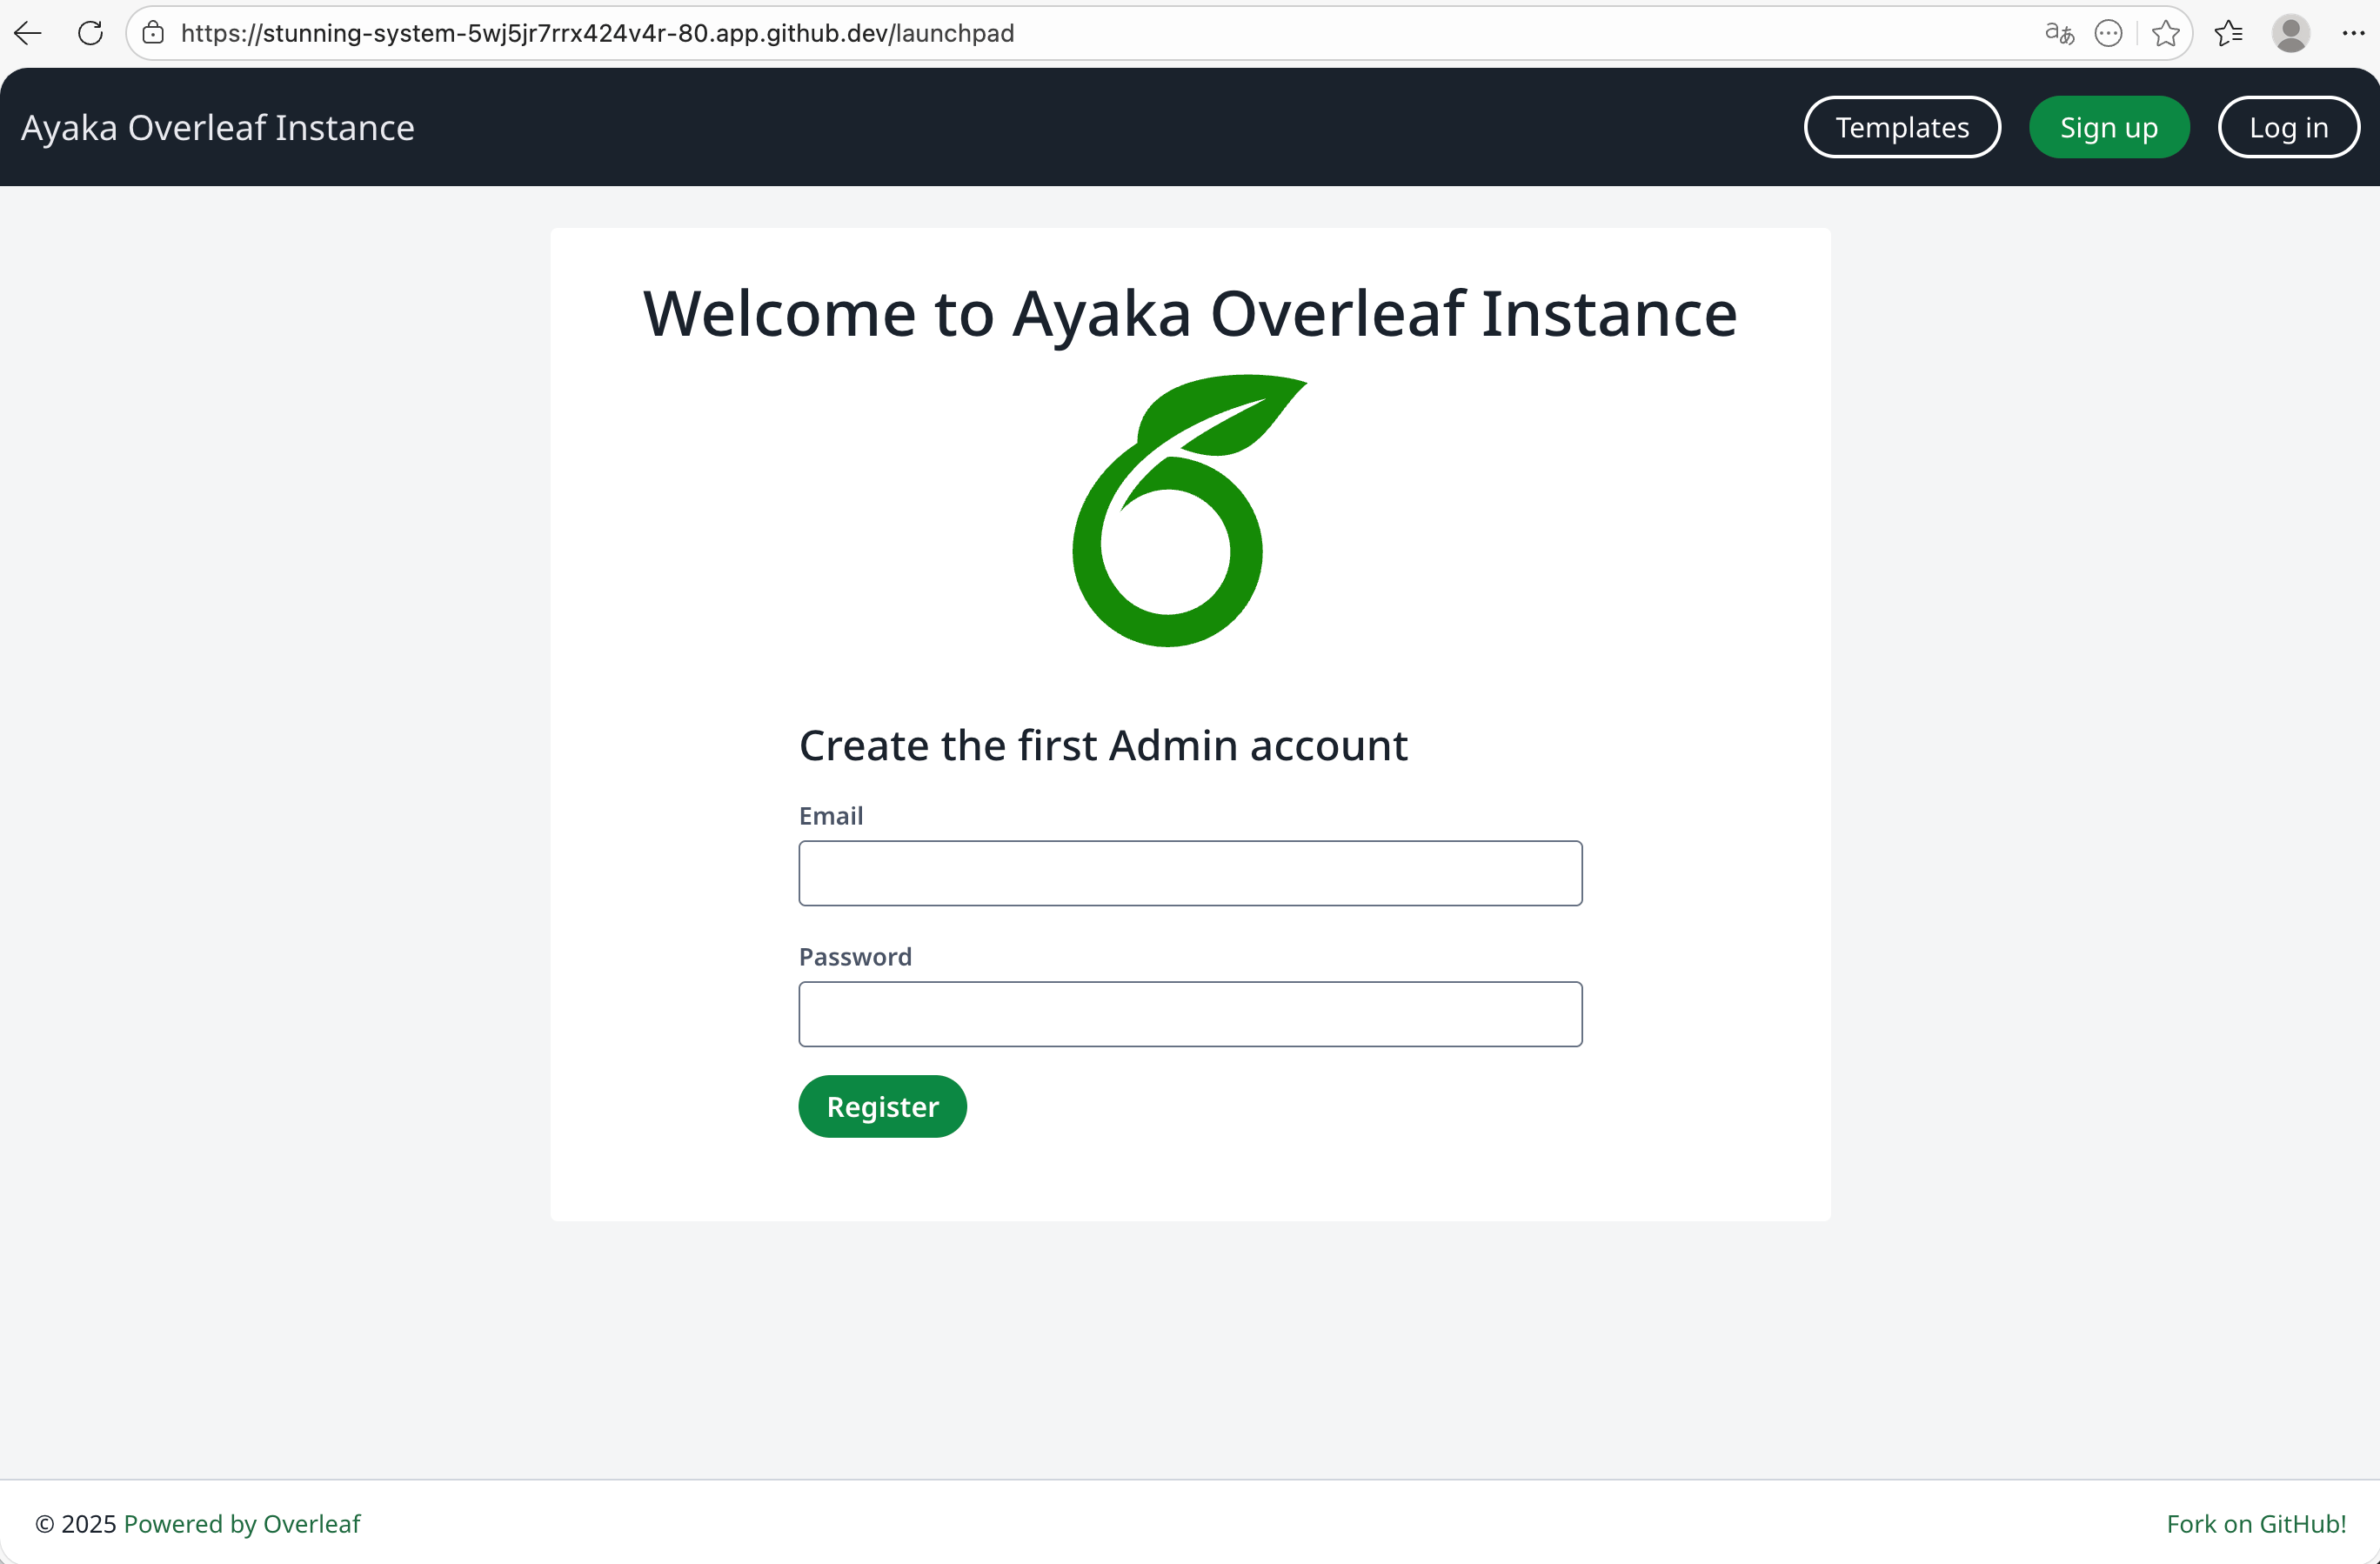
 その後、**Forwarded Address** をクリックすると Overleaf インスタンスにアクセスできます。Overleaf のウェルカムページを表示するには、`/launchpad` を付け加える必要がある場合があります。
管理者アカウントとパスワードを入力し、Register ボタンをクリックします。
その後、**Forwarded Address** をクリックすると Overleaf インスタンスにアクセスできます。Overleaf のウェルカムページを表示するには、`/launchpad` を付け加える必要がある場合があります。
管理者アカウントとパスワードを入力し、Register ボタンをクリックします。
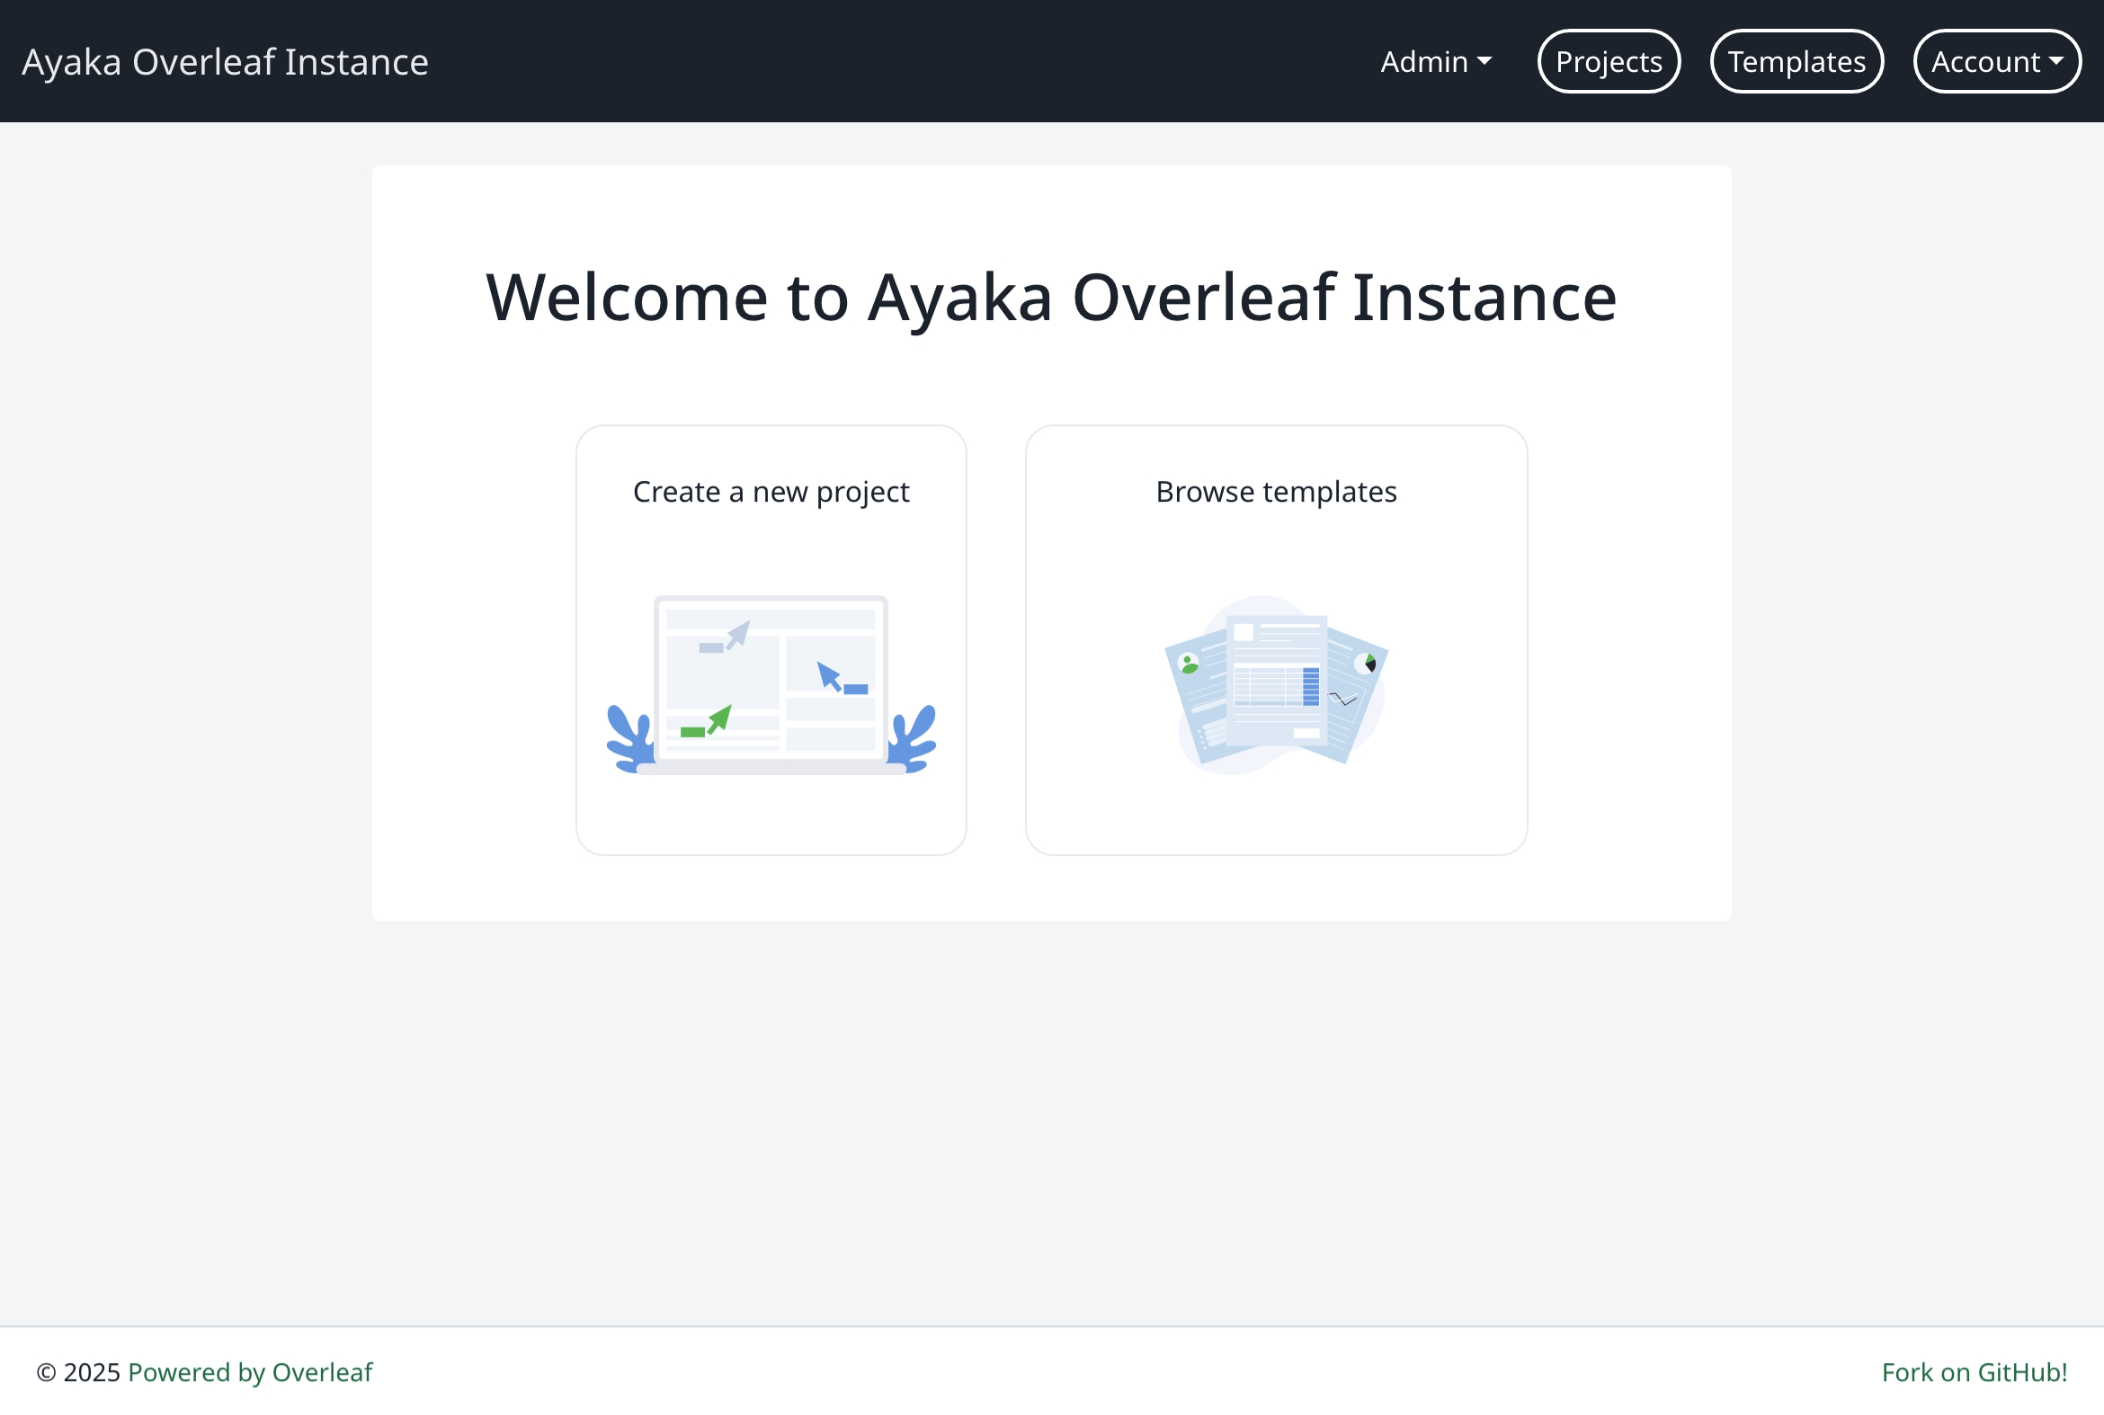
 さあ、$\LaTeX$ での執筆を楽しみましょう!
 #### TeXLive Full イメージを使用する
8 コア/64 GB の GitHub Codespaces を利用できる場合は、このプレイグラウンドで TeXLive Full イメージを使用できます。`toolkit/config/variables.env` ファイルの次の環境変数を変更すると、TeXLive Basic イメージの代わりに TeXLive Full イメージを使用できます。
```dotenv wrap theme={null}
ALL_TEX_LIVE_DOCKER_IMAGES=ghcr.io/ayaka-notes/texlive-full:2026.1, ghcr.io/ayaka-notes/texlive-full:2025.1, ghcr.io/ayaka-notes/texlive-full:2024.1
ALL_TEX_LIVE_DOCKER_IMAGE_NAMES=Texlive 2026, Texlive 2025, Texlive 2024
TEX_LIVE_DOCKER_IMAGE=ghcr.io/ayaka-notes/texlive-full:2026.1
```
環境変数を変更した後は、変更を反映するために Toolkit を再起動する必要があります。次のコマンドを実行して Toolkit を再起動できます。
```bash theme={null}
cd toolkit && bin/up -d
```
This documentation is built and hosted on [Mintlify](https://mintlify.com), a developer documentation platform.
#### TeXLive Full イメージを使用する
8 コア/64 GB の GitHub Codespaces を利用できる場合は、このプレイグラウンドで TeXLive Full イメージを使用できます。`toolkit/config/variables.env` ファイルの次の環境変数を変更すると、TeXLive Basic イメージの代わりに TeXLive Full イメージを使用できます。
```dotenv wrap theme={null}
ALL_TEX_LIVE_DOCKER_IMAGES=ghcr.io/ayaka-notes/texlive-full:2026.1, ghcr.io/ayaka-notes/texlive-full:2025.1, ghcr.io/ayaka-notes/texlive-full:2024.1
ALL_TEX_LIVE_DOCKER_IMAGE_NAMES=Texlive 2026, Texlive 2025, Texlive 2024
TEX_LIVE_DOCKER_IMAGE=ghcr.io/ayaka-notes/texlive-full:2026.1
```
環境変数を変更した後は、変更を反映するために Toolkit を再起動する必要があります。次のコマンドを実行して Toolkit を再起動できます。
```bash theme={null}
cd toolkit && bin/up -d
```
This documentation is built and hosted on [Mintlify](https://mintlify.com), a developer documentation platform.